Manage cookies that are used for advertising, such as ad personalization, remarketing, and ad effectiveness analysis.
4.7.2. Mail import
Automatically
Via IMAP
When using this method, our server connects via IMAP to the mailbox located on the specified mail server and copies all messages from all folders (both standard and manually created) from it. The copied messages are not deleted from the source server.
Important points:
- Duplicate messages will not be transferred. If there are multiple copies of the same message in your inbox, only one copy will be transferred.
- Restarting the import process transfers only new messages. Messages that have already been transferred will not be transferred again.
- If the import completed successfully but some messages were not transferred, the process will automatically repeat up to 20 times.
- For Gmail:
- Gmail allows you to download a maximum of 2.5 GB per day via IMAP, so you can import no more than 2 GB from your Gmail inbox at a time. If your inbox contains more than 2 GB of messages, you'll need to run the import several times on different days — the messages will be downloaded in batches. However, do not run the import more than once a day, as once the daily limit of 2.5 GB is reached, Gmail will return an error and mail clients will not be able to access the mailbox via IMAP for the rest of the day.
- If two-step authentication is enabled on your Google account, use a special app password instead of your account password. You can create one by following the instructions.
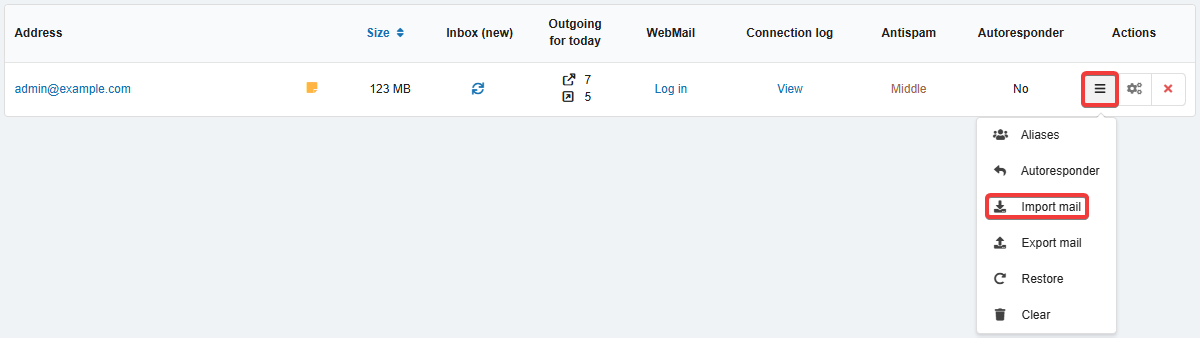
- Open the "Mailboxes" section.
- In the mailbox menu, click "Import mail":
- Fill out the form on the "IMAP" tab and click "Import mail":
- "IMAP settings" — select the mail service from which you want to import your emails:
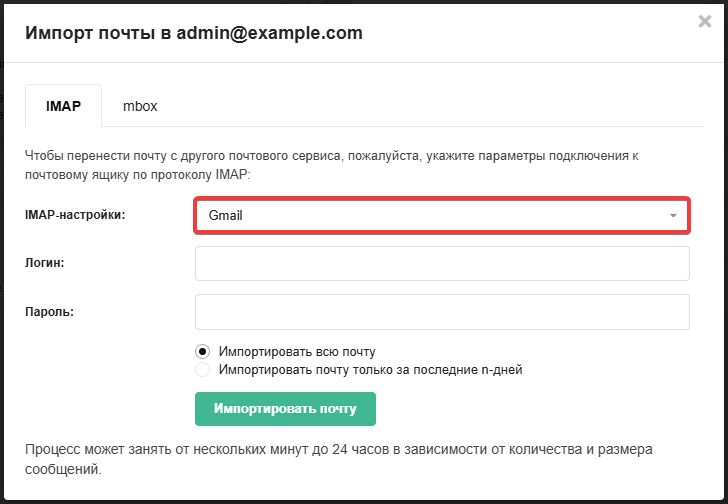
The default settings for connecting to the selected mail service will be used.

Specify the details for connecting to the mail server (you should check these with your mail service provider or the administrator of the server from which the mail is being imported):
- "IMAP server" — the address of the IMAP server from which you want to import emails.
- "IMAP port" — the port used to connect to the IMAP server.
- "SSL connection security" — enable this option if you want to use encryption when connecting.
- "Do not verify SSL certificate validity" — select this option if a secure connection is used and the IMAP server from which you are importing mail does not have a valid SSL certificate (for example, if it uses a self-signed certificate).
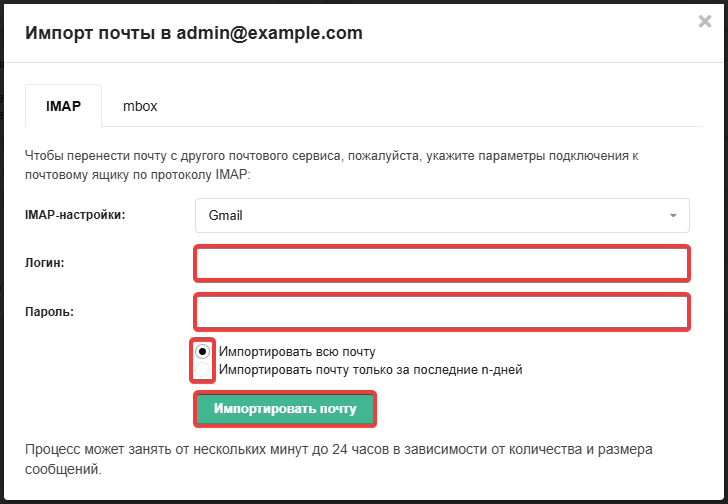
- Specify the login and password for the mail account from which you want to import emails. Use the toggle switch to choose whether to import all emails or only those from the last few days (you will need to specify the number of days yourself):
- Please wait for the import to complete. Once it is finished, a notification will be sent to your account email, specifying the source and destination of the import, as well as the number of messages transferred and their total size.
Once all your mail has been transferred, you can set our MX records in the domain settings so that incoming mail is delivered to the mailboxes we've created, rather than to the mailboxes on your old hosting provider.
From mbox file
The mbox format is used to export mail from a mailbox.
When using this method, messages are uploaded to our server from an mbox file. This format consists of a text file in which all messages are stored as plain text, one after another (each message's data in the file begins with the text From and ends with a blank line). This is the format in which messages from a Gmail inbox are saved when exporting data using Google Takeout.
Maximum file size: 30 GB
The size of the file you import must not exceed 30 GB. Larger files can be split into parts using a text editor (such as Notepad++, VS Code, etc.) or specialized software.- Open the "Mailboxes" section.
- In the mailbox menu, click "Import mail":
- On the "mbox" tab, select an mbox file and click "Import mail".
Manually
If automatic transfer isn't an option for any reason (for example, the mail server from which you need to transfer messages doesn't support IMAP), you can transfer the messages manually using a mail client.
- Create a mailbox with the same name as the one you had on your old hosting provider.
- Connect to two mailboxes at once using the Thunderbird mail client:
- To the new mailbox created on our hosting service, to which you need to transfer your messages (using the IMAP protocol).
- To the old mailbox created on the old hosting service, from which you need to transfer the messages.
- In Thunderbird, select the mailbox and folder on the left from which you want to transfer emails.
- Select all the messages you want to transfer.
- Right-click on the selected messages and select "Copy to Folder" from the menu that appears.
- In the context menu, select the mailbox and folder where you want to transfer the messages.
- Wait until the message copying process is complete.
A screenshot showing an example of the process of copying messages from the test1 mailbox (created on the old hosting service) to the test mailbox (created on our service):![]()
Once all your mail has been transferred, you can set our MX records in the domain settings so that incoming mail is delivered to the mailboxes we've created, rather than to the mailboxes on your old hosting provider.
(2)