Manage cookies that are used for advertising, such as ad personalization, remarketing, and ad effectiveness analysis.
4.3.3.2. Set up Thunderbird mail client
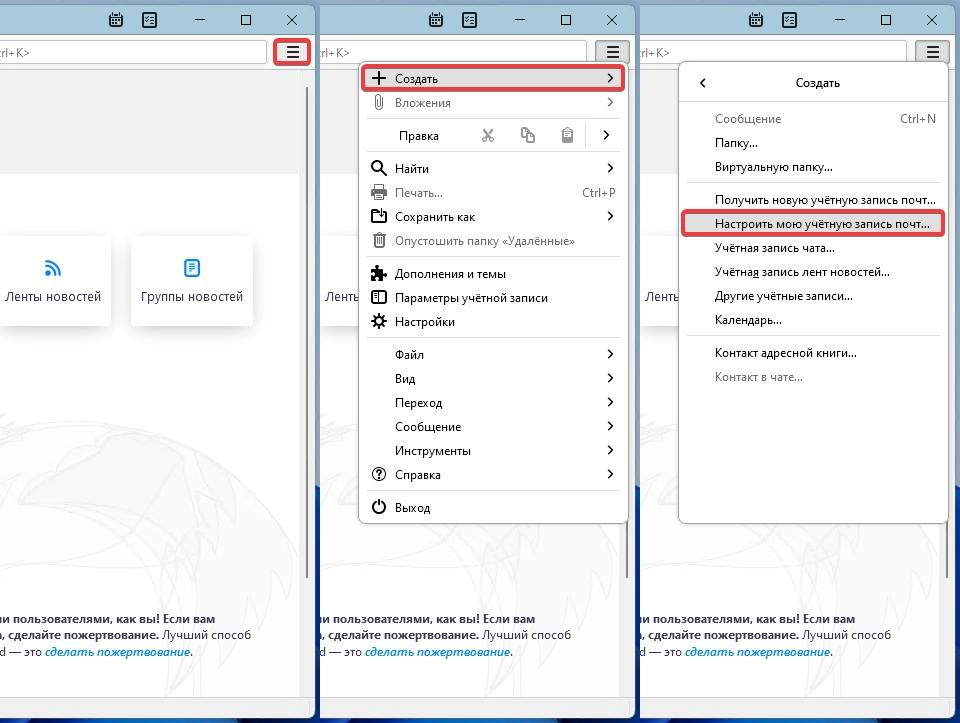
- Click "Create → Configure my email account" in main menu:
- Fill in the fields and click "Configure manually":
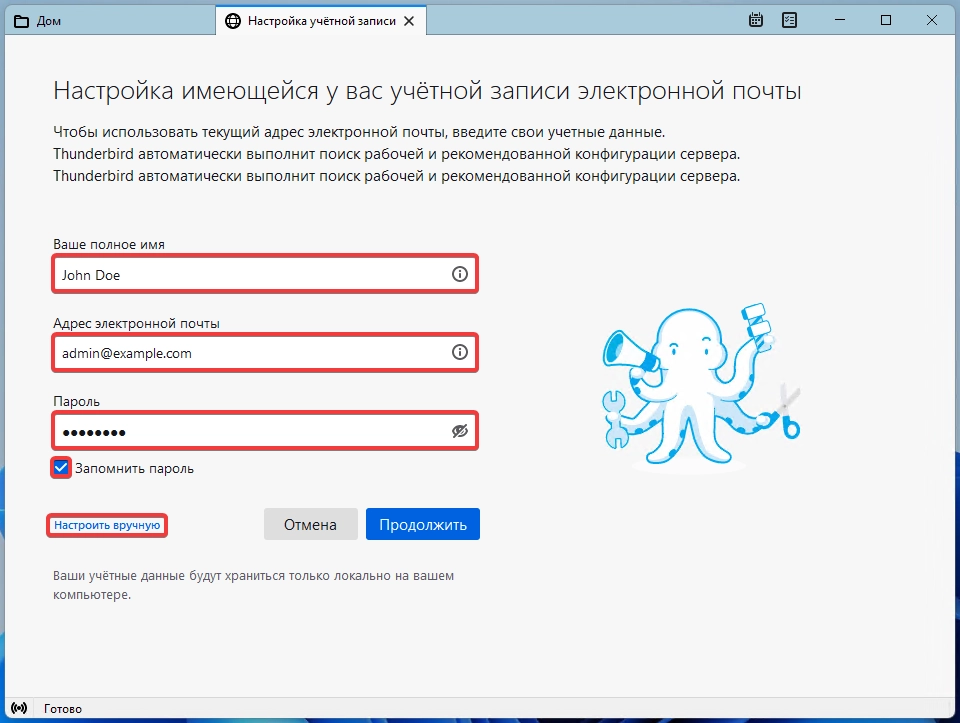
- "Your full name" — your name in any form.
- "Email address" — mailbox name. ⚠️ If domain name contains national alphabet characters, for example Cyrillic, you must convert mailbox name to Punycode.
- "Password" — mailbox password.
- "Remember password" — enable if you do not want to enter the password each time you connect to server.
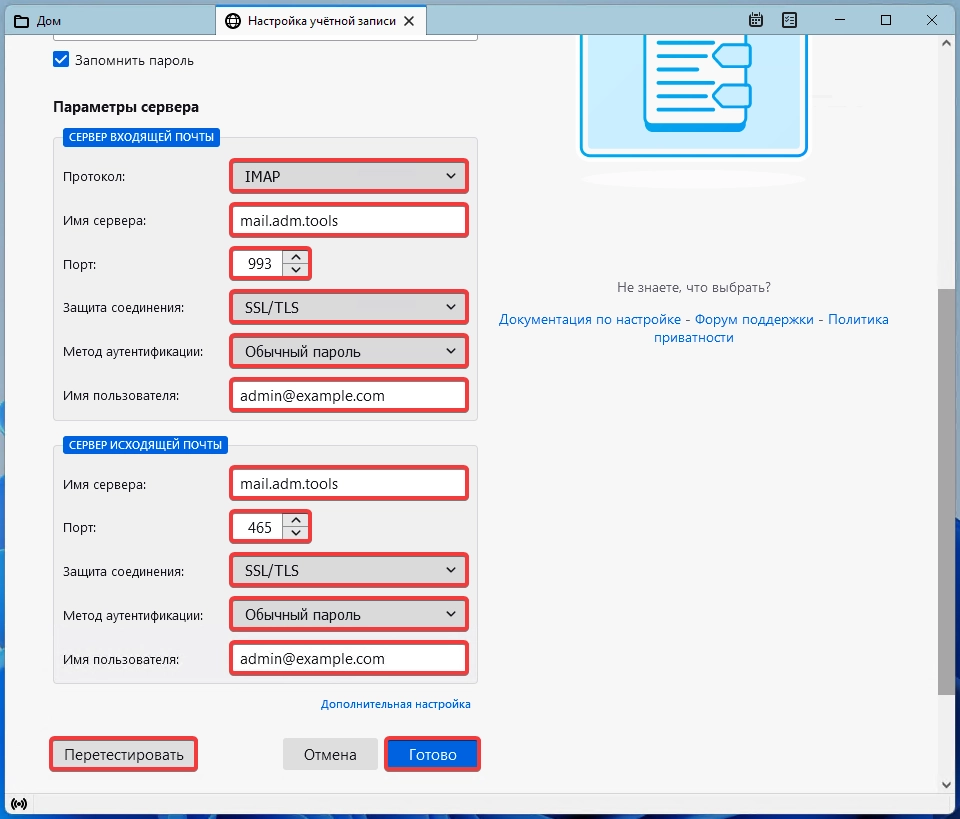
- Specify the settings and click "Retest", then "Done":
 To avoid entering settings manually each time, you can use autoconfiguration.
- Incoming mail server:
- "Protocol" — "IMAP".
- "Server name" —
mail.adm.tools. - "Port" —
993. - "Connection protection" — "SSL/TLS".
- "Authentication method" — "Regular password".
- "Username" — mailbox name or its part before
@.
- Outgoing mail server:
- "Server name" —
mail.adm.tools. - "Port" —
465. - "Connection protection" — "SSL/TLS".
- "Authentication method" — "Regular password".
- "Username" — mailbox name or its part before
@.
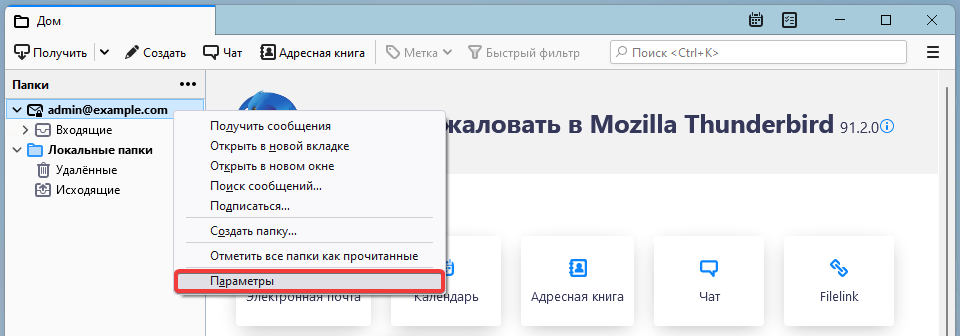
- Right-click the added account in the main window and select "Settings":
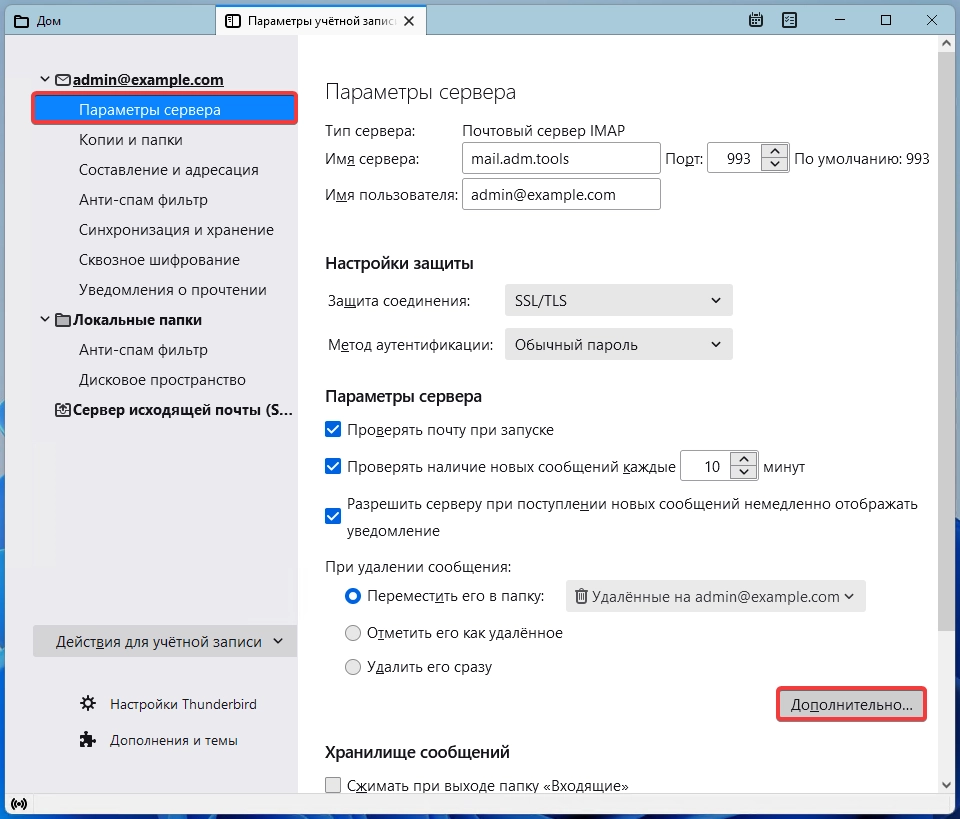
- In the "Server settings" section, click "More":
- Specify
INBOX.(with a dot) in the "IMAP server directory" field and click "OK":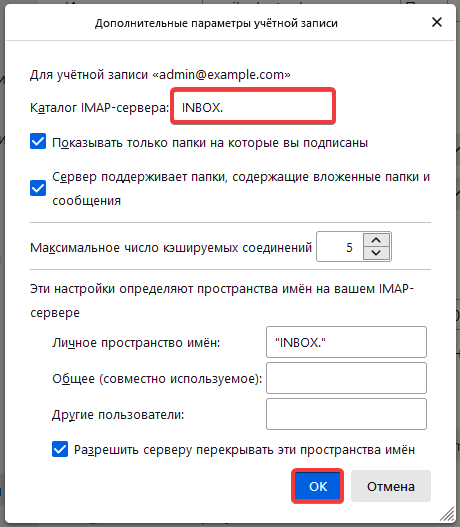
- Restart Thunderbird and check email operation.
(3)