Manage cookies that are used for advertising, such as ad personalization, remarketing, and ad effectiveness analysis.
4.3.3.3. Set up automatic configuration for Thunderbird
To avoid manually entering data for connection when setting up mail in Thunderbird, you can organize autoconfiguration. To do this, you need to place a special configuration file in XML format on the site. The mail client will then check for the presence of this file in the default locations when configuring mail. If the file is found, the settings will be filled in automatically and you will only need to select the protocol for incoming mail: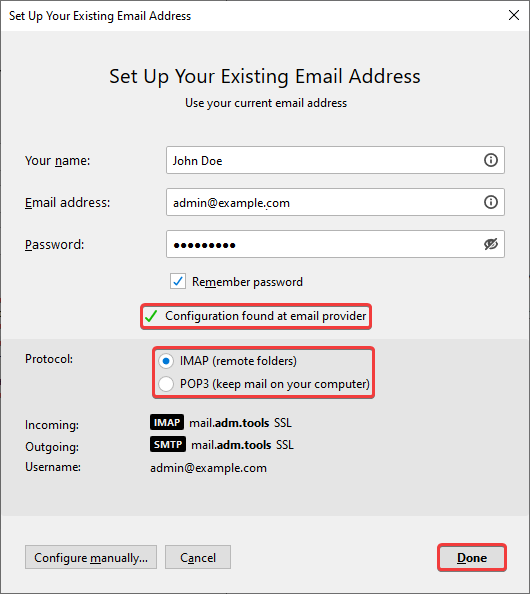
Autoconfiguration file
The file contains connection data common to all users of our mail service for mailboxes: host addresses, port numbers, and connection types for the IMAP, POP3, and SMTP protocols.
Create a file named config-v1.1.xml with the following content:
<?xml version="1.0" encoding="UTF-8"?>
<clientConfig version="1.1">
  <emailProvider id="mail.adm.tools">
    <domain>%EMAILDOMAIN%</domain>
    <displayName>%EMAILADDRESS%</displayName>
    <displayShortName>%EMAILADDRESS%</displayShortName>
    <incomingServer type="imap">
      <hostname>mail.adm.tools</hostname>
      <port>993</port>
      <socketType>SSL</socketType>
      <authentication>password-cleartext</authentication>
      <username>%EMAILADDRESS%</username>
    </incomingServer>
    <incomingServer type="pop3">
      <hostname>mail.adm.tools</hostname>
      <port>995</port>
      <socketType>SSL</socketType>
      <authentication>password-cleartext</authentication>
      <username>%EMAILADDRESS%</username>
    </incomingServer>
    <outgoingServer type="smtp">
      <hostname>mail.adm.tools</hostname>
      <port>465</port>
      <socketType>SSL</socketType>
      <authentication>password-cleartext</authentication>
      <username>%EMAILADDRESS%</username>
    </outgoingServer>
  </emailProvider>
</clientConfig>
File location
The autoconfiguration file can be placed on the main domain or on the autoconfig subdomain.
On main domain
- Download the autoconfiguration file.
- Using the file manager or any FTP client, place the downloaded file in the root directory of the site at the path
.well-known/autoconfig/mail/config-v1.1.xml. The absolute path will look like this:/home/example/example.com/www/.well-known/autoconfig/mail/config-v1.1.xml, whereexampleis the name of your hosting account, andexample.comis the name of your mail domain. - Check the availability of the file at the link
example.com/.well-known/autoconfig/mail/config-v1.1.xml, whereexample.comis the name of your mail domain. - Check if autoconfiguration works when setting up mail in Thunderbird.
On autoconfig subdomain
- Add subdomain with the name
autoconfig. - Download the autoconfiguration file.
- Using file manager or any FTP client, place the downloaded file in the root directory of the subdomain
autoconfigunder the pathmail/config-v1.1.xml. The absolute path will be something like this:/home/example/example.com/autoconfig/mail/config-v1.1.xml, whereexampleis the name of your hosting account,example.comis the name of your mail domain. - Check the availability of the file at a link of the form
autoconfig.example.com/mail/config-v1.1.xml, whereexample.comis the name of your mail domain. - Check if autoconfiguration works when setting up mail in Thunderbird.