Manage cookies that are used for advertising, such as ad personalization, remarketing, and ad effectiveness analysis.
2.10.1. General information about Node.js
Attention!
Full Node.js functionality is supported only on business hosting plans. On shared hosting, Node.js can only be used in the console; you cannot run sites or apps that need to listen on ports and be accessible from the outside. If you change plan from business hosting to shared hosting, sites running on Node.js will stop working.Scheme of Node.js work on hosting
Node.js works on hosting just as it does on a VPS or dedicated server, but with proxying HTTP traffic to the Node.js app.
Proxying HTTP traffic is necessary to protect your app from DDoS attacks and to provide you with additional features of our hosting, such as installation of a free SSL certificate from Let's Encrypt, caching of static files, etc. Without proxying, HTTP traffic will not reach your app. If you don't need HTTP traffic, you can run your app without it — everything will work.
flowchart LR
client([Client])
host1[sub.example.com:80]
host2[sub.example.com:443]
proxying{Proxying}
socket[~/.system/nodejs/sub.example.com.sock]
ip["127.X.X.X:3000"]
app([App])
client-->host1 & host2
host1 & host2-->proxying
proxying-->|By socket|socket
proxying-->|By IP address|ip
socket & ip-->app
Two types of proxying are available:
- By socket. When the app is launched, a socket file is created into which all HTTP traffic is proxied. The advantage of this approach is that the socket interface itself is faster than proxying by IP address; the disadvantage is that not all popular frameworks are able to start an HTTP server over a socket and accept only the parameters
--hostand--portin their settings. If you have the ability to run an HTTP server over a socket — we advise you to do it, if you don't — use proxying by IP address. - By IP address. HTTP traffic is proxied through the local IP address. This is organized as follows. We give you a unique local IP address of the form
127.*.*.*, where*is any number between 0 and 255, and the default port is3000. You specify these values in your app's settings. Depending on your framework, these parameters may be specified in different ways, but in most cases they are the app startup parameters--hostand--port. Note If you have a dedicated IP, you can directly receive any kind of traffic on any port. To use a dedicated IP, it must be explicitly specified as the second parameter inserver.listen(port, ip).
The proxying type is selected in the site settings when Node.js is enabled (see below). The data for using the selected type is displayed on the Node.js settings page. They are also contained in the environment variables process.env.PORT and process.env.HOST (respectively, the socket path and an empty value when proxying over a socket, or the port and IP address when proxying over an IP address).
The order in which the request is processed:
- Request comes to the shared server on port 80 or 443.
- Based on the host name is redirected to the app according to the selected proxying type — to the socket of the desired site or local IP address.
- App receives the data, processes it, and returns a response.
How to start the app
Within minutes of enabling Node.js in site settings in the site root directory, a primitive app is automatically created, displaying a stub that the site is ready to use.
- Open the "Site settings" section.
- Select the web server Node.js, the desired version, HTTP traffic proxying type and save the changes:

- Locate your app files in the site root directory — upload the files from a ready-made project or install using npm.
- Add script with the
startcommand topackage.json. - Click "Restart" in Node.js settings.
Possible problems:
- When starting HTTP-server not with our socket (when proxying by socket) — app will continue to work, but the site will have a 502 error.
- When starting HTTP-server not with our IP-address and port (when proxying by IP-address) — app will stop working after a couple of seconds with error code
9. - When starting HTTP server only with port, without specifying host (when proxying by IP address) — app will occupy the port globally and interfere with apps running on other hosts within the hosting account. The solution is to specify the host in
app.listen(). - Error 502 generally means that we can't find where to proxy your traffic. This usually occurs when an app is started with an incorrect IP address, port, or socket (see above), or when the app startup has failed.
- If your app crashes due to some internal error, our Supervisor system will track this and attempt to restart your app within 10 seconds. It will keep trying until your app is up and running.
If you need to start the app from the console and you are using proxying by IP address, you explicitly specify the IP address and port at startup:
HOST=127.*.*.* PORT=3000 node index.js
Instead of 127.*.*.* and 3000, substitute the IP address and port from the Node.js settings page.
General information
Notes:
- If node and npm are not visible in the console — make sure that
.bashrcand.bash_profilefiles exist in the hosting account and they do not contain errors.
npm
Hosting also supports npx.
npm — Node.js package manager. Allows you to install additional packages directly on the hosting. To use it, just connect via SSH and run the necessary commands in the site directory.
Commands:
npm -v— view the current version of npm.npm install package(ornpm i package) — package installation. After installation, a subdirectorynode_moduleswill appear, where the installed module will be located.npm uninstall package— package deletion.
package.json
package.json — npm package configuration and management file.
Parameters:
name(required) — app name in small Latin letters without spaces, you can use-and_to separate words.description— app description.dependencies— section with information about all packages used by the app.
The npm init command — creates a file from scratch. Before creating the file, all necessary data is requested. At the end you need to familiarize yourself with the contents of the future file and if everything is OK, enter yes. Note You can just press Enter for all questions, then a file with standard content will be created.
Node.js settings
Node.js app is managed in the "Node.js settings" section.
App status
The "App status" block: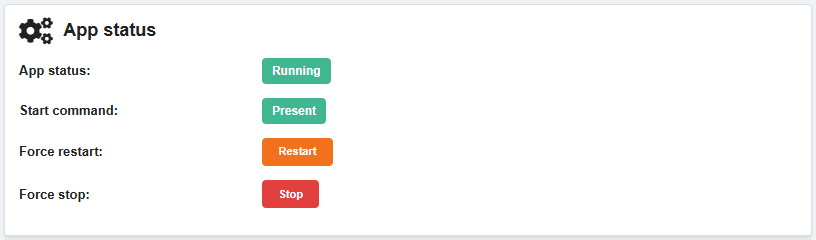
- "App status" — current status of the Node.js service operation:
- "Running" — service is up and running.
- "Stopped" — is not running (e.g. because
package.jsonis missing) or is stopped because an error occurred.
- "Start command" — presence in the
package.jsonfile of a script with thestartcommand:- "Present" — script found.
- "Missing" — script not found.
- "Force restart" — restart the service. ⚠️ Must always be pressed after any file changes.
- "Force stop" — stop the service. The button is displayed only when the app is running.
Main settings
The "Main settings" block: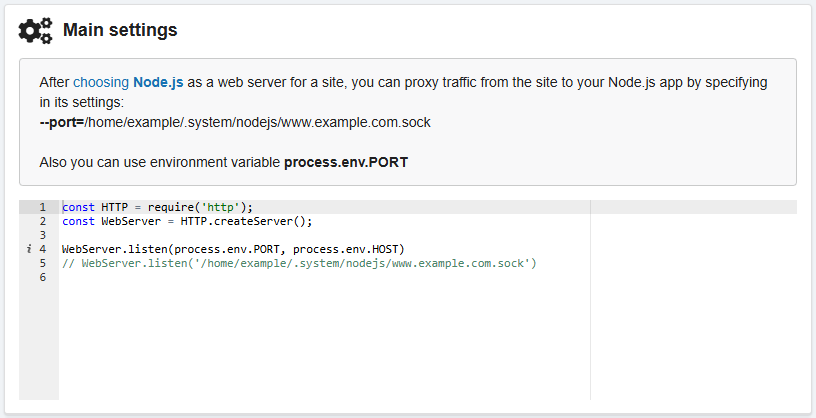
- Path to socket or IP address and port (depending on proxying type).
- Environment variable name with path to socket or variables with port and IP address (depending on proxying type). Note Forced to be passed to each app when it is started.
- Sample code that should be in the app to listen for site traffic.
Launch app
The "App start" block — contains the command to be added to package.json to start the app (/index.js in the command is the path to the main app file, the file name can be anything):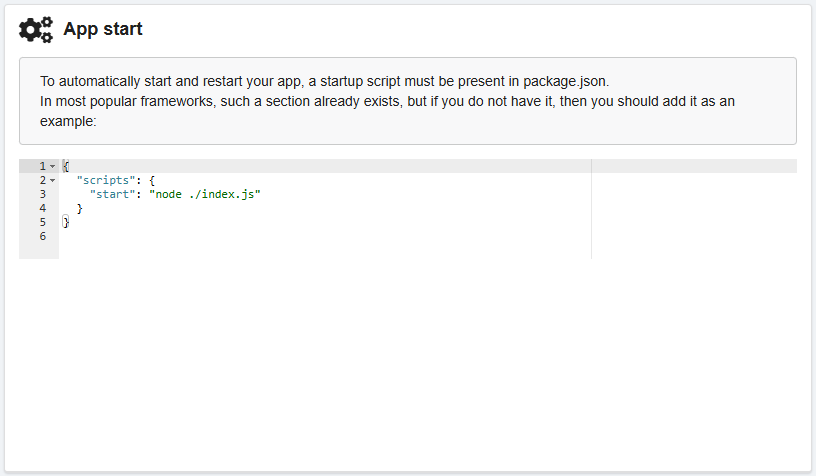
Your package.json
The "Your package.json" block — shows the current contents of the package.json file from site root directory (updated when the settings page is opened or reloaded):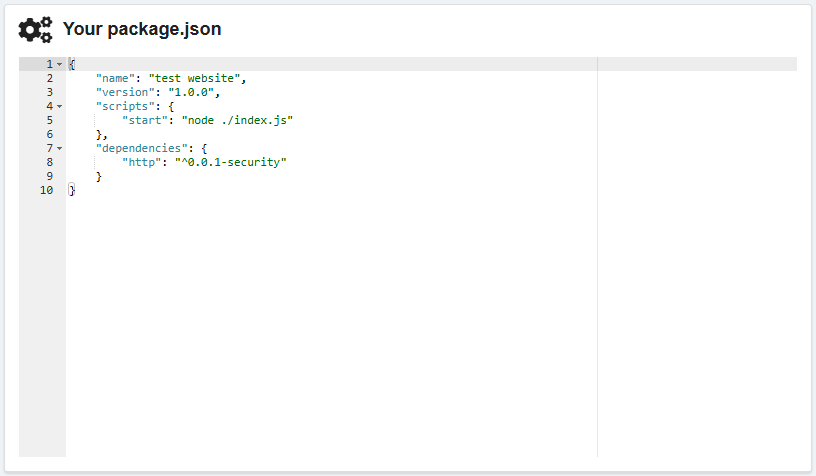
If syntax errors are detected in the file, the block will display the message "File contains errors". If the error message is displayed when the app is running, it means that the app was started before the error in the file appeared.
App logs
The "App logs" block — outputs real-time app logs. Includes information that the app outputs to the console during operation.
The full log is in a file of the form ~/.system/nodejs/logs/www.example.com.log, where instead of www.example.com would be the name of your site.
Examples of apps
Hello, World!
Using proxying by IP address.
- In the site root directory, create two files:
- Configuration file
package.json:{ "name": "node", "version": "1.0.0", "scripts": { "start": "node ./index.js" } } - App file
index.js:const HTTP = require('http'); const WebServer = HTTP.createServer((req, res) => { res.statusCode = 200; res.setHeader('Content-Type', 'text/plain'); res.end('Hello, World!'); }); WebServer.listen(process.env.HOST, process.env.PORT, () => { console.log(`Server is running.`); });
- In Node.js settings, click "Restart".
- Open the site in a browser — if successful, the text "Hello, World!" should be displayed.
Using npm and express framework
Using proxying by socket.
- Connect to the hosting via SSH.
- Go to site root directory (use your own data in the command):
cd example.com/www - Initialize npm and install express framework:
npm init && npm i express - In the site root directory, create the
index.jsapp file:const express = require("express"); const app = express(); app.get("/", function(request, response){ response.end("Hello from Express!"); }); app.listen(process.env.PORT); - Edit the
package.jsonfile and add the run command to it:"scripts": { "start": "node ./index.js" }Observe JSON syntax when adding the command!
The command should be added not just to the end of the file, but following the standard JSON format syntax:- The
scriptssection should not be duplicated. If it is already in the file, add thestartcommand there. - There must be a comma at the end of the previous line at the same nesting level.
- The nesting order of brackets must be correct.
- In Node.js settings, click "Restart".
- Open the site in a browser — if successful, the text "Hello from Express!" should be displayed.
(4)
Comments
Там використовується проксування за сокетом, тому хост не потрібен. Додамо примітку стосовно цього моменту.
але в прикладі для Express "app.listen(process.env.PORT);" вказано тільки порт...