Manage cookies that are used for advertising, such as ad personalization, remarketing, and ad effectiveness analysis.
2.19.6. How to take screenshot
When contacting tech support, the easiest and fastest way to create and send screenshots is to use the special button in the chat. For more information, see Online chat.
Windows
In Windows, screenshots can be taken in several ways:
For all versions
The methods for taking a screenshot vary across different versions of Windows (for example, in Windows 8 or 10, you can save a screenshot by pressing a keyboard shortcut), but one method remains the same for all versions. To use it, follow these steps:
- Open the app you want to take a screenshot of.
- On your keyboard, press the Prt Sc key to take a screenshot and copy it to the clipboard (this key may have different names on different keyboards, such as PrtScr, Print Scrn, or Print Screen):

- Open the Paint app (usually located in the "Start" menu under "All Programs → Accessories").
- In the window that opens, press Ctrl+V to paste the screenshot you copied from the clipboard.
- Press Ctrl+S or select "Save As" from the "File" menu, then specify the path and name of the file you want to save.
Windows 7-10
To take a screenshot, you can use the Snipping Tool app. To do this, follow these steps:
- Open the app you want to take a screenshot of.
- Open the Snipping Tool app (usually located in the "Start" menu under "All Programs → Accessories").
- Click "Create":
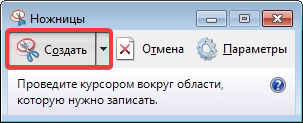
- Select the desired area of the screen, and a window will open where you can edit and save the screenshot.
- Press Ctrl+S or select "Save As" from the "File" menu, then specify the path and name of the file you want to save.
Windows 8-10
In Windows 8.1 and 10, you can take and save a screenshot by pressing the Win+PrtSc keys: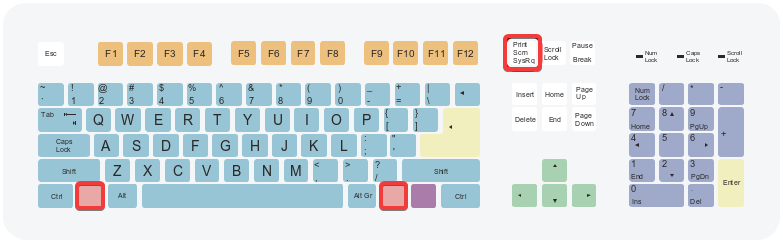
The screenshot file will be saved to the "Screenshots" folder. This folder is usually located at "Users → Your username → Pictures → Screenshots", or you can access it via "This PC → Pictures → Screenshots".
Linux
There is no one-size-fits-all method for taking screenshots in Linux. It all depends on the distribution and desktop environment you are using.
GNOME desktop environment
In GNOME, the Gnome-Screenshot app is installed and enabled by default. To take a screenshot, press the Prt Sc key on your keyboard (this key may be labeled differently on some keyboards, such as PrtScr, Print Scrn, or Print Screen):
A window will then appear asking you to save the screenshot file; you will need to specify its location and name.
GIMP
The GIMP app is a free graphics editor that allows you to take screenshots. To use it, follow these steps:
- If GIMP isn't installed on your device, there are several ways to install it:
- Download and install the appropriate version of the app from the official site.
- In the package manager or app store, search for
gimpand install it. - Run the following command in the terminal for your distribution and method:
- Ubuntu/Debian:
- Installation using
snap:sudo snap install gimp - Installation using
apt:sudo add-apt-repository ppa:otto-kesselgulasch/gimp sudo apt update sudo apt install gimp - Installation using
flatpack:sudo apt install flatpak sudo flatpak install https://flathub.org/repo/appstream/org.gimp.GIMP.flatpakref
- CentOS:
sudo yum install gimp - Fedora:
dnf install gimp
- Open the GIMP editor and, from the "File" menu, select "Create → Screenshot".
- Select the type of screenshot you want (single window, full screen, or a specific area) and click "Screenshot".
- The screenshot will open in the editor. Press Ctrl+S (or Ctrl+Shift+S), or go to the "File" menu, select "Save As", then choose where to save the file and enter a name for it.
macOS
All methods are listed on the official site.
To take a screenshot, follow these steps:
- Full-screen screenshot:
- Press the Shift+⌘+3 shortcut to take a screenshot of all windows.
- Once the process is complete, the screenshot will be saved to your desktop.
- Screenshot of a specific window:
- Press the Shift+⌘+4 shortcut.
- Press Space, and the cursor will turn into a camera icon.
- Click on the desired window.
- Once the process is complete, the screenshot will be saved to your desktop.
Android
The method for taking a screenshot on a specific device depends on the OS version, the device manufacturer, and the firmware being used.
The most common methods:
- Press the power button and the volume down button at the same time, and hold them down for a couple of seconds (the most common method).
- Press the power button and the "Home" button at the same time, and hold them down for a couple of seconds.
- Press the power button and the "Back" button at the same time, and hold them down for a couple of seconds.
- Press the power-off button and select "Screenshot" ("Take screenshot"). This method is often available on custom ROMs.
- On Xiaomi devices running recent versions of MIUI, you can take a screenshot by swiping down with three fingers from the top of the screen.
You can also use specialized apps to take screenshots, such as the free, open-source app Screenshot Tile (for Android 7.0 and later).
After taking a screenshot, a notification will appear in the notification shade. The screenshot can usually be found in the "Pictures/Screenshots" folder or in the gallery.
iOS (iPhone, iPad)
All methods are listed on the official site.
To take a screenshot, follow these steps:
- On iPhone X and later:
- Press the side button and the volume up button at the same time (it's easier to press the volume up button a split second after the side button).
- Release the buttons quickly (if you hold them down too long, Siri will launch).
- A thumbnail of the photo will appear in the lower-left corner of the screen. Do one of the following:
- Click the thumbnail to add images and text using the "Markup" feature.
- Tap and hold the thumbnail to share the screenshot.
- To remove a thumbnail, swipe it to the left.
- On iPhone 8 and earlier models, and on iPad:
- Press the top or side button and the "Home" button at the same time (it's easier to press the "Home" button a split second after the top or side button).
- Release the buttons quickly.
- A thumbnail of the photo will appear in the lower-left corner of the screen. Do one of the following:
- Click the thumbnail to add images and text using the "Markup" feature.
- Tap and hold the thumbnail to share the screenshot.
- To remove a thumbnail, swipe it to the left.
You can find the screenshots you've taken in the Photos app under "Screenshots".
(1)