Manage cookies that are used for advertising, such as ad personalization, remarketing, and ad effectiveness analysis.
2.16.2. Create, restore and download backup
flowchart LR
current(👉 Current version of data)
auto[(🔄 Automatic backups)]
create["➕ Creating
( site, DB, all DB
or hosting account)"] created[(📋 Created
backups)] restore["↩️ Restoring
(site or DB only))"] download[⬇️ Downloading] delete[❌ Deleting] auto-->create current-->create create-->created created-->restore auto-->restore restore-->|Replacing current data|current auto-->|Scheduled|delete created-.->|Manually|delete created-->download created-->|10 days|delete
Create
Important points:
- Created backups are stored on a separate server and do not use disk space of the hosting account.
- Site and account backups for the current date are created uncompressed in tar format, for the past days — compressed in tar.gz format. Database backups are always created with compression.
- The size of the created database backup may be much smaller than the actual size of the database on the hosting.
- Creating backups is not available for sites that have root directory as symlinks. Files of such sites are only available in a backup of the entire hosting account. Possible solutions:
- Created backups are automatically deleted after 10 days.
- Open the "Backups" section.
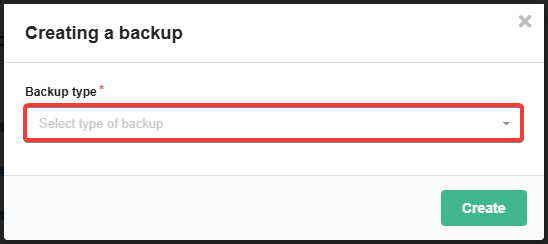
- Click "Create backup".
- Select the type of backup:
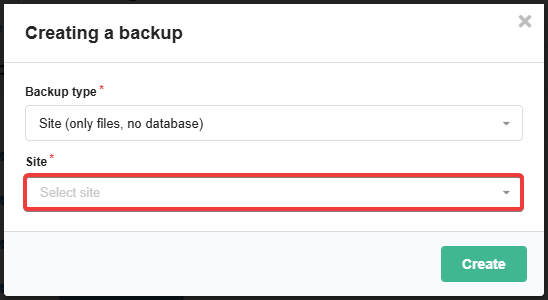
- "Site (only files, no database)" — creating an archive with the contents of the site root directory. The database of this site is not included in the archive.
- "Database" — creating an archive with a database dump or all databases of the hosting account. Backups are created with all tables, procedures, functions, etc.
- "Account (only files, no database)" — creating an archive with all files and directories of the hosting account. The databases of this hosting account are not included in the archive.
- Select the name of a certain site, database or hosting account (for databases the option "All databases in one archive" is available):
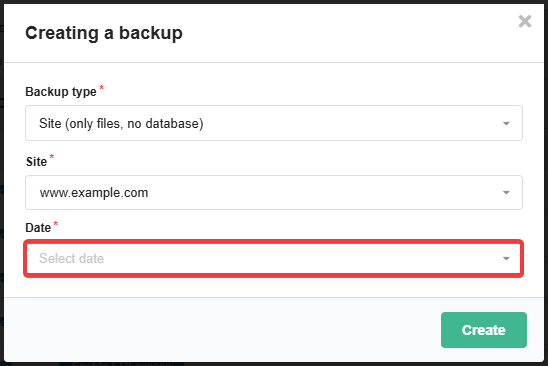
- Select the desired date from the list of available dates or the "Current version" option:
- Click "Create":
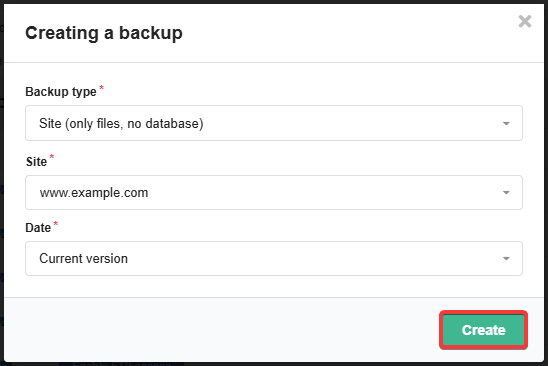
- Wait for the operation to complete (usually from several minutes to several hours, depending on server load, queue and data size) — a notification will be sent to email and connected messengers.
Restore
Attention!
When you restore a backup, the current content of the site or database is completely replaced with the data from the backup.Important points:
- Only site and database backups can be restored. A backup of a hosting account can only be downloaded.
- To fully restore the site to its original state, you need to restore two copies: a copy of the site and a copy of its database. The copies should be as close in date as possible.
- If the site stores some data outside of its root directory, such data must be restored manually using the file manager.
- Restoring from backup does not affect the settings in the control panel (site settings, PHP, SSL, etc.).
- Restoring backups is not available for sites that have root directory as symlinks. Files of such sites are only available in a backup of the entire hosting account. Possible solutions:
- All active queries are forcibly terminated for the database before restoring it.
- Operation history is kept for 10 days.
- Open the "Backups" section.
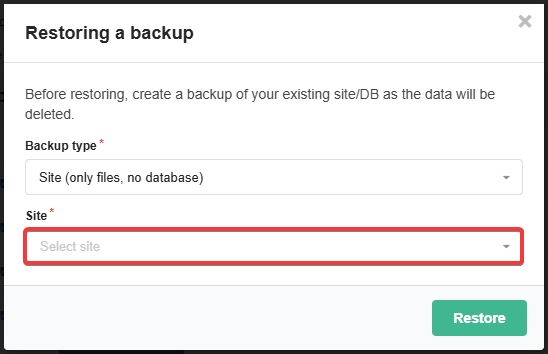
- Click "Restore backup".
- Select the type of backup:

- "Site (only files, no database)" — replacing the current contents of site root directory with data from an automatic backup. The database of this site is not affected.
- "Database" — replacing the current database contents with data from an automatic backup.
- Select the name of a certain site or database (for DB you will additionally need to select its user):
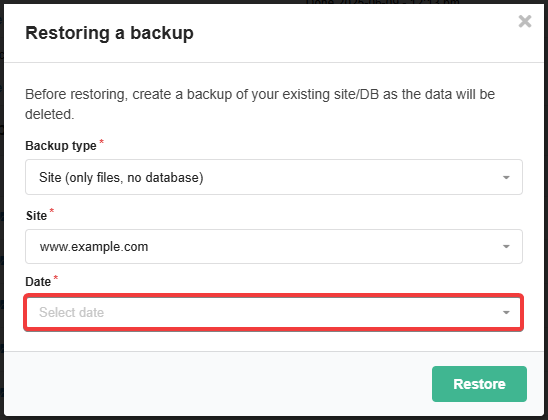
- Select the desired date from the list of available dates:
- Click "Restore":
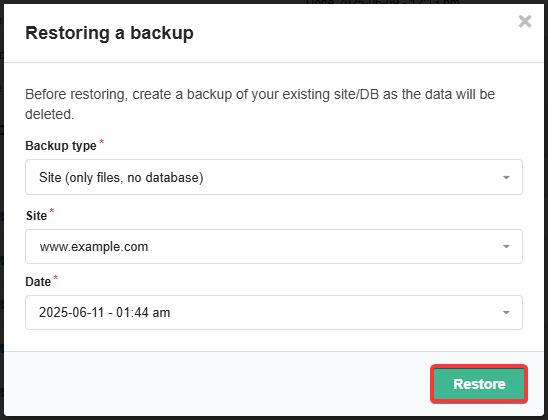
- Wait for the operation to complete (usually from several minutes to several hours, depending on server load, queue and data size) — a notification will be sent to email and connected messengers.
- Click on the button in the "Restore" column:

- Make sure that the current version of the site or database does not contain important data that may be lost during the restore (for the site, you can enable the option "Back up current data before restoring?", for DB you will additionally need to select its user), and click "Restore":
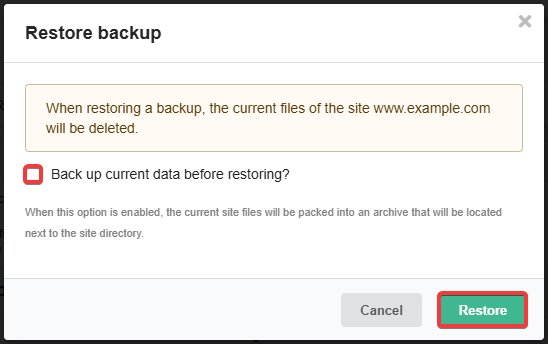
- Wait for the operation to complete (usually a few minutes to a few hours, depending on server load, queue and data size).
- Open the file manager.
- In the file manager panels, select the desired connection sources: in one panel select your hosting account, in the other select the backup for the desired date.
- Select the desired files and directories in the panel with the backup and copy them to the panel with the hosting account.
Download
Notes:
- Anyone with the link can download the backup. Authorization in the account is not required.
- The link is expired when the created backup is deleted.
- Create a backup (if not created).
- Click on the button in the "Download" column:

Delete

(5)