Manage cookies that are used for advertising, such as ad personalization, remarketing, and ad effectiveness analysis.
4.3.1.2.1. Events, calendars and tasks in WebMail.Online
The time zone is selected in the WebMail.Online settings.
Working with the calendar is performed in the "Calendar" section.
Events
Create
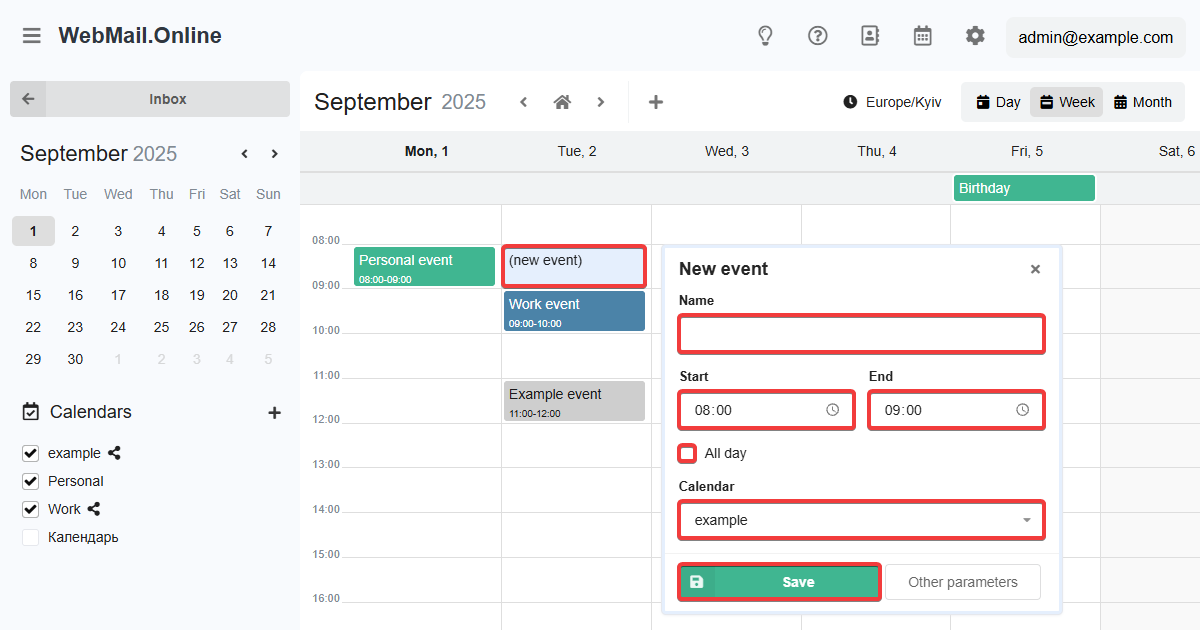
To create a new calendar event:
- For specific times — click on the cell of the desired hour.
- For all day — either click on the empty space under the name of the desired day (only for the daily or weekly calendar), or enable "All day" in the event creation form.
Event creation form:
- "Name" — arbitrary name of the event.
- "Start" and "End" — the start and end times of the event (only for events not for all day).
- "All day" — whether the event is for all day or not.
- "Calendar" — in which calendar the event will be created.
- "Other parameters" — open all event settings.
Settings
To change the event settings, select it in the calendar and click "Edit":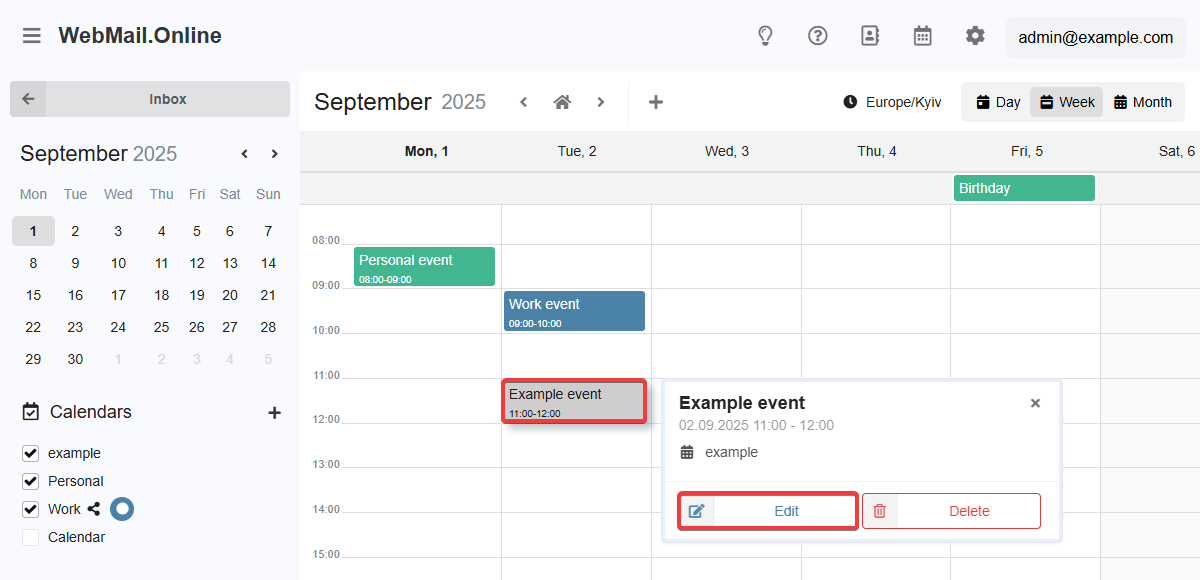
Event settings:
- "Main":
- Name.
- Date, time, and time zone of the start and end of the event (time and time zone only for events not for all day).
- Whether the event is for all day or not.
- Calendar.
- "Additional parameters" (optional):
- Location.
- Description.
- URL.
- Categories (one or more).
- Custom background color (can be selected from the palette or specified in RGB, HSL, or HEX formats).
- Status (busy, available).
- Considered when online booking.
- Event visibility (public, private, confidential).
- Priority (from 1 to 9, where 1 is the highest and 9 is the lowest).
- "Repeat":
- Never.
- By days (frequency of repetition, ending — endless, until a specified date, or after a certain number of repetitions).
- By weeks (frequency of repetition, days of repetition, ending).
- By months (frequency of repetition, periodicity or days of repetition, ending).
- By years (frequency of repetition, periodicity, or month and date of repetition, ending).
- "Notifications":
- Setting up the text and time of notification sending:
- Before, during, or after the event begins.
- Before, during, or after the event ends.
- At a specific time.
- Sending notifications:
- Displayed in WebMail.Online interface when the tab is active.
- Can be sent via the browser when the tab is inactive (if enabled in WebMail.Online settings).
- Can be sent via clients that have this calendar connected.
Calendars
Create
To create a new calendar, click ➕ in the sidebar, specify the main settings (name, description, colors), and save your changes.
Settings
To change the calendar settings, click ⚙️ in the sidebar to the right of the calendar: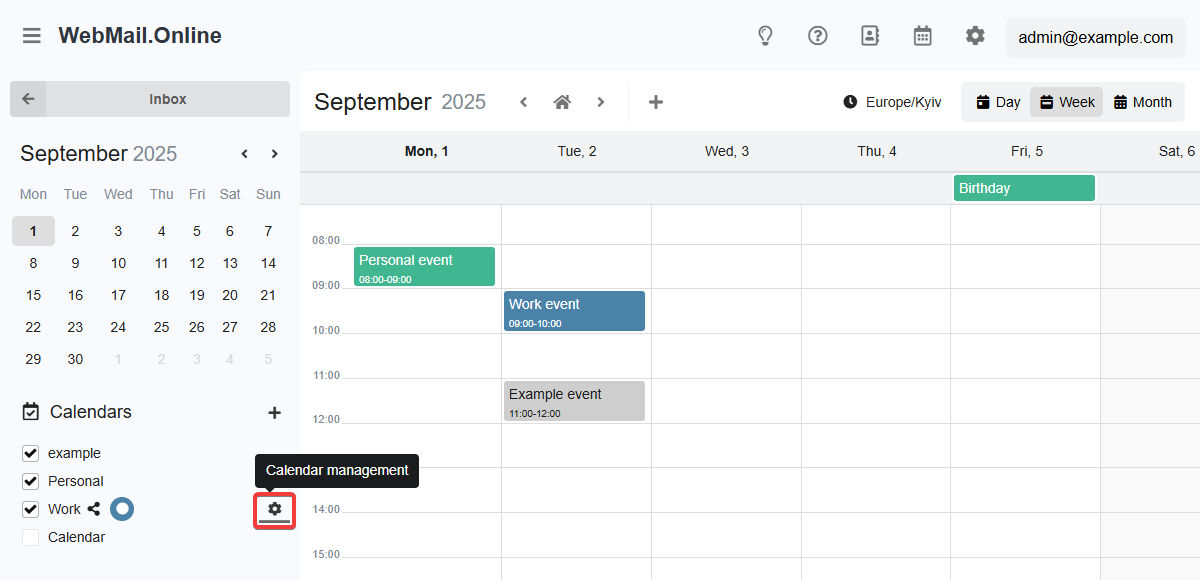
Calendar settings:
- "Main":
- Name.
- Description.
- Background and text colors for events ( can be selected from the palette or specified in RGB, HSL, or HEX formats).
- "Public access" — see Public access to WebMail.Online calendar.
- "CalDAV" — see Access to WebMail.Online calendar via CalDAV.
- "Access delegation" — see below.
- "Import" and "Export" — see Import and export calendar events in WebMail.Online.
Access delegation
Important points:
- For corporate mail only.
- Mailboxes to which access is granted:
- Must be served by us.
- Can be of any type: hosting account mail or corporate mail.
- Can be associated with any mail domain (except public ones, such as Gmail, etc.).
Delegating access allows you to share your calendar with another mailbox. This calendar will be visible in the calendar list for both the owner and users with delegated access. You can also manage the access level: read-only or read and write.
To delegate access, open calendar settings, switch to the "Delegate access" tab, enter the email address you want to grant access to, and click "Grant access":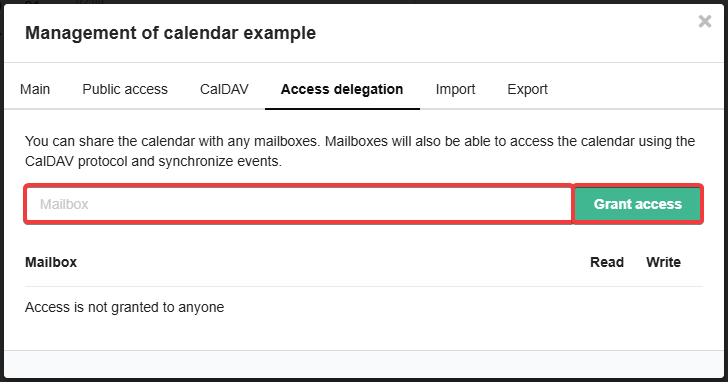
If you need to allow changes to be made to the calendar, additionally grant write permission: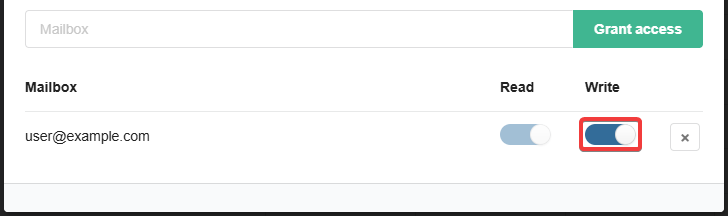
Calendars with delegated access are marked with the corresponding icon in the sidebar.
To close access on the "Access delegation" tab, simply delete the addresses from the list. Users with delegated access can also revoke it themselves.
Tasks
Tasks are similar to events, but they involve performing some kind of action and have a status (to do, doing, done, canceled).
All tasks are displayed in the calendar in the "Tasks" view mode: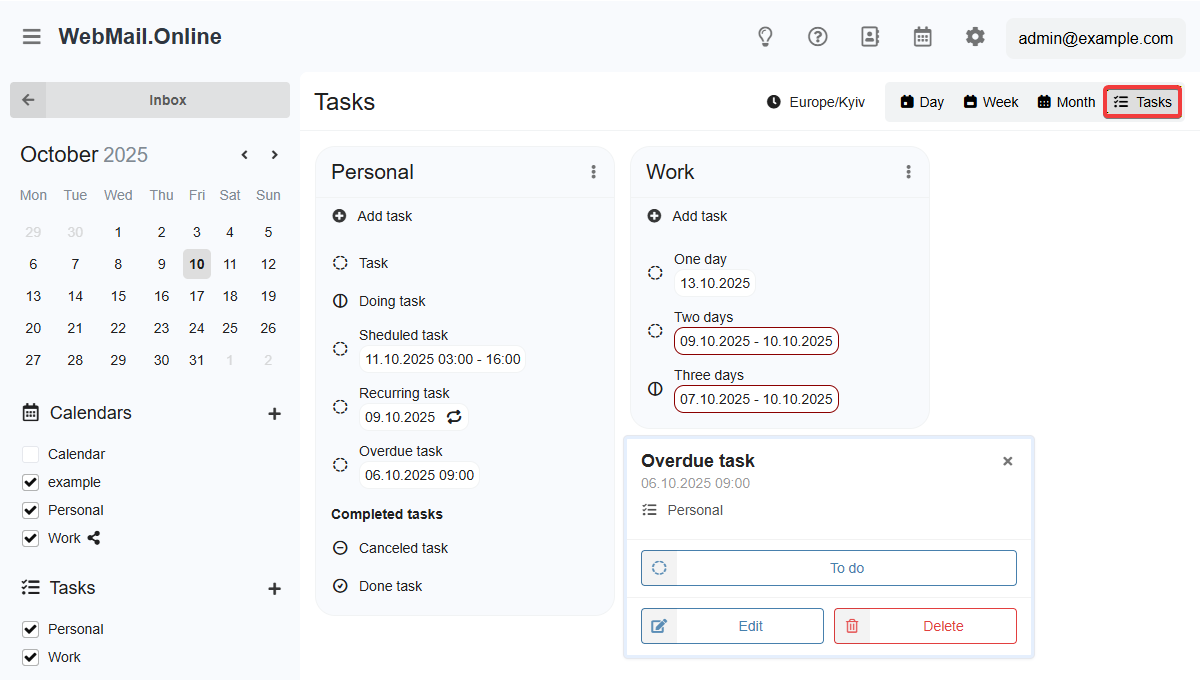
Tasks that have a start date are also displayed in the calendar view modes by day, week, and month.
Otherwise, task and task list settings are similar to events and calendars.