Manage cookies that are used for advertising, such as ad personalization, remarketing, and ad effectiveness analysis.
4.3.1.2.5. Online booking to WebMail.Online calendar
Attention!
For corporate mail only.For each calendar in WebMail.Online, you can create a publicly accessible online form through which users can book your services for available times, and you will be able to see all their bookings in your calendar.
How it works:
- You configure an online form for the calendar: select an available address in the time.contact domain, specify the form name and description, select the work schedule, and add your services.
- After configuring the form, you will get a public link to it.
- Provide the link to your clients.
- Customers follow the link and fill out the form: select the service, date, time, and enter their details (available times are suggested considering events in the calendar).
- After submitting the form, an event based on the data from the form automatically appears in your calendar.
With online booking, you can organize meetings, consultations, and appointments for clients at beauty salons, barbershops, etc.
Online form
Configure
Notes:
- Only one form can be configured for each calendar. However, one mailbox can have multiple calendars, each of which can have its own form configured.
- A calendar with a configured form is marked with the 👤 icon. The color of the icon shows the current status of the online booking: green — opened, orange — suspended.
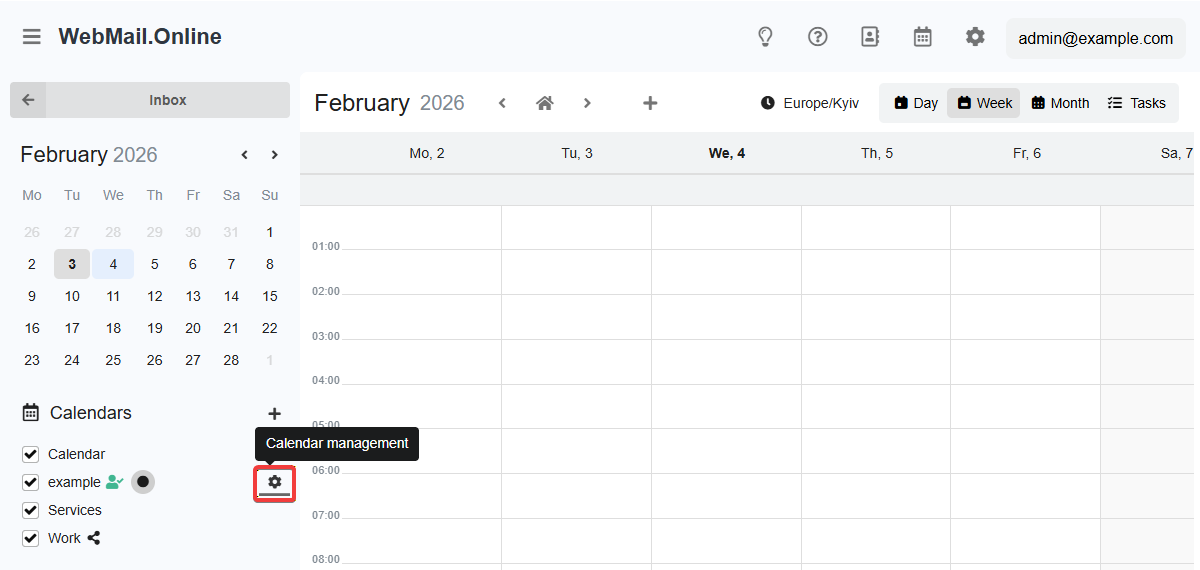
- Open WebMail.Online.
- Go to the "Calendar" section.
- In the side menu, in the row with the desired calendar, click ⚙️ ("Calendar management"):
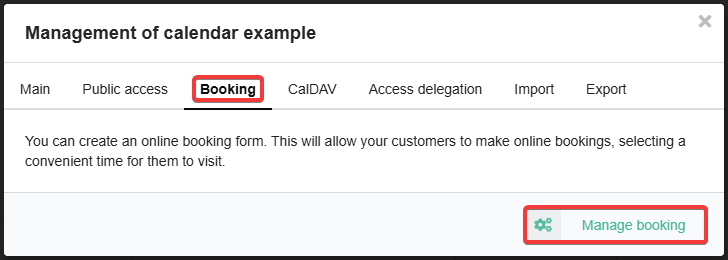
- Switch to the "Booking" tab and click "Manage booking":
- Configure the form and save your changes:
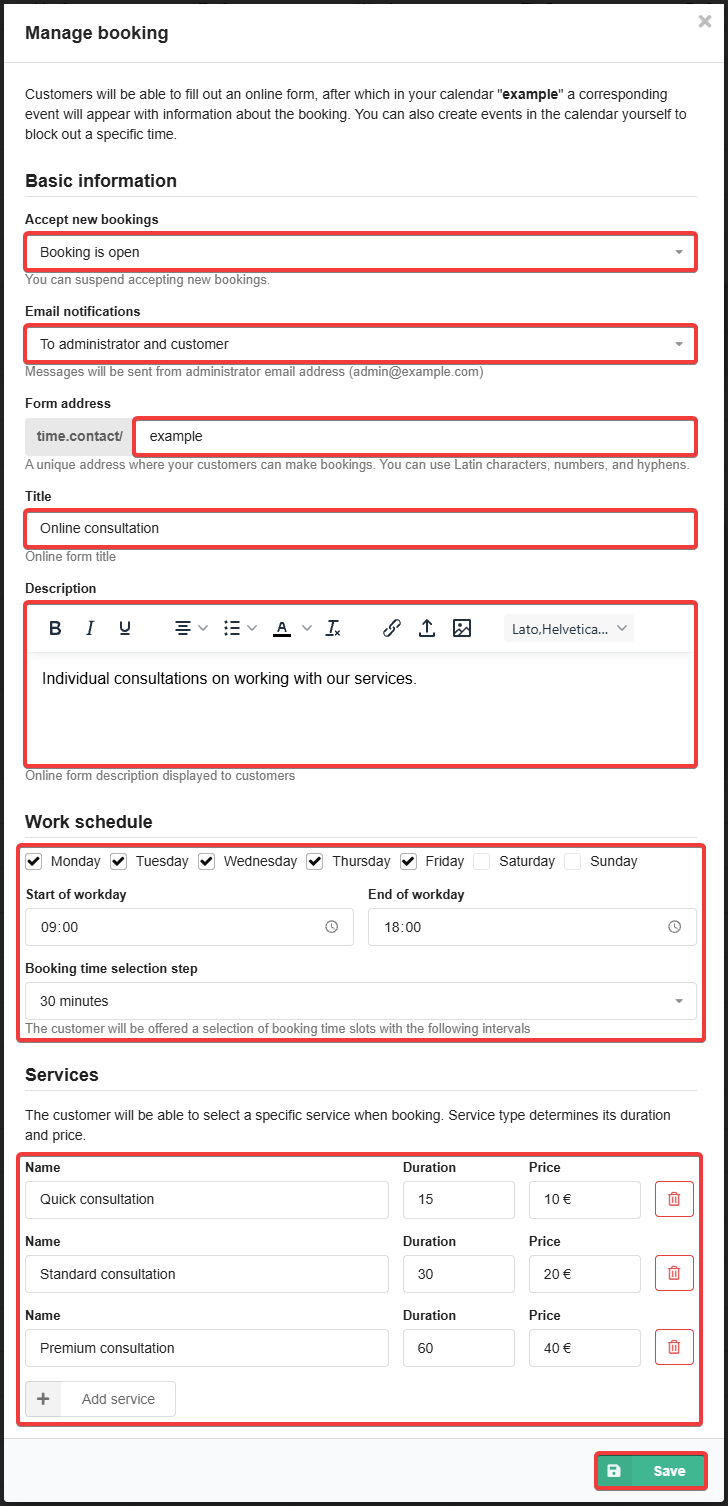
- Basic information:
- Accept new bookings — enable/disable the form.
- Email notifications — configure notifications.
- Form address — the unique address of the form in the time.contact domain.
- Title — the title of the form.
- Description — you can use formatting and insert images.
- Work schedule:
- Days of the week when the booking is allowed.
- Start of workday and End of workday — the time range when booking is allowed on selected days.
- Booking time selection step — the step at which you can select the booking time (15 minutes, 30 minutes, 1 hour, 2 hours).
- Services — name, duration (15-600 minutes), and price of the service.
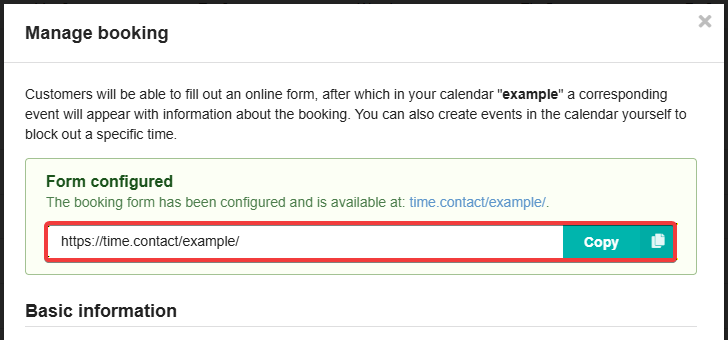
- At the top of the form settings window, you will see the "Form configured" block with a link to your form — copy this link and provide it to your customers:
Use
- Open the page with the form at the link provided.
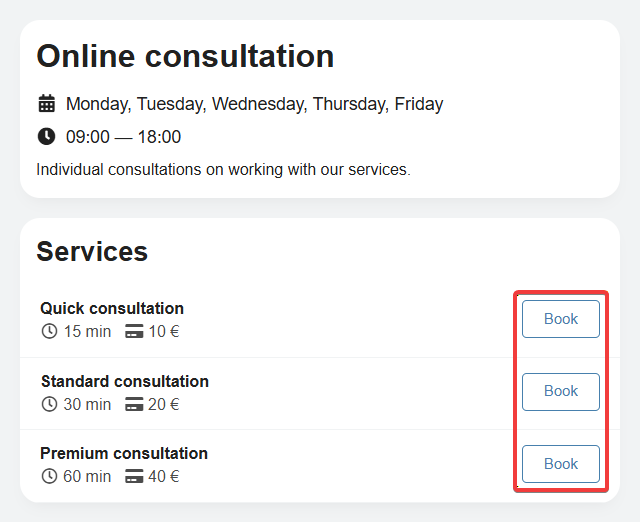
- Select a service and click "Book":
- Select the date and time:
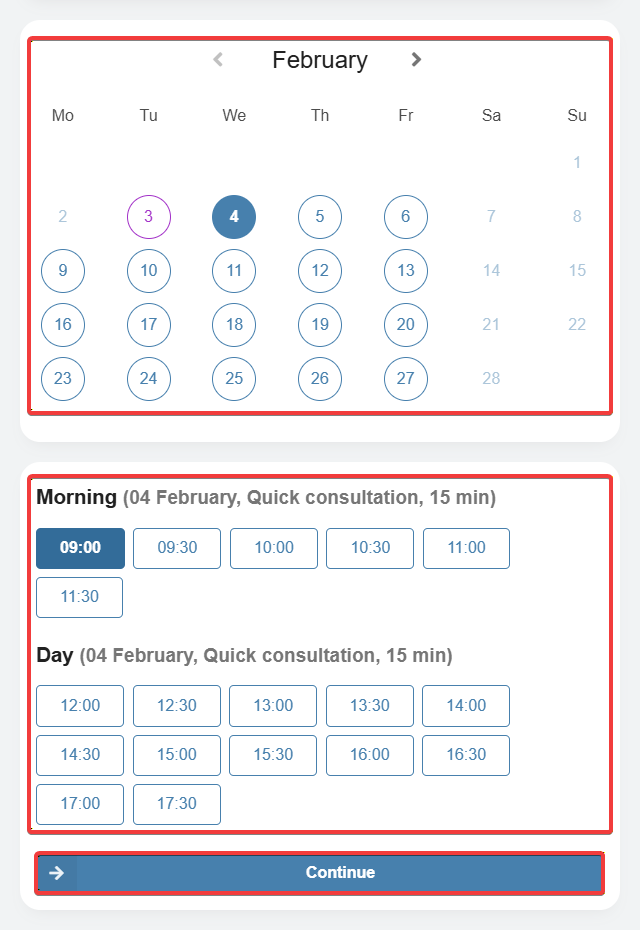
- Only free time without added events or with events marked as "Not busy" is available for selection.
- When selecting free time, the duration of the selected service is considered.
- Enter your details and click "Book":
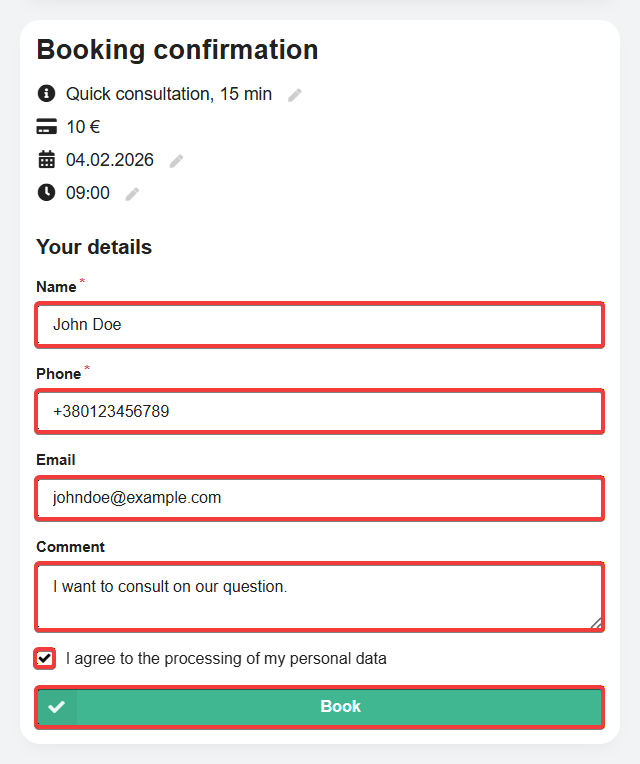
- If necessary, you can change the service, date, and time at this stage.
- After submitting the form, an event will be automatically created in the owner's calendar.
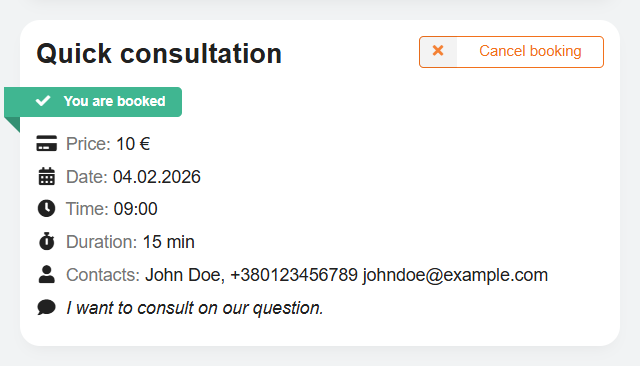
- The booking details are saved in your browser — you can check the current status of your booking on the form page and cancel it if necessary:
Calendar events
flowchart LR
booking@{ shape: stadium, label: "📝 Booking" }
event@{ shape: rounded, label: "📅 Event in calendar" }
changed@{ shape: rounded, label: "📝 Event changed" }
canceled@{ shape: stadium, label: "🚫 Event canceled" }
deleted@{ shape: stadium, label: "❌ Event deleted" }
done@{ shape: stadium, label: "✔️ Done" }
booking-->|Submit form|event
event-->|Date and time|done
event-->|Change
in calendar|changed changed-->|New
date and time|done event--->|Cancel in form|canceled event--->|Cancel in calendar|canceled event--->|Delete in calendar|deleted
in calendar|changed changed-->|New
date and time|done event--->|Cancel in form|canceled event--->|Cancel in calendar|canceled event--->|Delete in calendar|deleted
Create
Events in the calendar are created automatically immediately after submitting the form. The time and duration of the event correspond to what was selected in the form. The event name contains data from the form (name, phone number, email) and the name of the selected service. The comment is saved in the description in event settings in additional parameters.
Change
Events can only be changed from the calendar. After changing an event, a notification appears on the page with the form showing the new date, time, and duration. If you return the event to its previous location in the calendar, the notification will disappear.
Cancel
Events can be canceled both on the form page and from the calendar.
When an event is canceled on the page with the form using the "Cancel booking" button, the status "Not busy" is automatically set in the calendar in event settings in additional parameters, and the background color of the event changes to red with stripes.
To cancel an event from the calendar, set the status to "Not busy" in event settings in additional parameters. The background color of the canceled event will turn gray with stripes.
After canceling the event status on the form page, it changes to "Booking canceled" and the "Hide" button appears. The time that was occupied by the event is freed up for new bookings.
Only events that have been canceled from the calendar can be restored. To do this, simply remove the "Not busy" status in event settings in additional parameters.
Delete
Events can only be deleted from the calendar. After deletion, the status of the event on the page with the form changes to "Booking deleted by staff" and the "Hide" button appears. The time that was occupied by the event is freed up for new bookings. A deleted event cannot be restored.
Notifications
Notifications are managed in the online form settings. You can send them to the administrator and customer, only to the administrator, or disable them.
Notifications are sent via SMTP from the mailbox for which the online form is configured to the customer's email address specified when sending the form. All messages are counted in the email sending limits per day (the "Via SMTP with authorization" limit).
To whom and when notifications are sent:
- To the administrator:
- When creating a booking by a customer.
- When cancelling a booking by a customer.
- To a customer:
- When creating a booking.
- When cancelling an event by the administrator (including deletion).
An ICS file containing event data in a universal calendar format is attached to customer notifications. This file can be used to import the event into your own calendar. Some mail clients (except WebMail.Online and WebMail classic) can automatically recognize such a file and offer to add the event to the calendar directly in the message.
Comments