Manage cookies that are used for advertising, such as ad personalization, remarketing, and ad effectiveness analysis.
4.3.2.14. Set up CalDAV calendar synchronization in WebMail classic
To be able to use CalDAV calendar synchronization for mailbox calendar and mail clients, sign in to mailbox where calendar is planned to be used using WebMail and perform the following steps: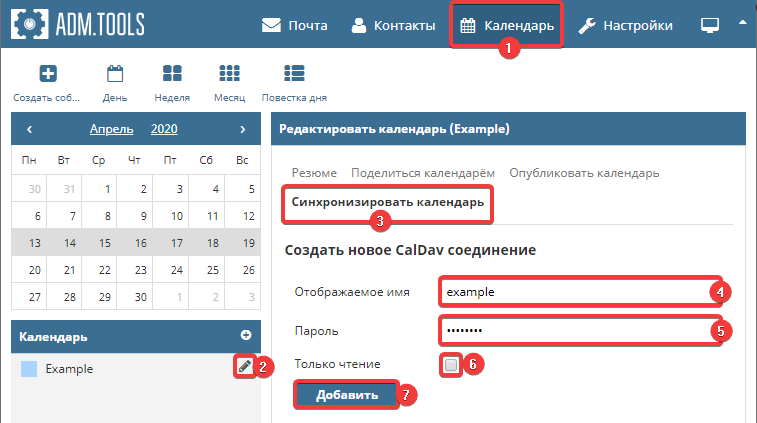
- Go to the "Calendar" section in WebMail.
- Edit or create a new calendar.
- Go to the "Synchronize calendar" section.
- "Display name" — specify new connection name (this name is used only to identify required connection in list).
- "Password" — specify the password that will be used for connection (must contain at least 10 characters). ⚠️ Save or remember specified password, it will be impossible to change or display it later.
- "Read-only" — a parameter that prohibits changing calendar events on server side by mail clients.
- Click "Add".
- A field "Your CalDav connection" appears lower on page, which displays connection data:
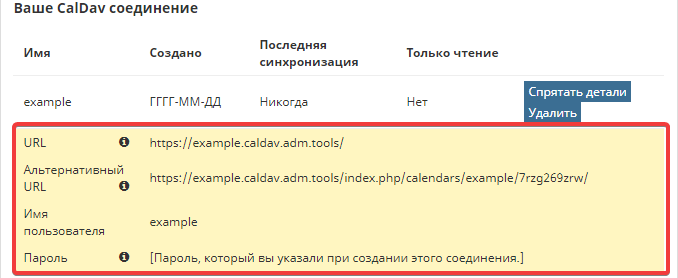
- "URL" — address to connect to for calendar synchronization.
- "Alternative URL" — alternative address, connection to which does not request access data (not all mail clients support this functionality).
- "Username" — username to use for connection.
- "Password" — password is not displayed and will not be displayed in connection data. Password cannot be recovered, you can only recreate connection.