Manage cookies that are used for advertising, such as ad personalization, remarketing, and ad effectiveness analysis.
5.12. Upload and mount images to VPS
Uploading, mounting, unmounting and deleting images is performed in the "VPS" section on the "CD-ROM" tab.
Upload own image
Notes:
- File size should not exceed 6 GB.
- Using the upload from own device button, you can upload an image in ISO format, a torrent image file, or any other type of file. In the last case, the uploaded file will be automatically packaged into an image.
- When a torrent file contains several images, all images will be uploaded at once. You can cancel uploading of unnecessary images.
- Uploaded images will be available for all VPS within the account.
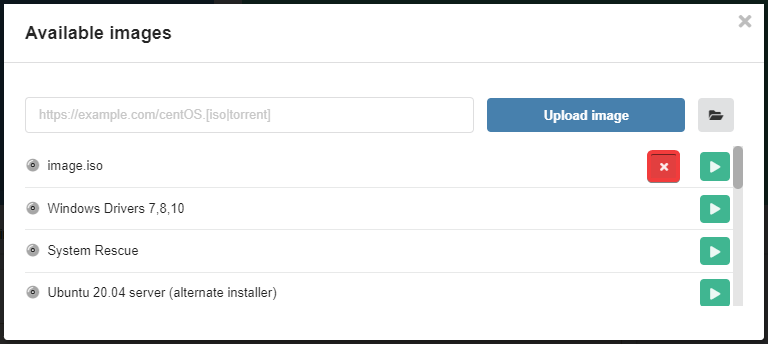
- In the "VPS" section, open the "CD-ROM" tab.
- On the row of any disk drive, click the image selection button:
- Specify a direct link to the desired ISO image or torrent file, click "Upload image" and wait for the upload to complete:

Mount image
Notes:
- Two images can be mounted at the same time (one in each drive).
- When mounting a Windows image in the second disk drive (if it is free), an image with virtio-win drivers will be automatically mounted.
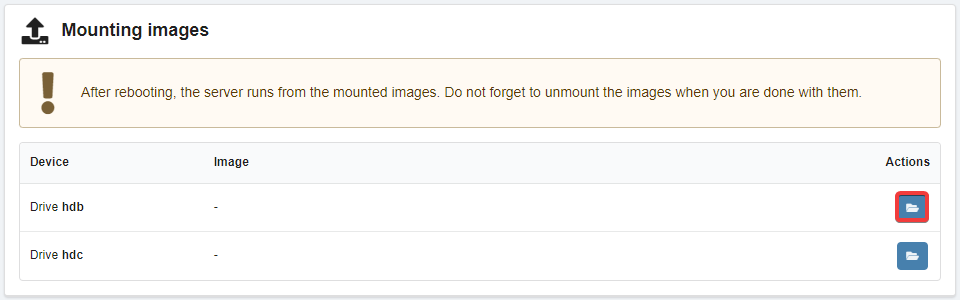
- In the "VPS" section, open the "CD-ROM" tab.
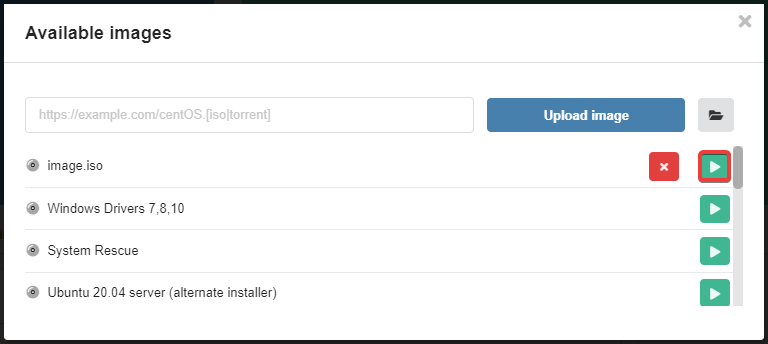
- In the row of the desired disk drive, click the image selection button:
- In the list of available images, mount the desired image:
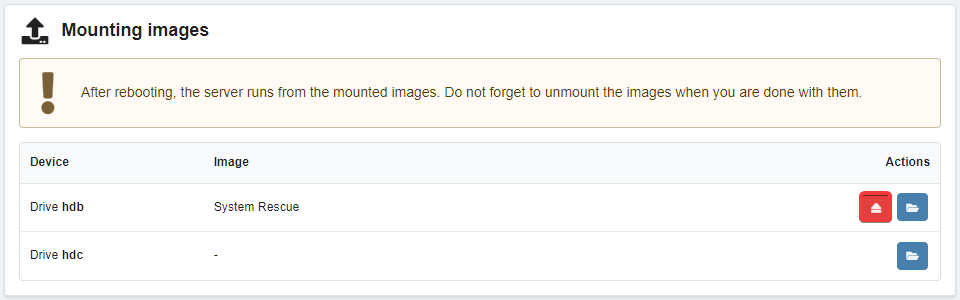
- Reboot server — after rebooting, the server will be started from the mounted image.
- Use VNC to further work with the server (installing the OS from an image, diagnostics, etc.).
Unmount image
Delete uploaded image
- In the "VPS" section, open the "CD-ROM" tab.
- In the row of either of the two disk drives, click the image selection button:
- In the list of available images, click ❌ in the row of the image you want to delete: