Manage cookies that are used for advertising, such as ad personalization, remarketing, and ad effectiveness analysis.
5.1.2. Access to VPS via VNC
VNC is a remote access system for another device that uses the RFB protocol. It allows you to transfer all actions from the client device to the server and receive the server screen content regardless of the current OS status. VNC access can be used to install an OS on a VPS, perform diagnostics when there is no access via SSH, in case of boot problems, etc.
Credentials
VNC server credentials can be found in the "VPS" section on the "SSH / VNC" tab in the "VNC" block:
- "Server" — server and port for connecting via VNC (specified after a colon).
- "Password" — change the password for connecting via VNC.
- "Access" — enable/disable access to the server via VNC.
- "WebVNC" — connect to the server using the web client.
Connect
You can connect to your VPS via VNC using the built-in web client or any third-party VNC client, such as the free TightVNC or TigerVNC.
WebVNC
WebVNC is a web client built into the control panel. It allows you to quickly connect to the server via VNC without using third-party apps.
- Open the "VPS" section and launch the web client in one of the following ways:
- In the "Server access" section, click "WebVNC".
- On the "SSH / VNC" tab in the "VNC" block, click "Connect" (access is automatically activated for 4 hours).
- After connecting, enter the login
rootand the root user's password (you must enter it manually; copying and pasting are not supported):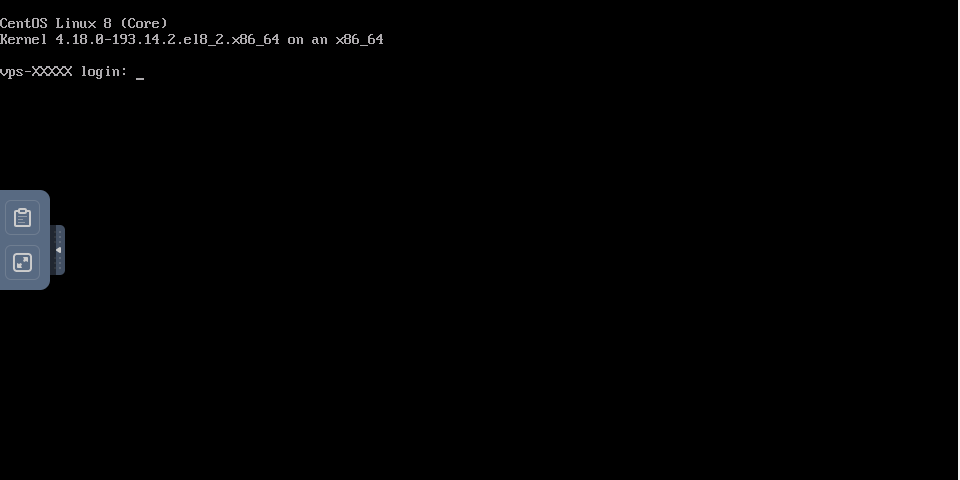
Notes:
- For security reasons on Linux systems, characters are not displayed on the screen when you enter a password or paste it from the clipboard.
- If a black screen appears instead of the command prompt after connecting, press any key (e.g., Ctrl) to exit power saving mode.
TightVNC
- Enable VNC access:
- Open the "VPS" section.
- Switch to the "SSH / VNC" tab.
- In the "VNC" block, enable the switch in the "Access" row.
- Select how many hours you want to activate access for (1-24 hours) and click "Activate".
- Download the latest version of TightVNC from the official site, install it, and run it.
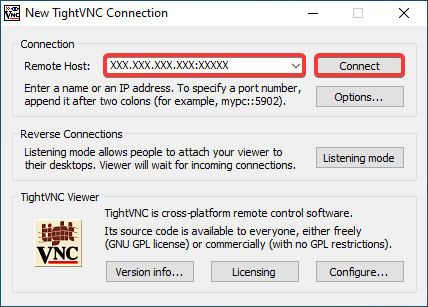
- In the "Remote Host" field, enter the server address from credentials and click "Connect":
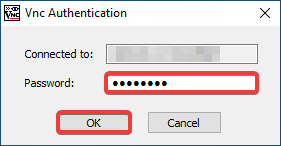
- In the "Password" field, enter the password from credentials and click "OK":
- After connecting, enter the login
rootand the root user's password (you must enter it manually; copying and pasting are not supported):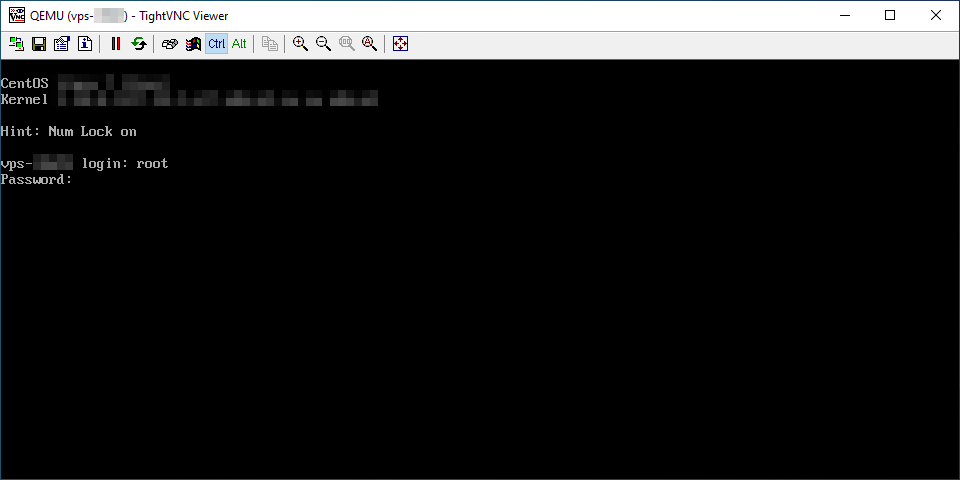
Notes:
- For security reasons on Linux systems, characters are not displayed on the screen when you enter a password or paste it from the clipboard.
- If a black screen appears instead of the command prompt after connecting, press any key (e.g., Ctrl) to exit power saving mode.
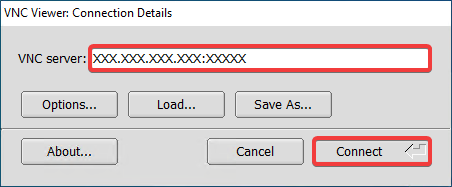
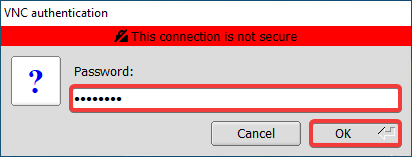
TigerVNC
- Enable VNC access:
- Open the "VPS" section.
- Switch to the "SSH / VNC" tab.
- In the "VNC" block, enable the switch in the "Access" row.
- Select how many hours you want to activate access for (1-24 hours) and click "Activate".
- Download the latest version of TigerVNC Viewer from the official repository and run it.
- In the "VNC server" field, enter the server address from credentials and click "Connect":
- In the "Password" field, enter the password from credentials and click "OK":
- After connecting, enter the login
rootand the root user's password (you must enter it manually; copying and pasting are not supported):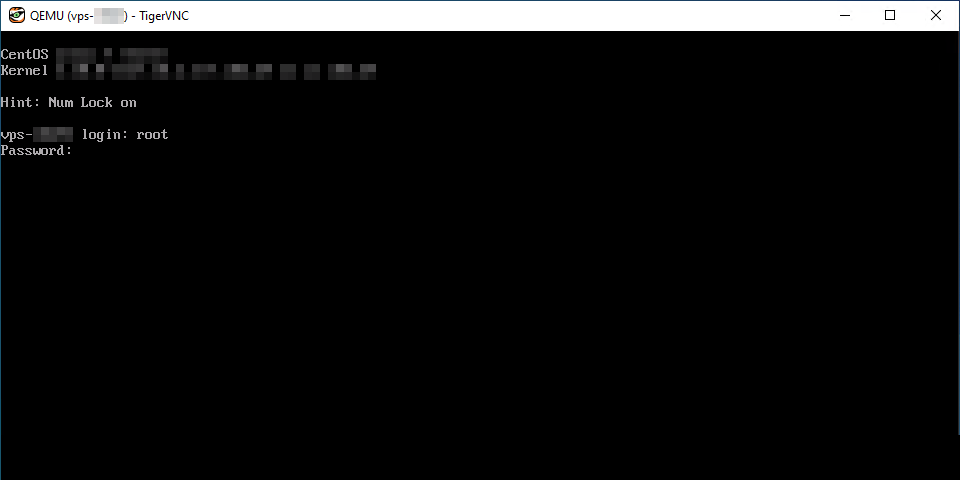
Notes:
- For security reasons on Linux systems, characters are not displayed on the screen when you enter a password or paste it from the clipboard.
- If a black screen appears instead of the command prompt after connecting, press any key (e.g., Ctrl) to exit power saving mode.
(2)