Manage cookies that are used for advertising, such as ad personalization, remarketing, and ad effectiveness analysis.
2.14.8.1. Install Moodle
Automatic install
See CMS auto-install.
Manual install
Prepare
- Download archive with the latest version of Moodle from official site to your PC.
- Place the distribution files on the hosting:
- Using file-manager or any FTP client, upload the archive to the root directory of the previously added site.
- Extract the downloaded archive using file manager.
- Move all contents of the
moodlesubdirectory to site root directory.
- Prepare database:
Install
- Open site in browser.
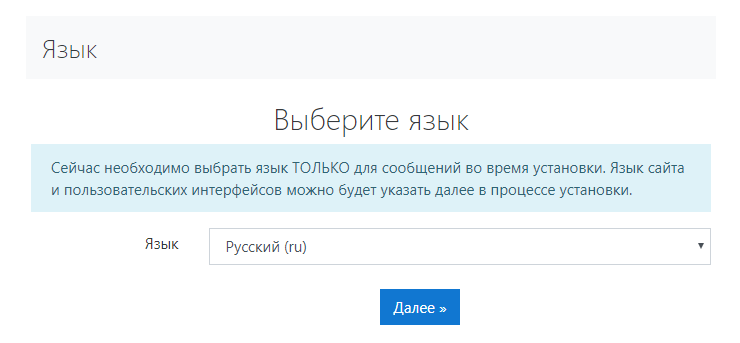
- Select desired language from list and click "Next":
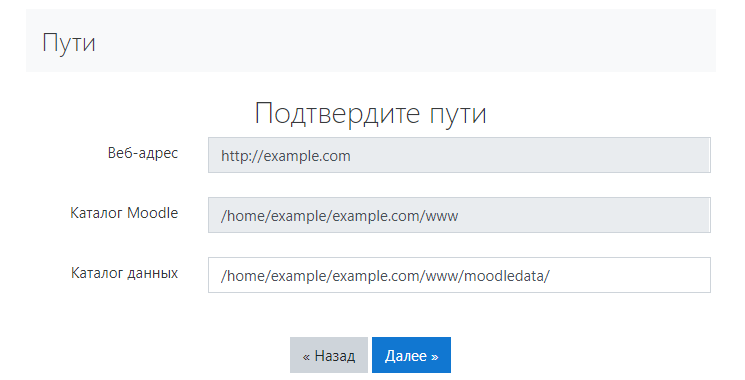
- Check that the file paths are correct and click "Next":
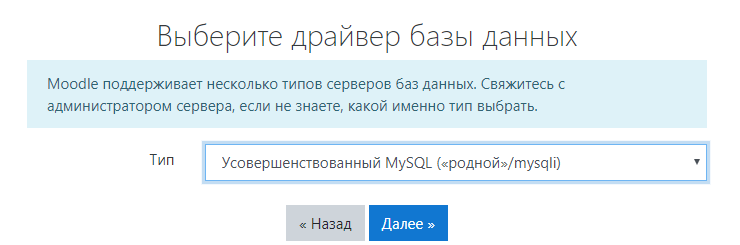
- Select database driver "Improved MySQL ("native"/msqli)":
- Specify the database connection settings and click "Next":
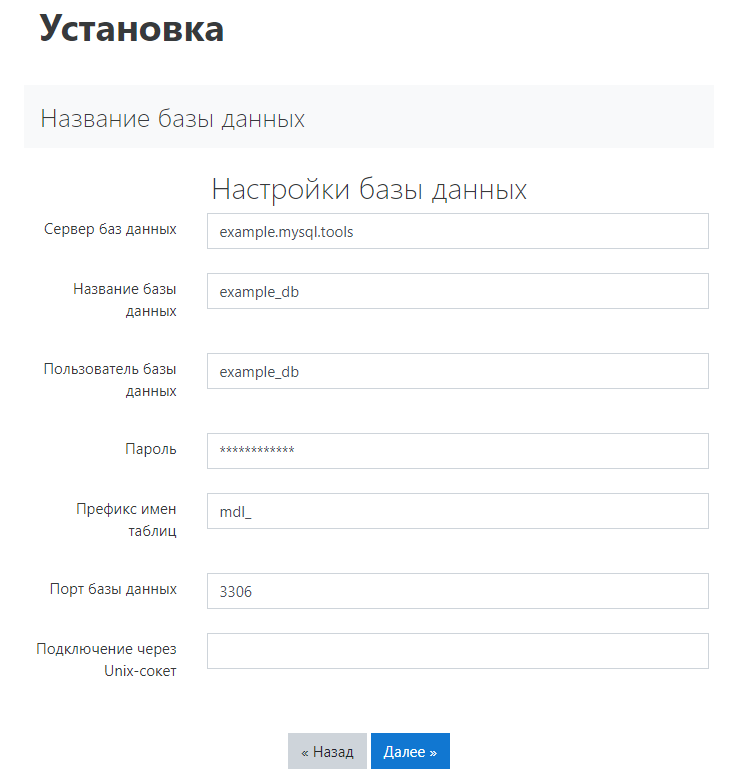
- "Database host" — database host.
- "Database name" — database name.
- "Database user" — database user login.
- "Password" — database user password.
- "Table name prefix" — default
mdl_or any other at your discretion. - "Database port" —
3306. - "Connection via Unix socket" — empty.
- Review copyright information and click "Continue".
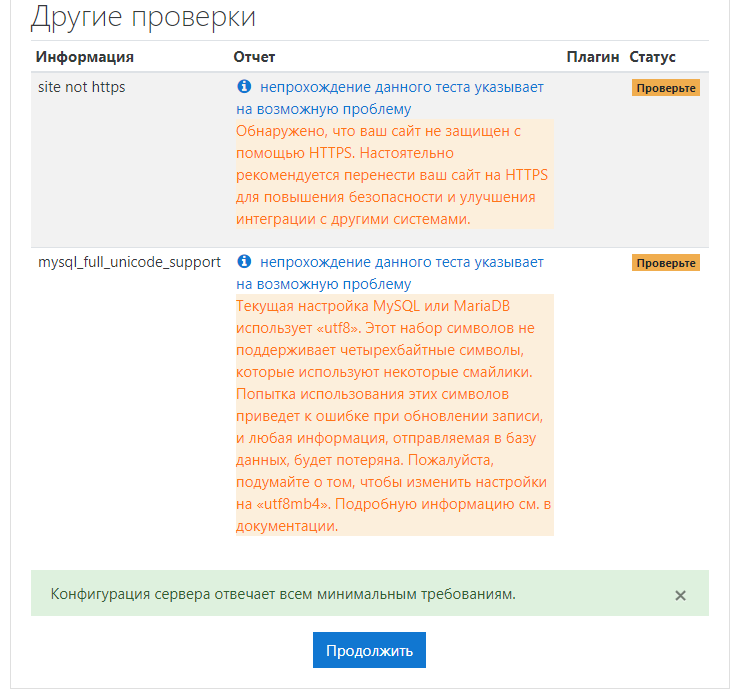
- After checking all parameters, several remarks may appear. If these are "site not https" and "mysql_full_unicode_support", then ignore them and click "Continue":
- Specify administrator data (it will be used to access the site admin panel) and click "Continue":
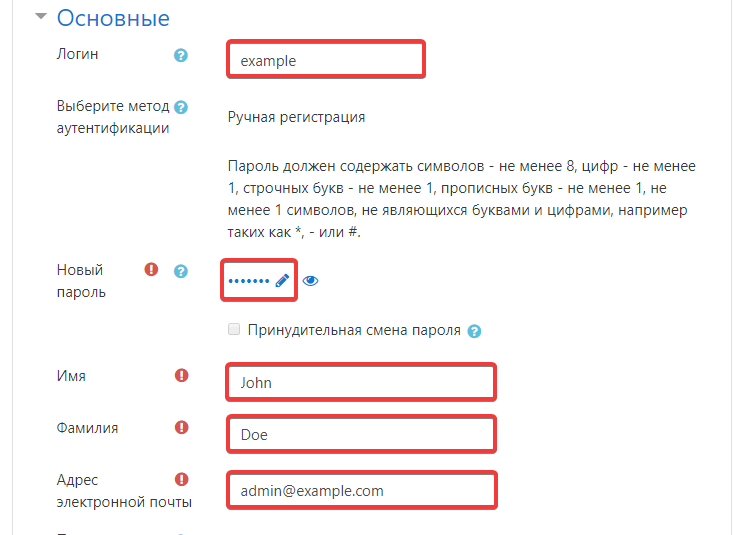
- "Login" — administrator login.
- "New password" — administrator password.
- "Name" — administrator name.
- "Last name" — last name of administrator.
- "Email address" — administrator's email.
- After installing all modules, click "Continue" at the bottom of the page.
- Fill in the fields and click "Save changes":
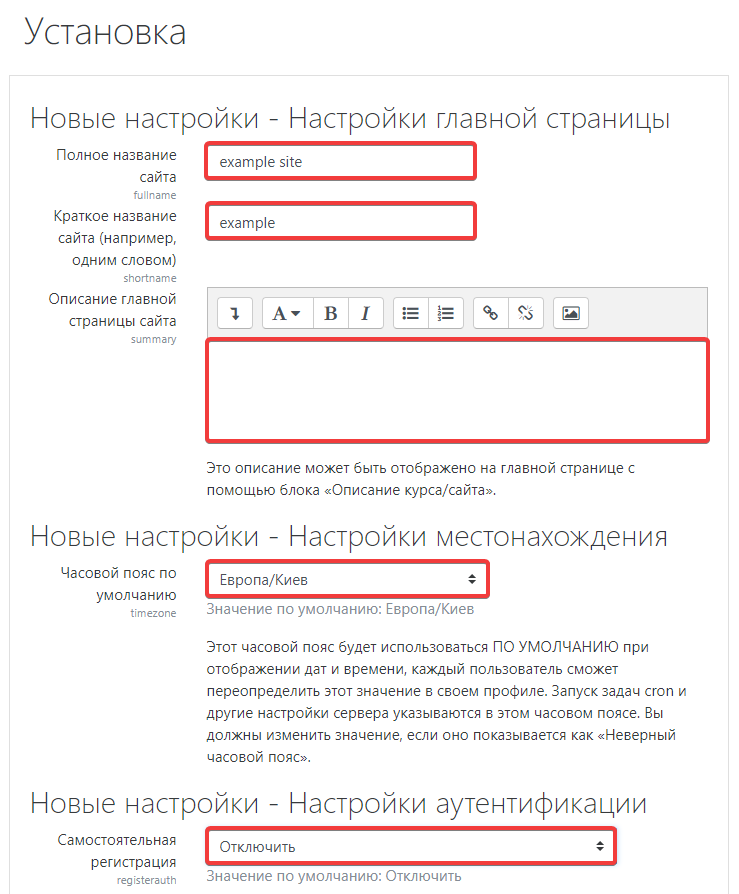
- "Full site name" — full name of site (will be used on site pages and during indexing).
- "Short site name" — name of the site consisting of one or two words (will be used for internal settings and when displaying the site).
- "Description of the site main page" — description of the main page (this text will be displayed on the site main page).
- "Default time zone" — time zone.
- "Self-registration" — option to allow register on the website (by default, there may be no other options besides "Disable").
- Check the site operation.