Manage cookies that are used for advertising, such as ad personalization, remarketing, and ad effectiveness analysis.
3.14. Set up public DNS Cloudflare/Google/Quad9
Attention!
If you get an error accessing any sites after setting up public DNS, you need to remove the public DNS settings or set up DoH, as your ISP may be blocking port 53.Public DNS provides the speed, reliability, and convenience of resolving domain names to IP addresses. Typically, public DNS caches are updated faster than local provider DNS, so devices that use public DNS can see changes to a domain's DNS records and status more quickly.
Addresses of public DNS
| Cloudflare | Quad9 | ||
|---|---|---|---|
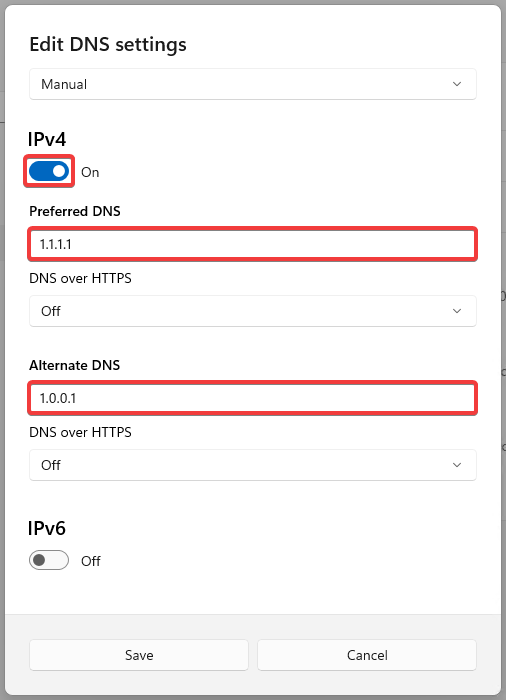
| IPv4 | 1.1.1.11.0.0.1 | 8.8.8.88.8.4.4 | 9.9.9.9149.112.112.112 |
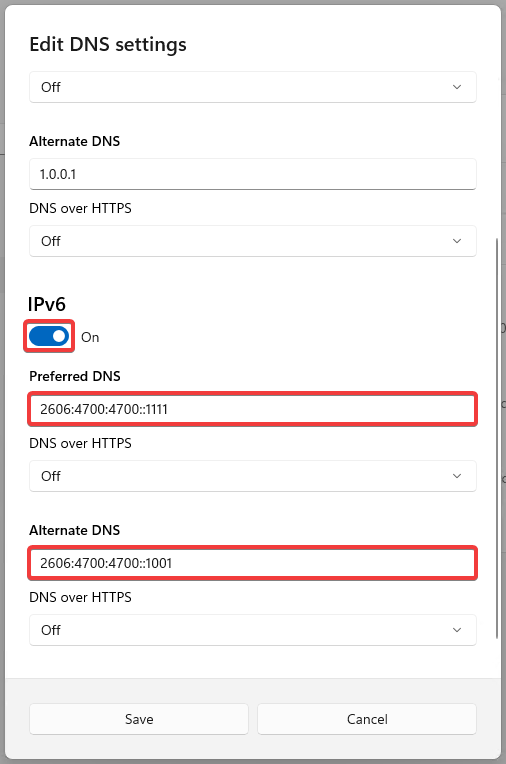
| IPv6 | 2606:4700:4700::11112606:4700:4700::1001 | 2001:4860:4860::88882001:4860:4860::8844 | 2620:fe::fe2620:fe::9 |
Windows
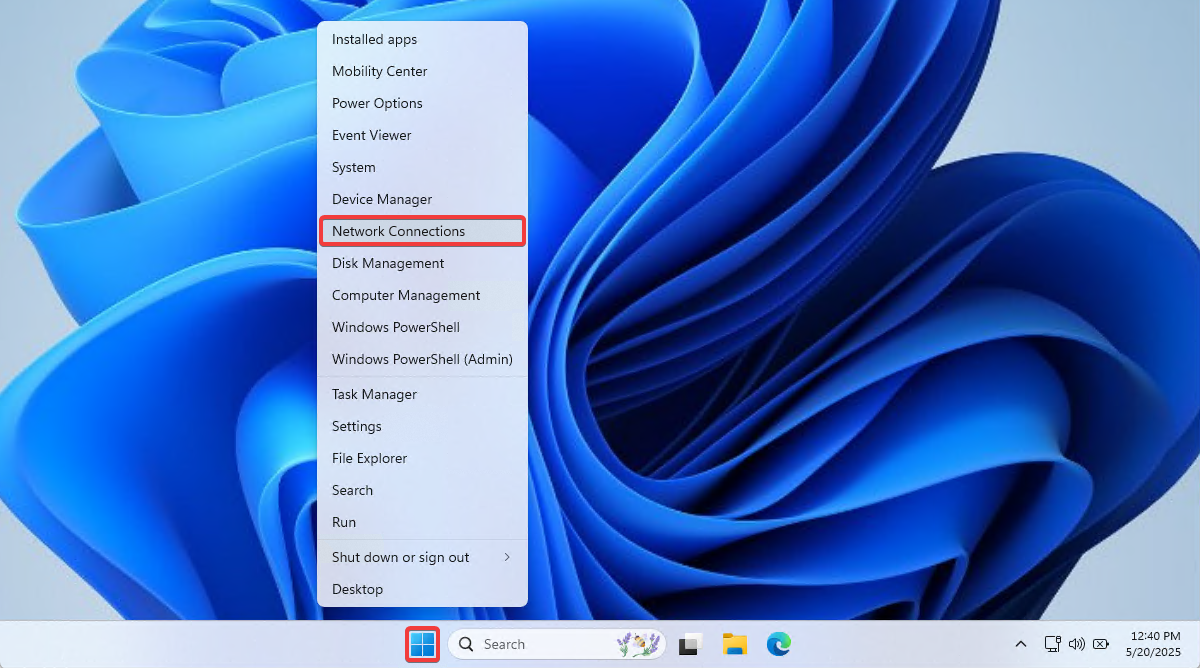
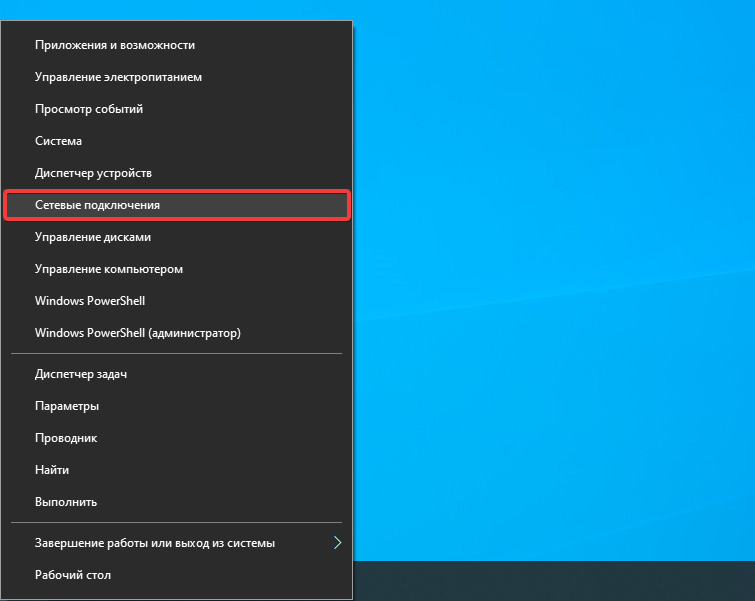
- Right click on "Start" and select "Network Connections":
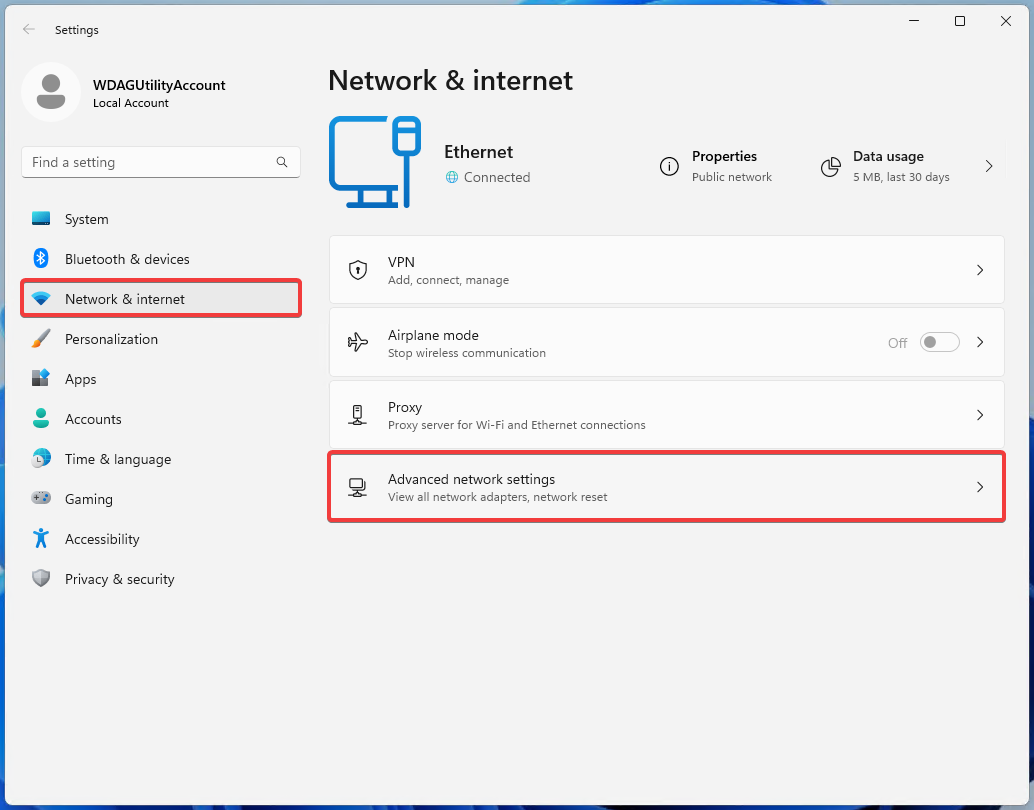
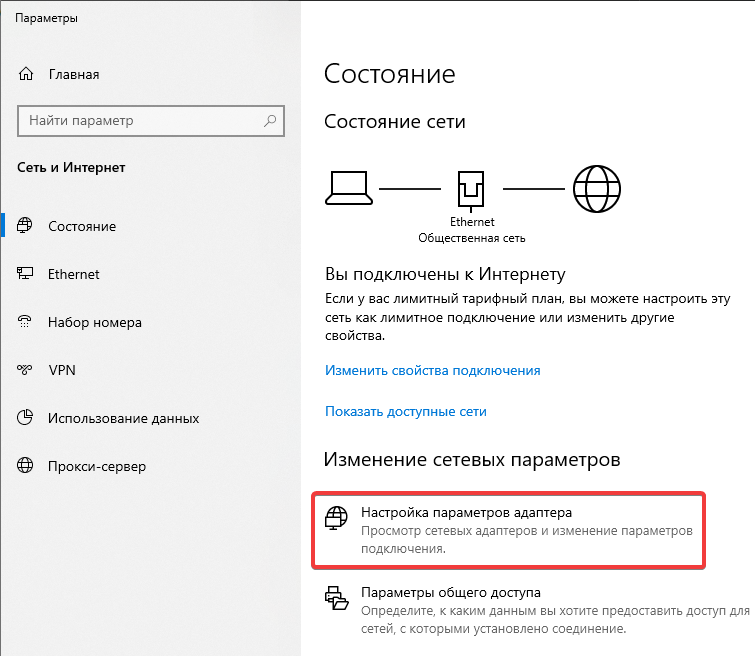
- At the bottom of the window, click "Additional network settings":
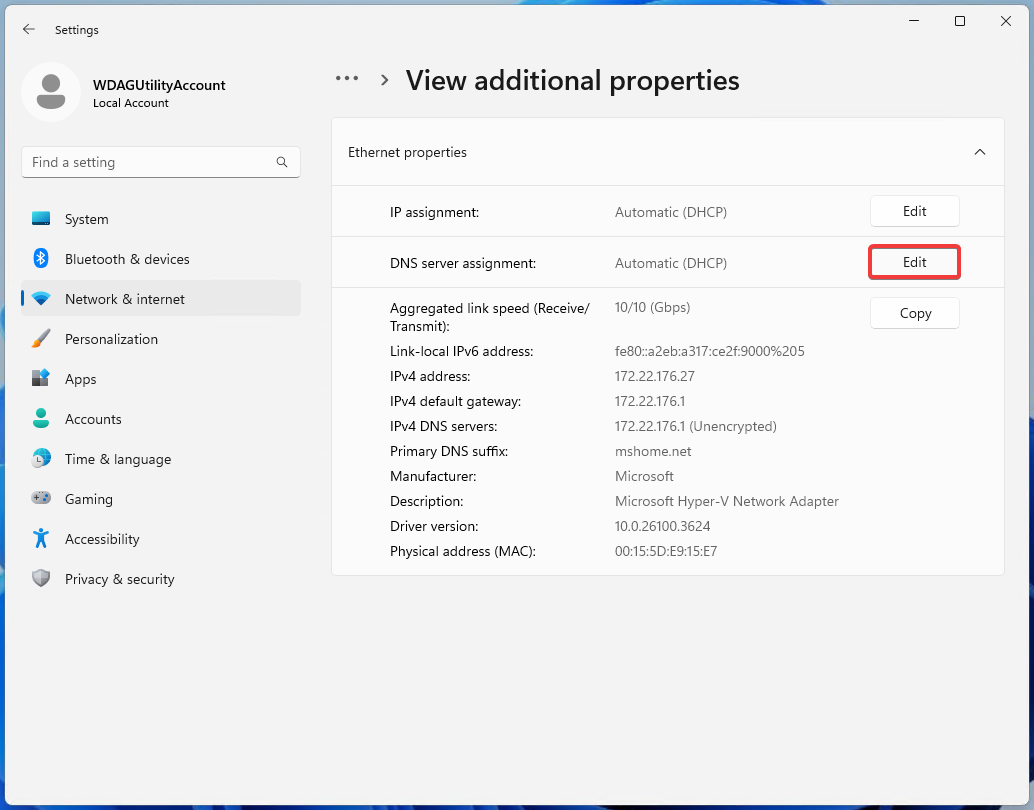
- Click on the network adapter you are using (wireless or Ethernet) and select "View additional properties":

- In the "DNS server assignment" section, click "Edit":
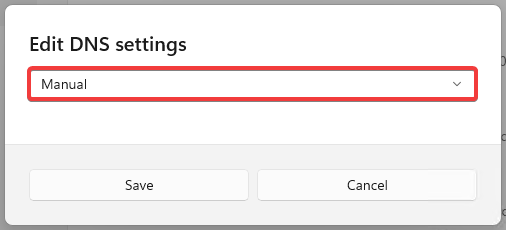
- Instead of "Automatic (DHCP)", select "Manual":
- Enable "IPv4" and specify addresses of public DNS of the service you want in IPv4 format:
- Enable "IPv6" and specify addresses of public DNS of the service you want in IPv6 format:
- Click "Save".
- Right click on "Start" and select "Network Connections":
- Click "Change adapter options":
- Right click on the network adapter you are using and select "Properties":
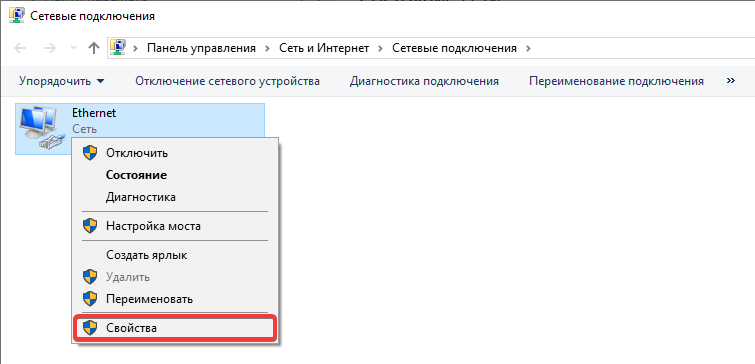
- In the components list, select "Internet Protocol Version 4 (TCP/IPv4)" and click "Properties":

- Select "Use the following DNS server addresses" and specify addresses of public DNS of the service you want in IPv4 format:
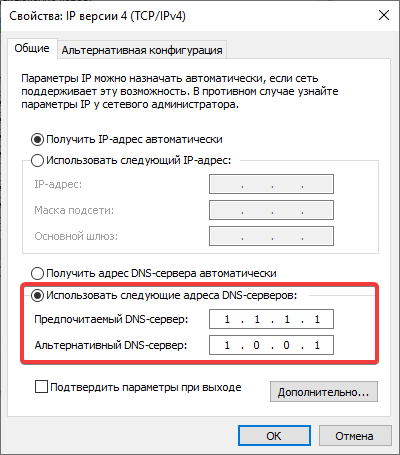
- Save the changes.
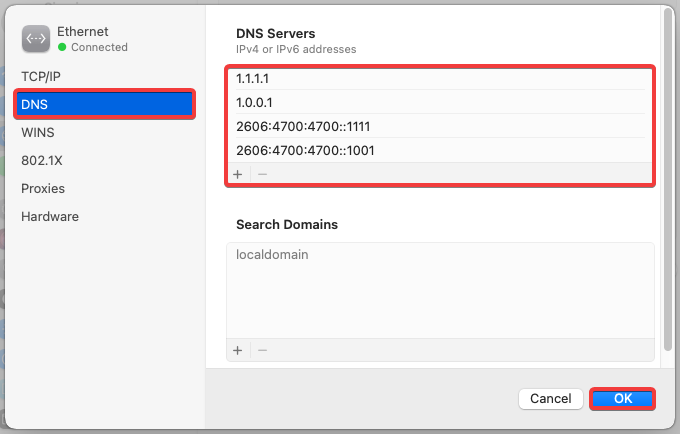
macOS
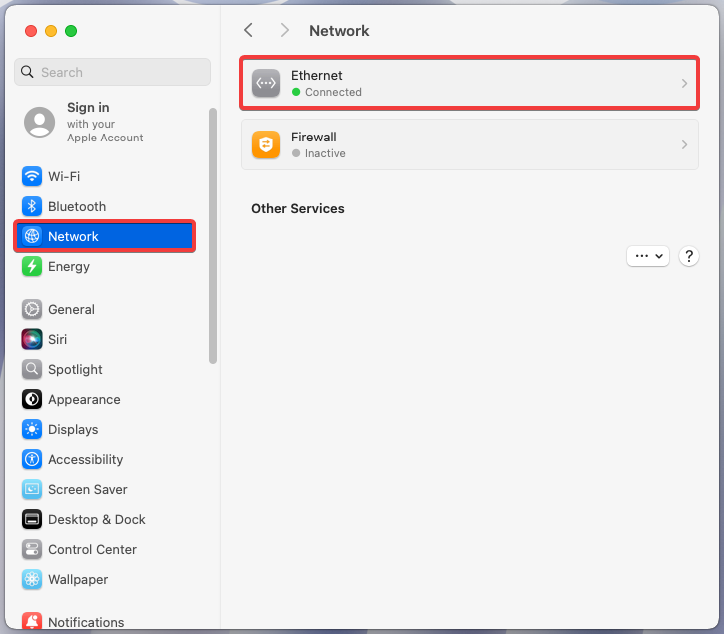
- Open the system settings:

- In the "Network" section, click on the Internet connection you are using:
- Click "Details":
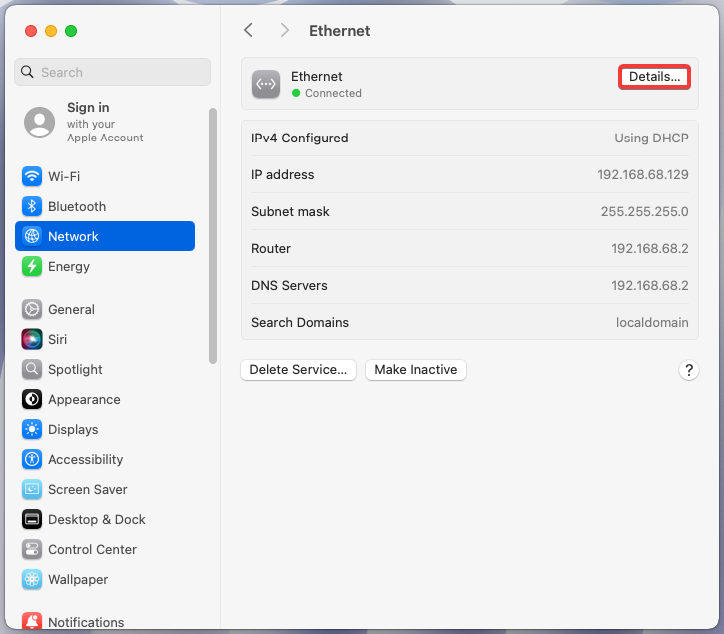
- In the "DNS" section, use ➕ to add to the list addresses of public DNS of the service you want and click "OK":
(1)