Manage cookies that are used for advertising, such as ad personalization, remarketing, and ad effectiveness analysis.
2.14.4.1. Install MODX
Automatic install
See CMS auto-install.
Manual install
Prepare
- Download from official site to your PC archive with the distribution of current version of MODX.
- Place the distribution files on the hosting:
- Using file-manager or any FTP client, upload the archive to the root directory of the previously added site.
- Extract the downloaded archive using file manager.
- Move the entire contents of the
modx-X.X.X-plsubdirectory (whereX.X.Xis the MODX version number) to the site root directory. - Rename the two files
ht.accessto.htaccess:- In the site root directory.
- In the
coresubdirectory.
- Prepare database:
Install
- Open the site in a browser by adding
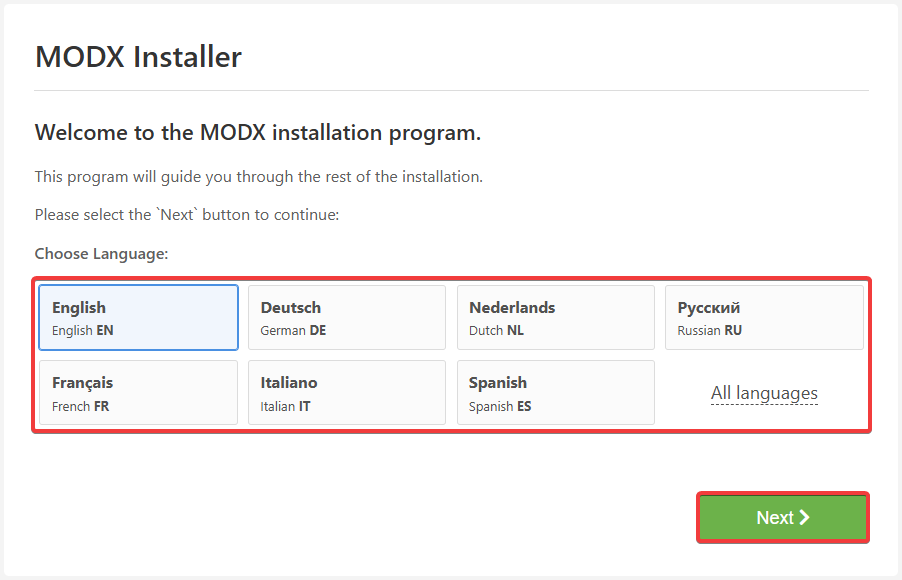
setupto its address (example —example.com/setup). - Select a language and click "Next":
- Select "New Installation", specify advanced options and click "Next":
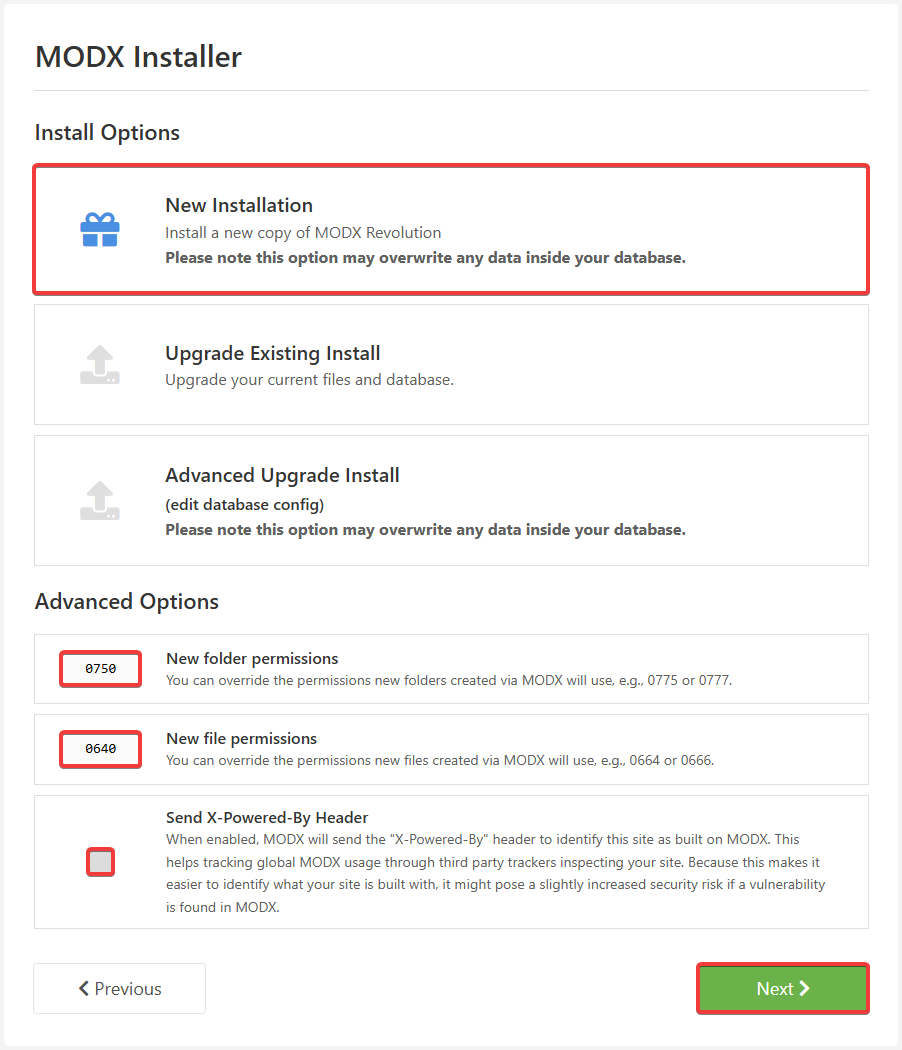
- "New folder permissions" —
0750. - "New file permissions" —
0640. - "Send X-Powered-By Header" — disabled (recommended for security reasons).
- Specify the database connection settings and click "Test":
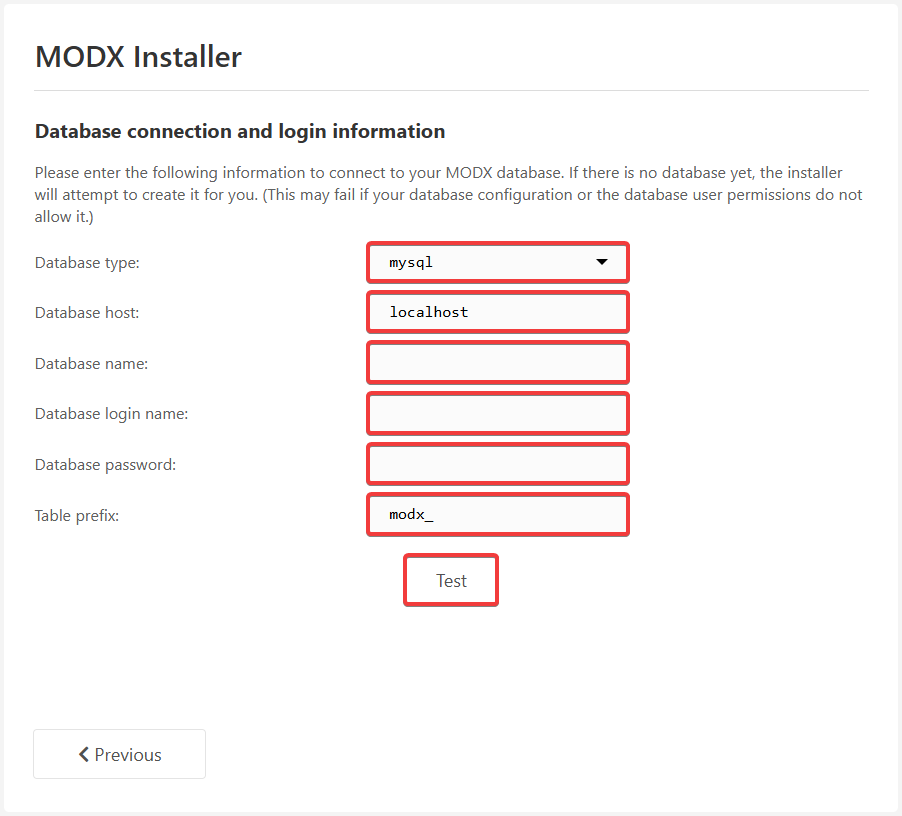
- "Database type" — "mysql".
- "Database host" — database host.
- "Database name" — database name.
- "Database login name" — database user login.
- "Database user password" — database user password.
- "Table prefix" — the standard
modx_or any other prefix of your choice.
- Select the connection encoding, collation and click "Test":
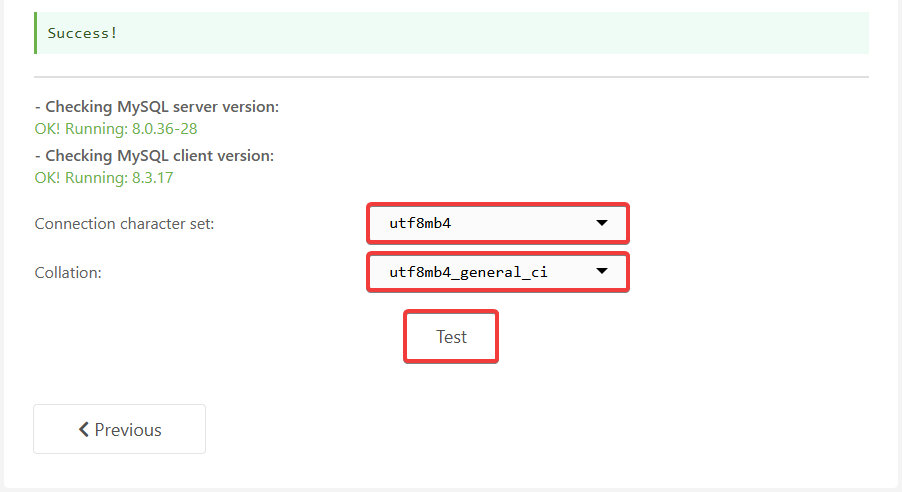
- "Connection character set" — "utf8mb4".
- "Collation" — "utf8mb4_general_ci".
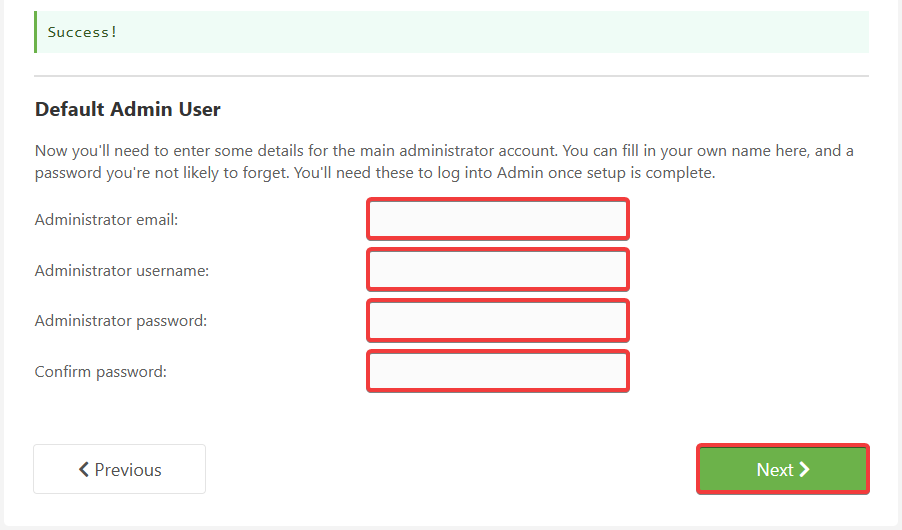
- Fill in email, login, password of the administrator (used to access the admin panel of the site) and click "Next":
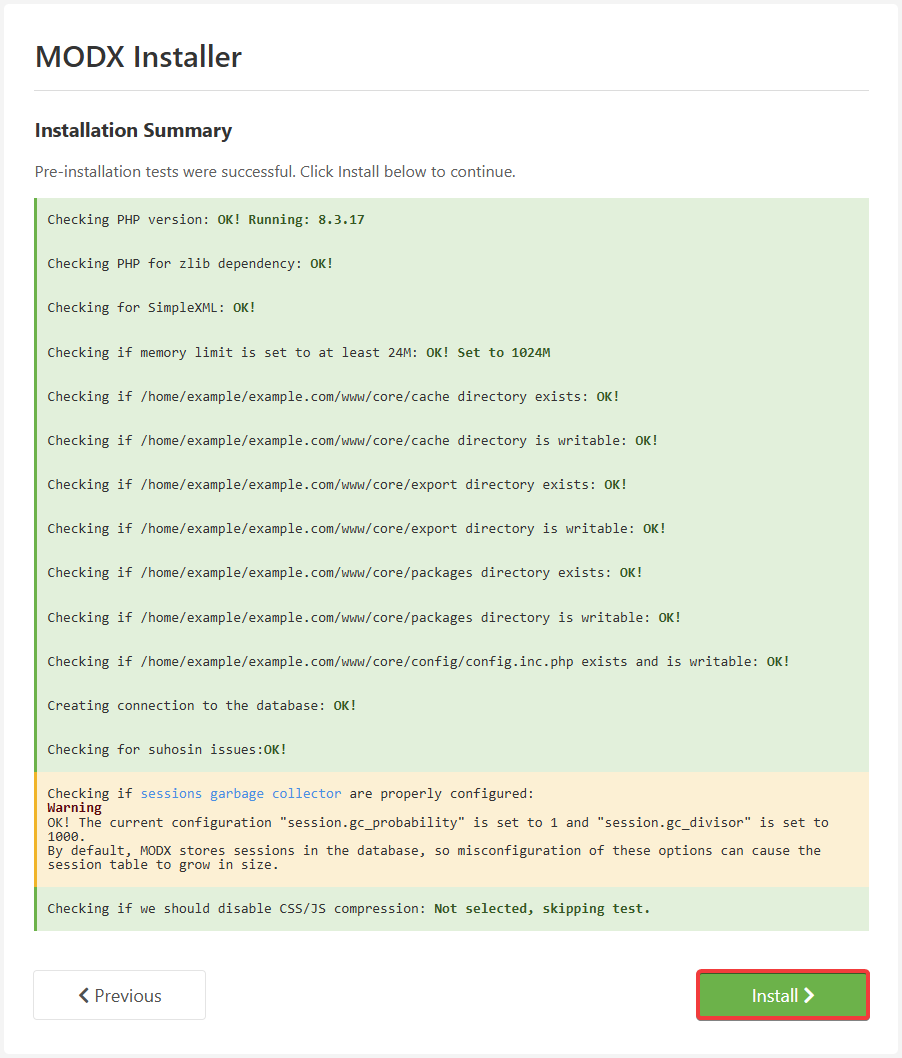
- View the results of the checks and click "Install":
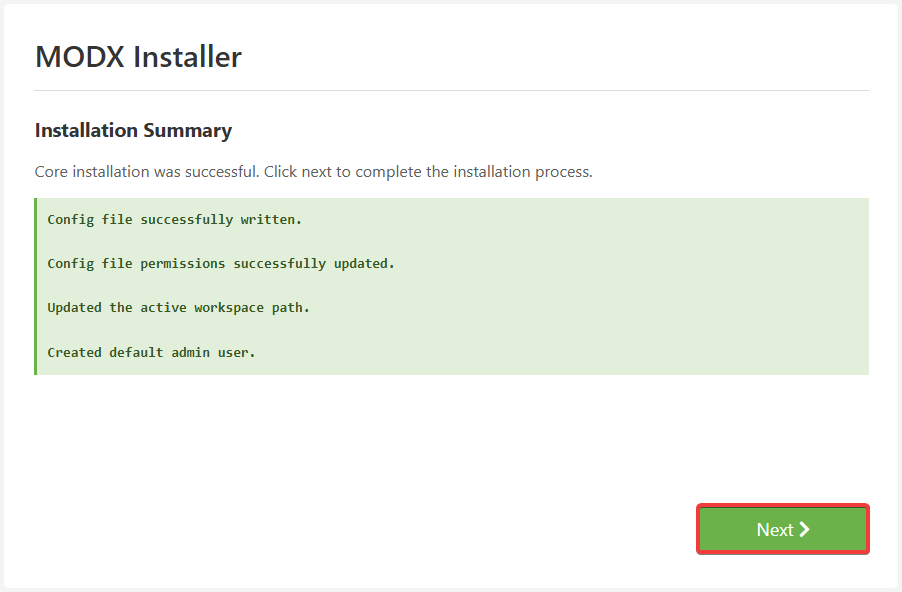
- Wait for the installation to complete and click "Next":
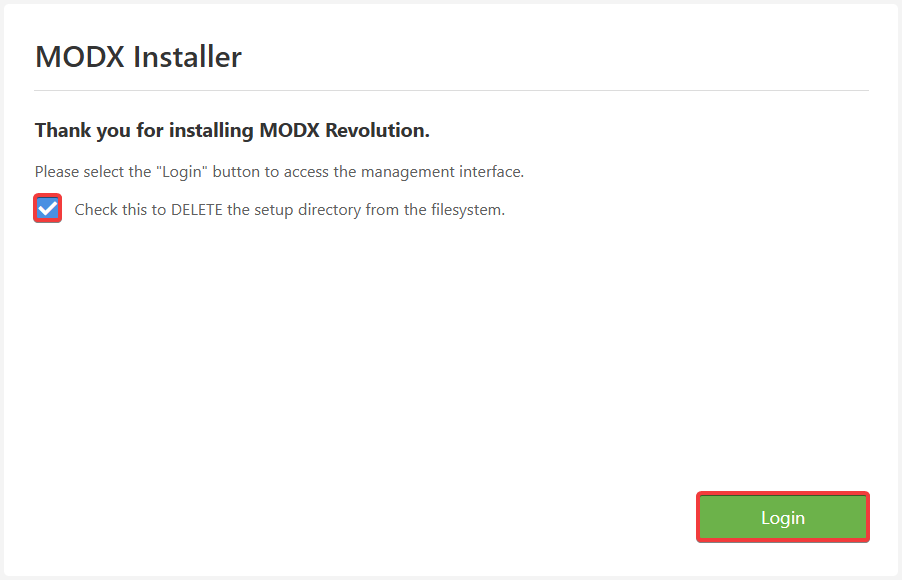
- Enable the deleting of setup files and click "Login":
- Check the site operation.