Manage cookies that are used for advertising, such as ad personalization, remarketing, and ad effectiveness analysis.
5.3.11. Increase partition sizes on VPS
Attention!
Before performing any actions, be sure to create a backup of the server and save copies of all important data from the server to your PC.Resizing partitions may be necessary when upgrading your VPS plan, as additional disk space appears on the system as unallocated space.
You can change the size of partitions using specialized graphical interface programs or via the console.
GParted
- Create a backup of the server and save copies of all important data from the server to your PC.
- Connect the latest available version of the System Rescue CD image — the server will automatically reboot.
- Connect to the server via VNC.
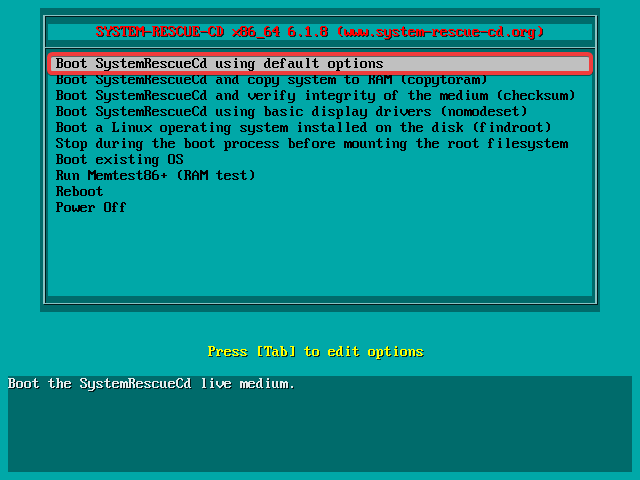
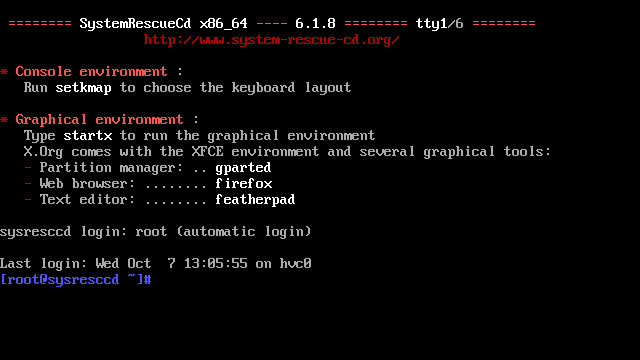
- If the main menu appears, select "Boot SystemRescueCd using default options":
- Start the graphical interface — enter the command
startxand press Enter:
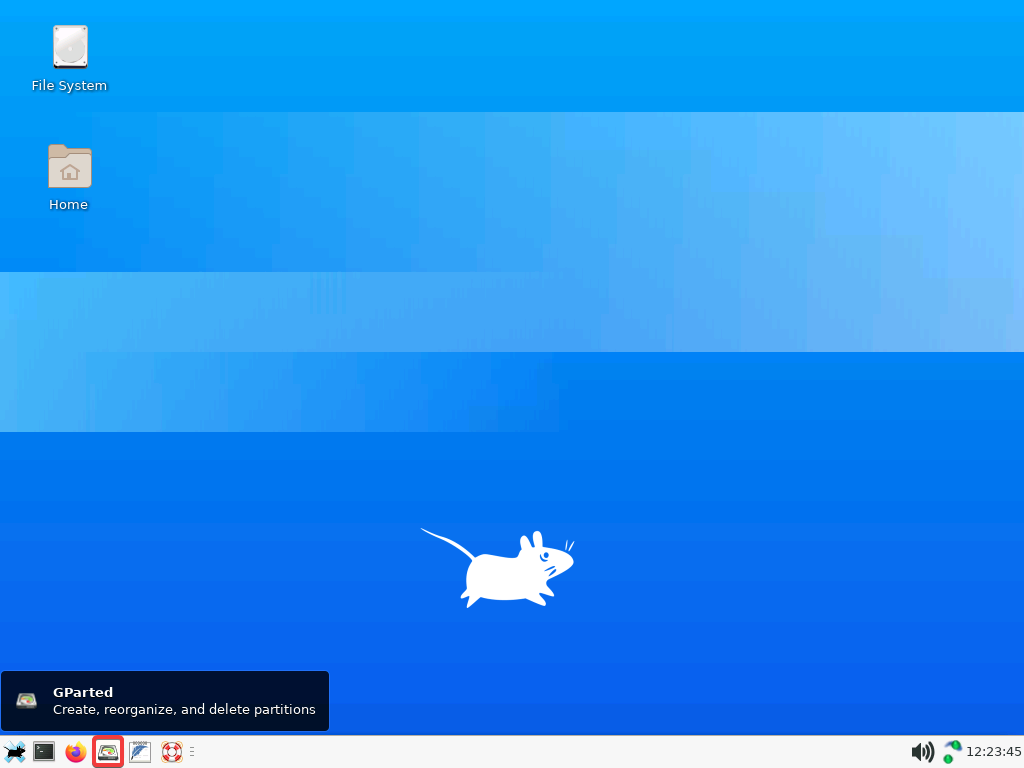
- Launch the GParted app:
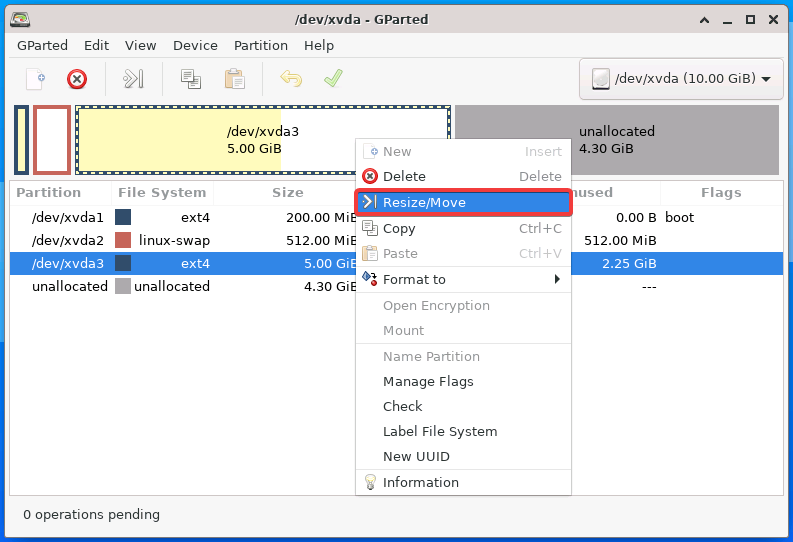
- Right-click on the section you want to enlarge and select "Resize/Move" from the context menu:
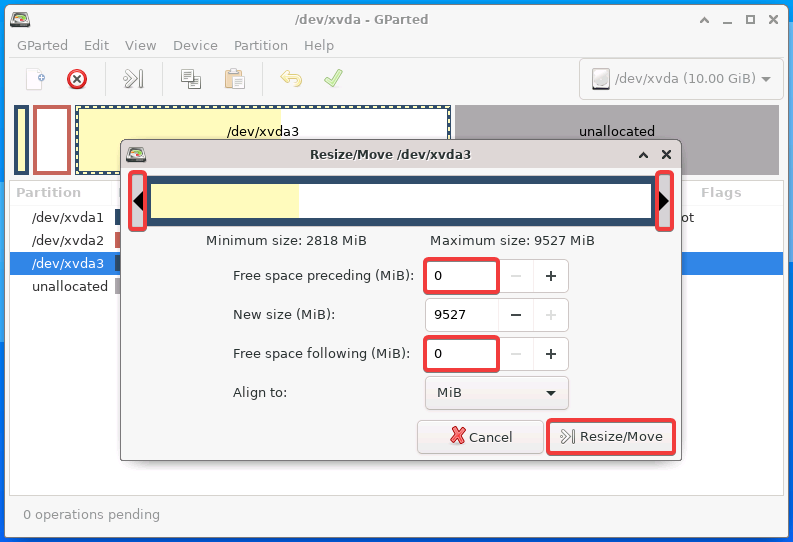
- Use the arrows to stretch the partition to fill all available space so that the "Free space preceding" and "Free space following" fields show zeros, then click "Resize/Move":
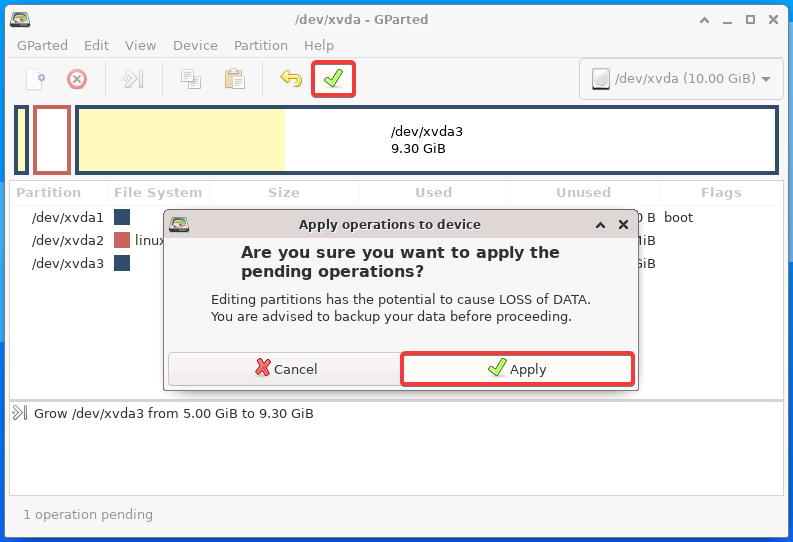
- Click on the apply changes button and confirm the operation:
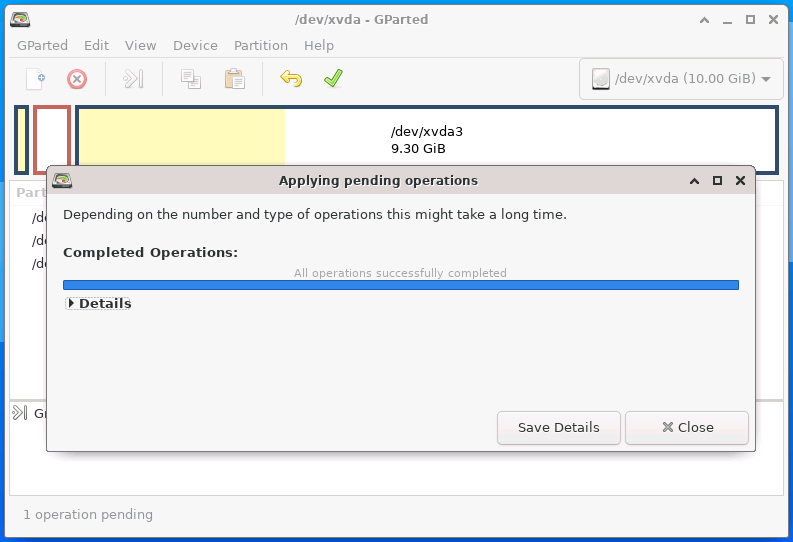
- Wait for the operation to complete successfully:
- Disconnect the mounted image.
- After restarting the server, connect to it via SSH and check the size information:
df -h
Console
Attention!
The resize2fs program only supports ext2-ext4 file systems. If your server uses a different file system, use Gparted or another method.- Create a backup of the server and save copies of all important data from the server to your PC.
- Connect the latest available version of the System Rescue CD image — the server will automatically reboot.
- Connect to the server via VNC.
- If the main menu appears, select "Boot SystemRescueCd using default options":
- Wait for the command prompt to appear:
- Check the current disk partitioning:
fdisk -l - Launch fdisk in interactive mode:
fdisk /dev/xvda - In interactive mode, execute the following commands in fdisk:
- Display a list of current partitions:
p - Delete the section you want to enlarge (only the markup is deleted, the data itself is not affected):
d
3
Instead of
3, specify the number of the partition to be deleted. The numbers can be found in the list of current partitions. - Create a new partition instead of the deleted one:
n p 3p— primary partition.
Instead of3, enter the number of the partition you are creating (it will be the same as the deleted one).
When prompted for the start and end sectors, just press Enter.
⚠️ When prompted to delete the signature, answen. - Check the resulting partitioning:
p - Save the changes:
w
- Check the file system of the created partition:
e2fsck -f /dev/xvda3Instead of
3, enter the number of the partition you created.. - Change the file system size of the created partition:
resize2fs /dev/xvda3Instead of
3, enter the number of the partition you created. - Exit the console:
exit - Disconnect the mounted image.
- After restarting the server, connect to it via SSH and check the size information:
df -h
(3)