Manage cookies that are used for advertising, such as ad personalization, remarketing, and ad effectiveness analysis.
2.14.3.16. Configure mail in OpenCart
Attention!
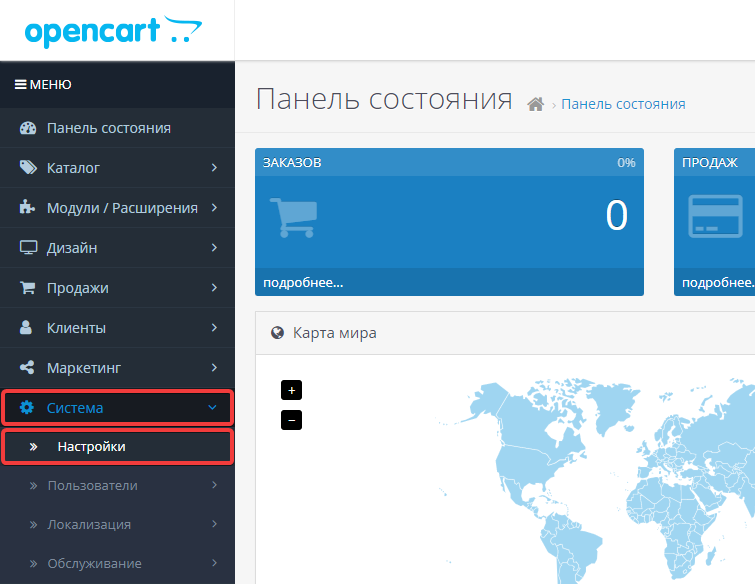
If you use third-party services to send emails, you should check security restrictions of such services. For example, to send from a @gmail mailbox, you may need security configuration.- Go to "System → Settings":
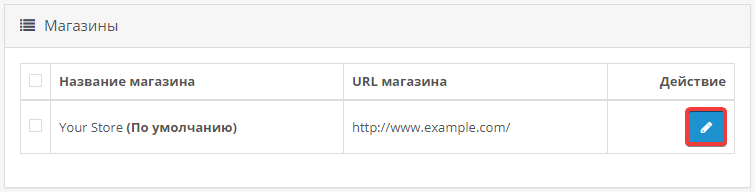
- To the right of the store name, click "Edit":
- Switch to "Store" tab (in some versions, you may need to go to "Main" section):

- In the "E-Mail" field, specify the mailbox to receive emails (you can specify additional mailboxes later):

- Switch to "Mail" tab:

- In "Main" section, specify required mail sending method and its corresponding settings:
- Using PHP mail function with sendmail (not recommended):
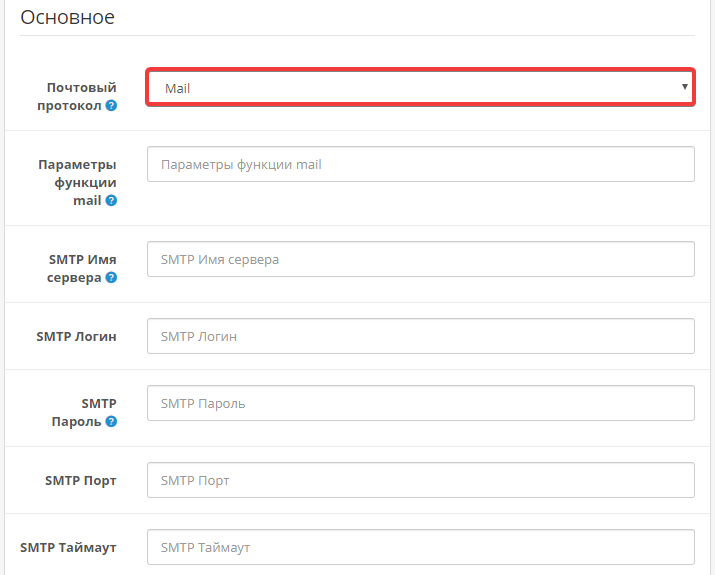
- "Mail protocol" — "Mail".
- Leave all other fields in section empty.
- Via SMTP from existing mailbox (recommended method):
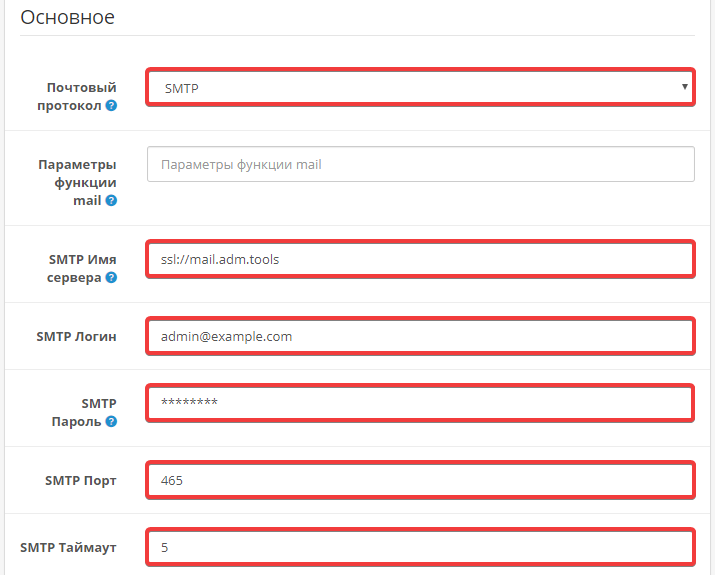
- "Mail protocol" — "SMTP".
- "Mail function parameters" — empty.
- "SMTP server name" — mailbox server address.
- ⚠️ When using SSL/TLS, specify it as
ssl://example.comortls://example.com. For our mail server, specifyssl://mail.adm.tools(when using port465).
- "SMTP login" — full name of mailbox used for sending.
- "SMTP password" — mailbox password.
- "SMTP порт" — port for connection to mail server.
- "SMTP timeout" — time allocated for connection and email sending.
- In "Email notifications" section, specify additional settings:
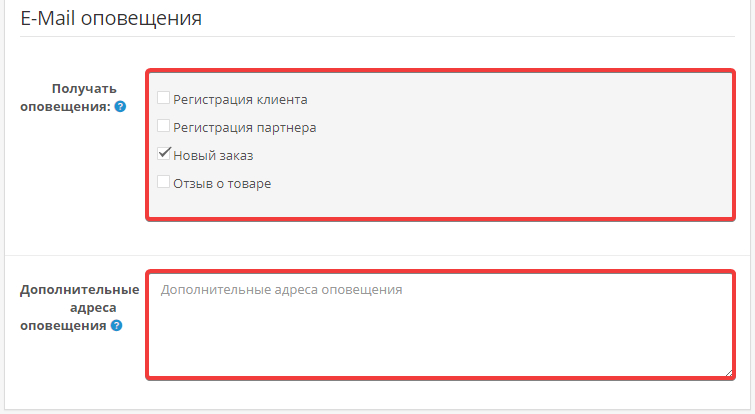
- "Receive notifications" — events for which emails must be sent.
- "Additional notification addresses" are mailboxes to send email copies to.
- Save changes by clicking "Save" in the upper-right corner of the page:

(7)