Manage cookies that are used for advertising, such as ad personalization, remarketing, and ad effectiveness analysis.
2.14.1.2.6. Configure LiteSpeed Cache in WordPress
- Enable OpenLiteSpeed for your site in the "Site settings" section (or "Hosting → My sites → your site → Site settings").
- Open the WordPress admin panel.
- Install and activate the LiteSpeed Cache plugin.
- Go to "LiteSpeed Cache → Cache", open the "Cache" tab, and make sure the "Enable Cache" switch is set to "ON" (if not, enable it and save the changes):
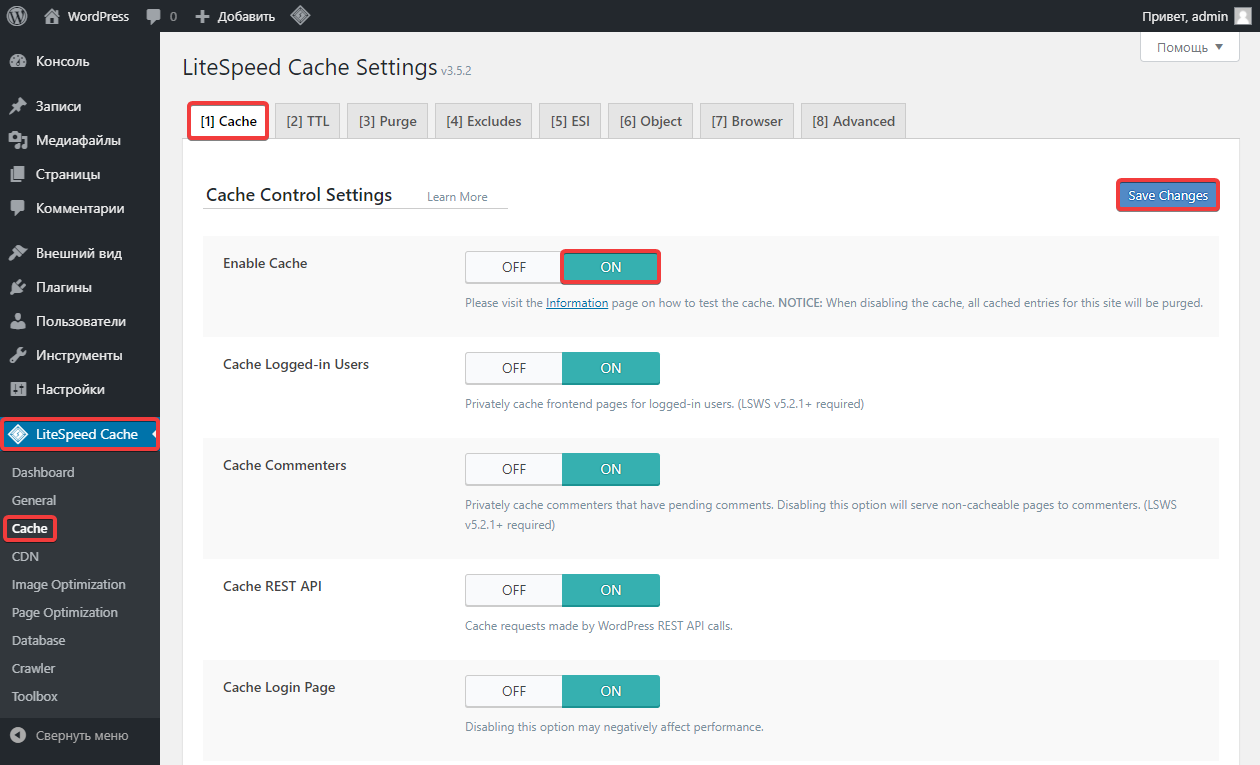
- On the same tab, enable the necessary caches and specify their settings in the same way.
- If you have the Memcache(d) or Redis extra service, you can configure the object cache:
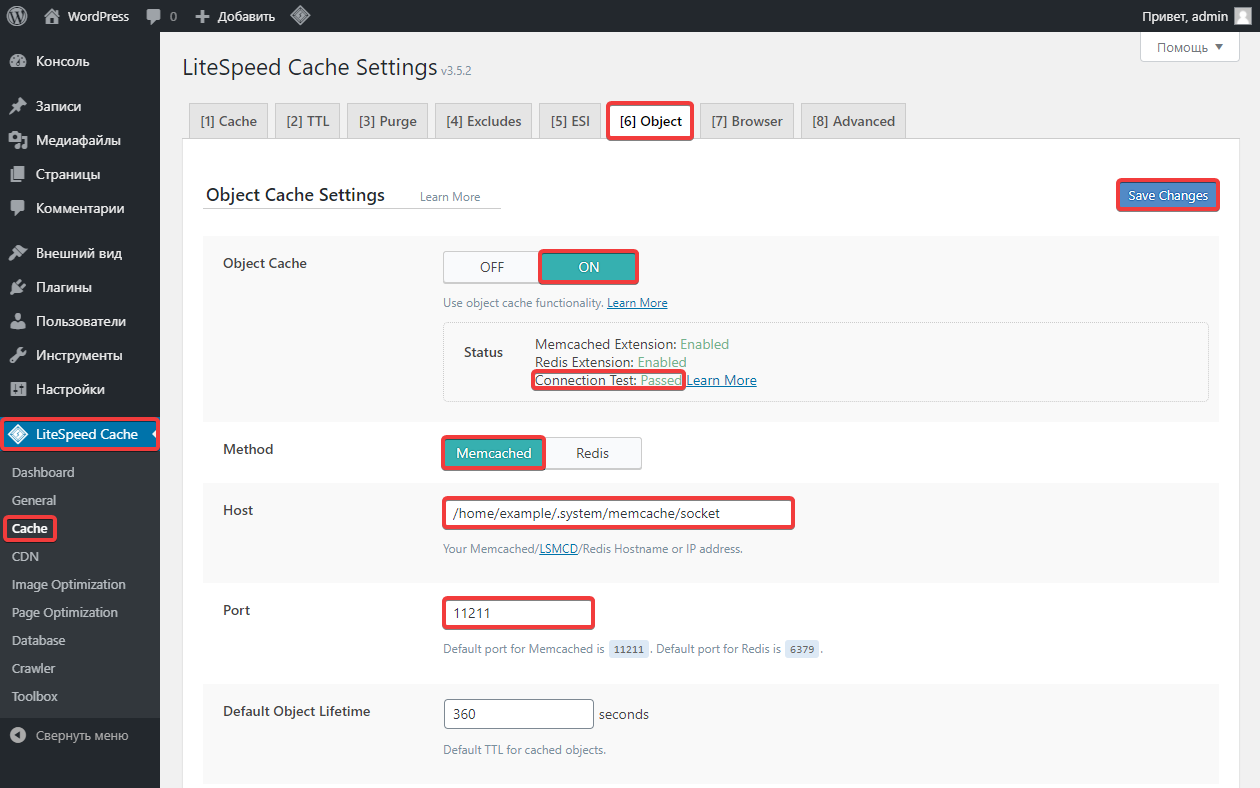
- In the "LiteSpeed Cache → Cache" section, open the "Object" tab.
- Switch "Object Cache" to "ON".
- Switch "Method" to "Memcached".
- Copy the path to the Memcached socket from the hosting control panel and paste it into the "Host" field.
- In the "Port" field, specify
11211. - Save your changes and make sure that the "Connection Test" status is displayed as "Passed".
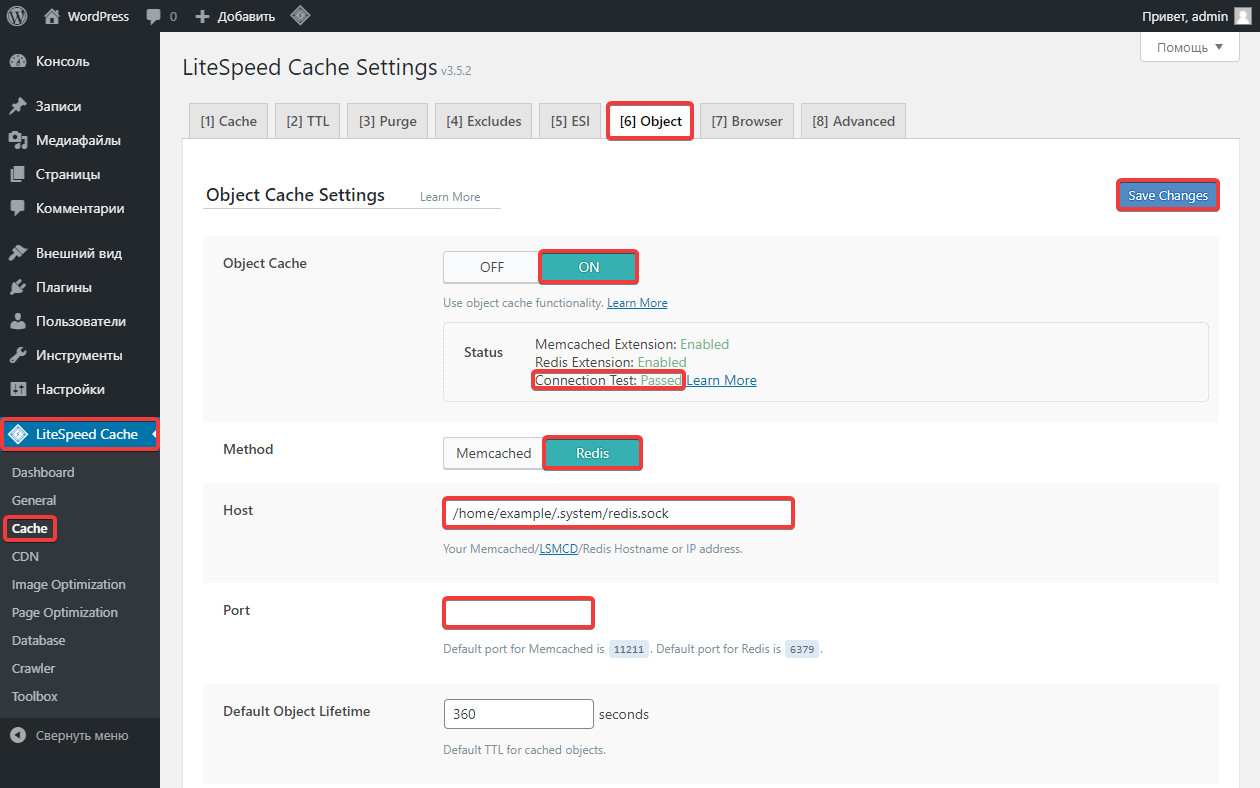
- In the "LiteSpeed Cache → Cache" section, open the "Object" tab.
- Switch "Object Cache" to "ON".
- Switch "Method" to "Redis".
- Copy the path to the Redis socket from the hosting control panel, remove
unix://at the beginning, and paste it into the "Host" field. - Clear the "Port" field.
- Save your changes and make sure that the "Connection Test" status is displayed as "Passed".
- If necessary, configure image optimization on LiteSpeed servers.
- Check the site operation.
(4)
Comments
Memcached — простий, легкий і дуже швидкий для кешування рядкових даних. Він має багатопотокову архітектуру, що дозволяє ефективно використовувати ресурси сервера. Однак він не підтримує складні структури даних і не має вбудованої можливості збереження даних на диск.
Якщо тобі потрібне просте кешування для високонавантажених веб-додатків, Memcached може бути кращим вибором. Якщо ж важлива гнучкість, складні структури даних та можливість збереження, Redis буде більш потужним рішенням.
УВАГА
Функції кешування LSCache на цій сторінці в даний момент недоступні!
Щоб використовувати функції кешування, ви повинні мати веб-сервер LiteSpeed або використовувати QUIC.cloud CDN. Дізнатися більше1
Чи можна безкоштовно зробити щоб цей модуль почав працювати і кешувати данні ? Я маю на увазі без VPS або покупки підписки QUIC.cloud
Завчасно дякую якщо хтось відповідьсть