Manage cookies that are used for advertising, such as ad personalization, remarketing, and ad effectiveness analysis.
2.14.1.2.8. Update WordPress core files
Attention!
Before updating, be sure to back up your site and its database.Via site admin panel
The easiest way to update WordPress — via the admin panel of the site itself. When a new version is available, a notification appears at the top of the admin panel: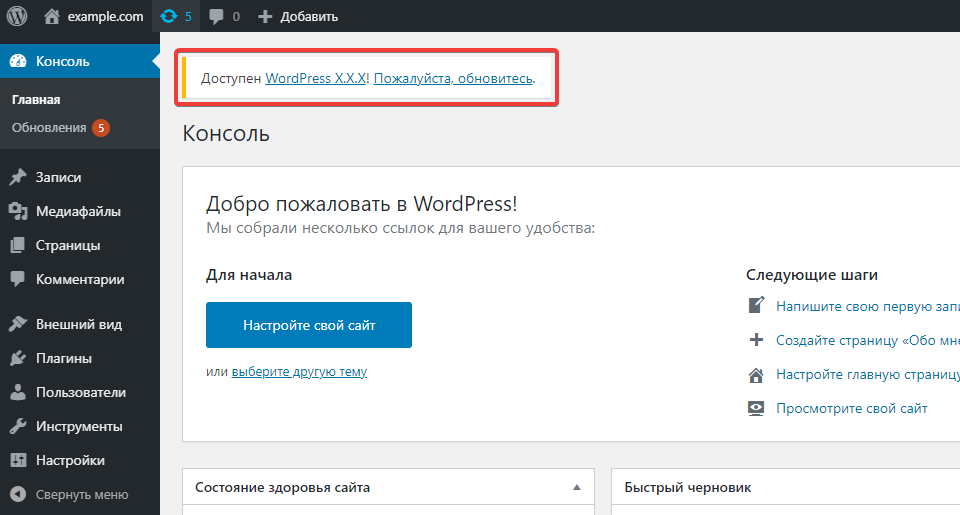
- Open the admin panel of the site.
- In the "Updates" section, click "Update now":
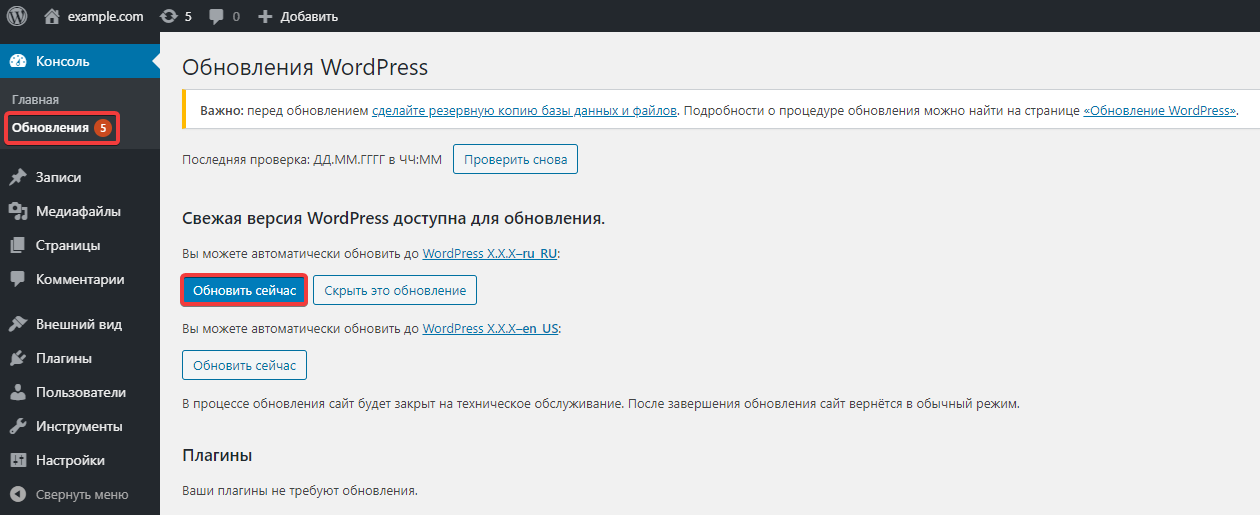
- Please wait for the process to complete. During the update, the site will automatically be switched to maintenance mode. As part of the update, the new version of WordPress will be downloaded and installed, and any installed plugins will be deactivated and then reactivated.
- Update your installed plugins, themes, and translations.
- Check the site operation.
Using WP-CLI
Updating using the official WP-CLI command-line tool can be useful if your WordPress files are corrupted or infected.
- Install the WP-CLI utility.
- Connect to the hosting via SSH.
- Run the core update by executing the following command:
wp core download --skip-content --force --path=/home/account_name/example.com/www/- Instead of
wp, specify the alias created during installation in step 5, or the path to the installedwp-cli.pharfile. - Replace
account_namewith the name of the hosting account where the actions are being performed. - Instead of
example.com/www, specify the path to the files for the desired site. - The
skip-contentkey specifies that standard themes and plugins should be skipped during the download. If you also want to install them, remove this key from the command.
- Wait for the message confirming the download was successful:
Success: WordPress downloaded. - Check the site operation.
(1)