Manage cookies that are used for advertising, such as ad personalization, remarketing, and ad effectiveness analysis.
2.14.1.2.7. Configure mail in WordPress
By default, WordPress sends messages from the web server without authorization on behalf of an address such as wordpress@example.com. Such messages may be blocked either at the time of sending (see Invalid senders) or on the recipient's side.
You can configure correct sending in one of the following ways:
- Use the Simple SMTP, WP Mail SMTP or Post SMTP plugin to fully configure sending messages via SMTP (recommended method).
- Use the Change Mail Sender plugin to replace the default sender address with the mailbox address of an existing mail domain.
Simple SMTP
See WordPress administration (subsection "SMTP").
The simplest and fastest method. It can be configured via the control panel with minimal manual operations.
WP Mail SMTP
- Open the WordPress admin panel.
- In the "Plugins" section, install and activate the WP Mail SMTP plugin.
- In the side menu, go to "WP Mail SMTP → Settings".
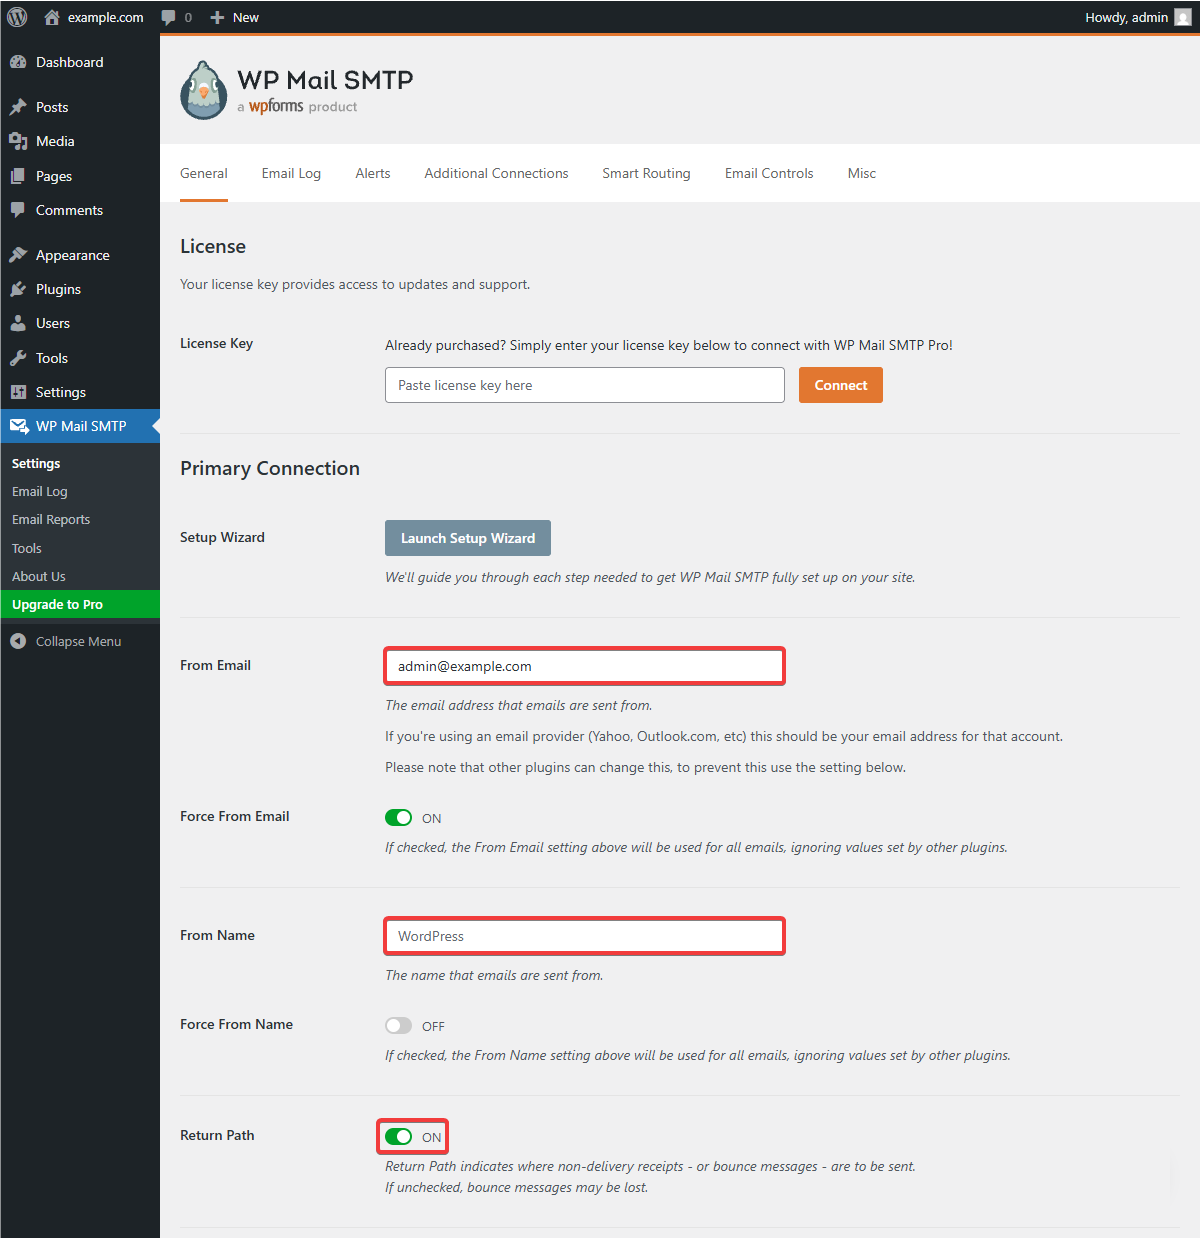
- On the "General" tab, specify the sending settings and save your changes:
- Specify the sender's address, sender's name, and enable Return Path:
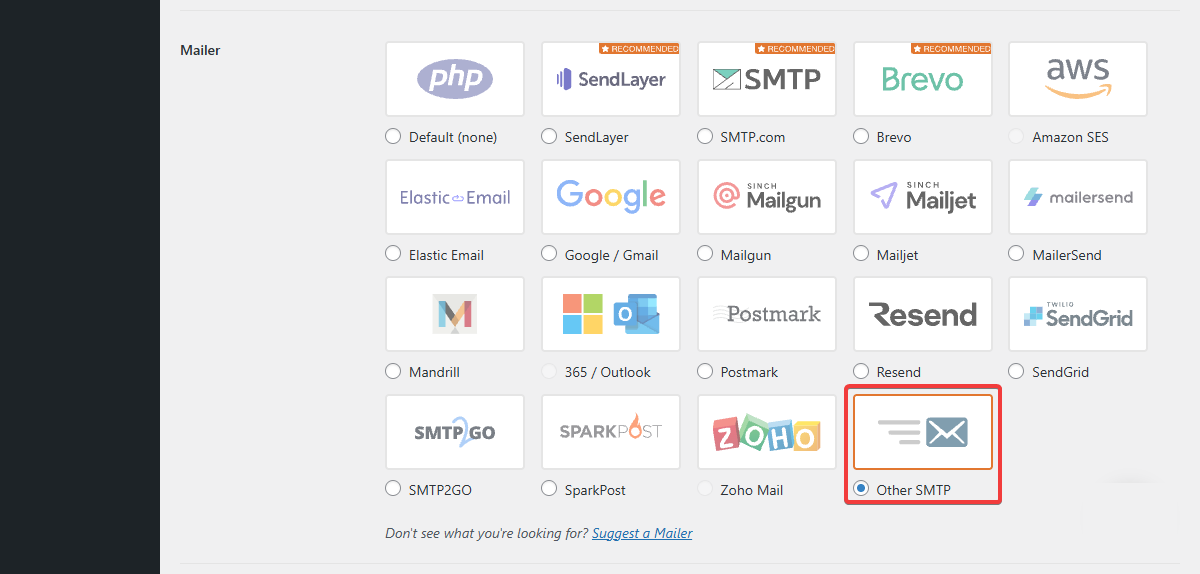
- As the mailer, select "Other SMTP":
- Specify the settings for connecting to the mail server:
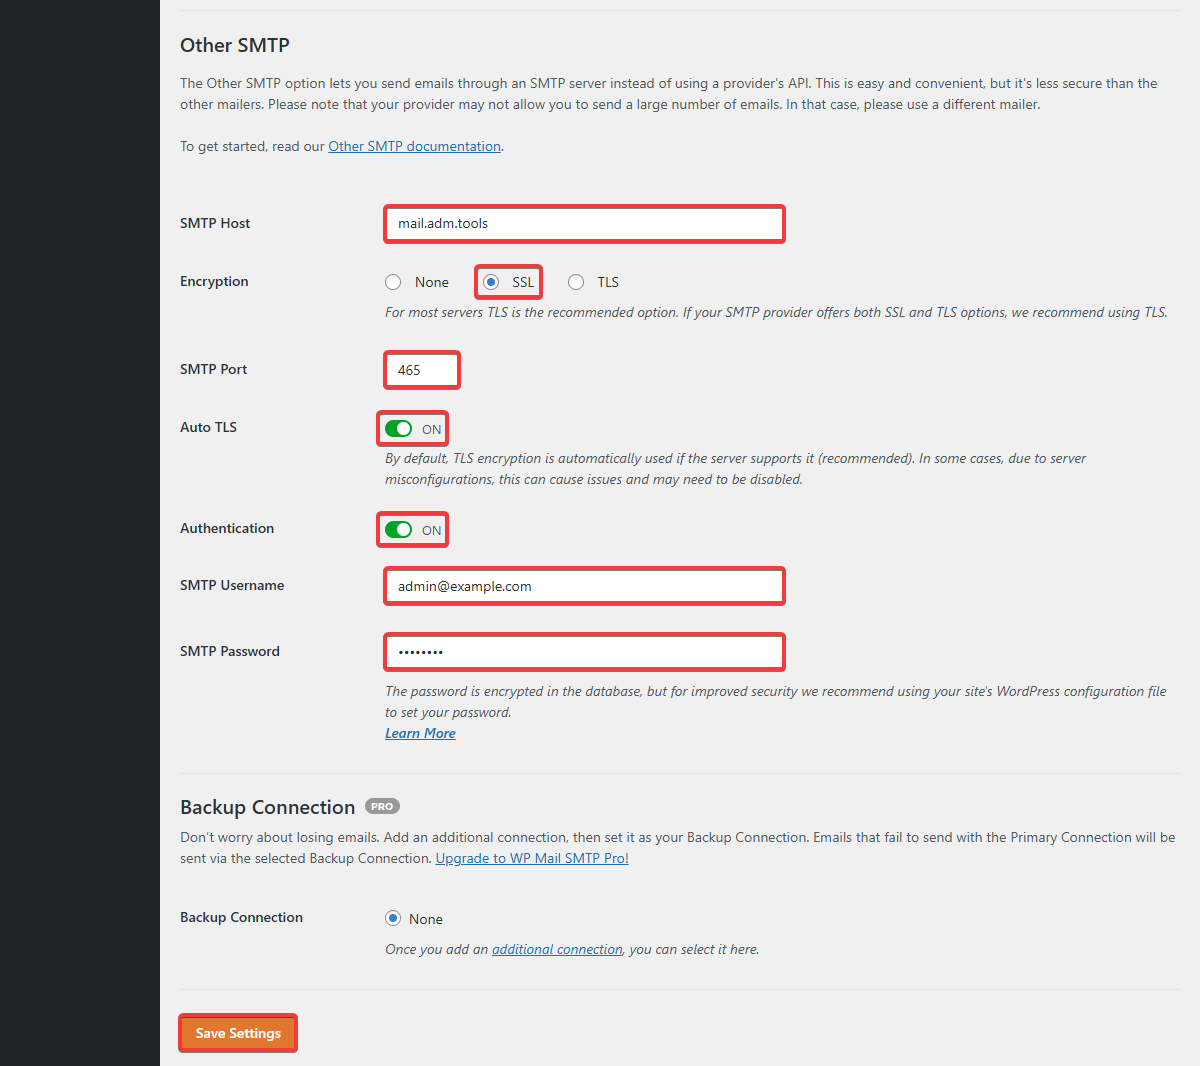
- "SMTP Host" —
mail.adm.tools. - "Encryption" – "SSL".
- "SMTP Port" —
465. - "Auto TLS" — enabled.
- "Authentication" — enabled.
- "SMTP Username" — mailbox name.
- "SMTP Password" — mailbox password.
- Check email sending (for example, in the "WP Mail SMTP → Tools" section using the "Send email" button).
Post SMTP
In the plugin settings, on the "Fallback" tab, you can configure an alternative method for sending messages, which will be used in case of problems with the main method.
- Open the WordPress admin panel.
- In the "Plugins" section, install and activate the Post SMTP plugin.
- In the side menu, go to "Post SMTP → Settings".
- Specify the sending settings:
- On the "Connections" tab, specify the settings for connecting to the mail server and save your changes:
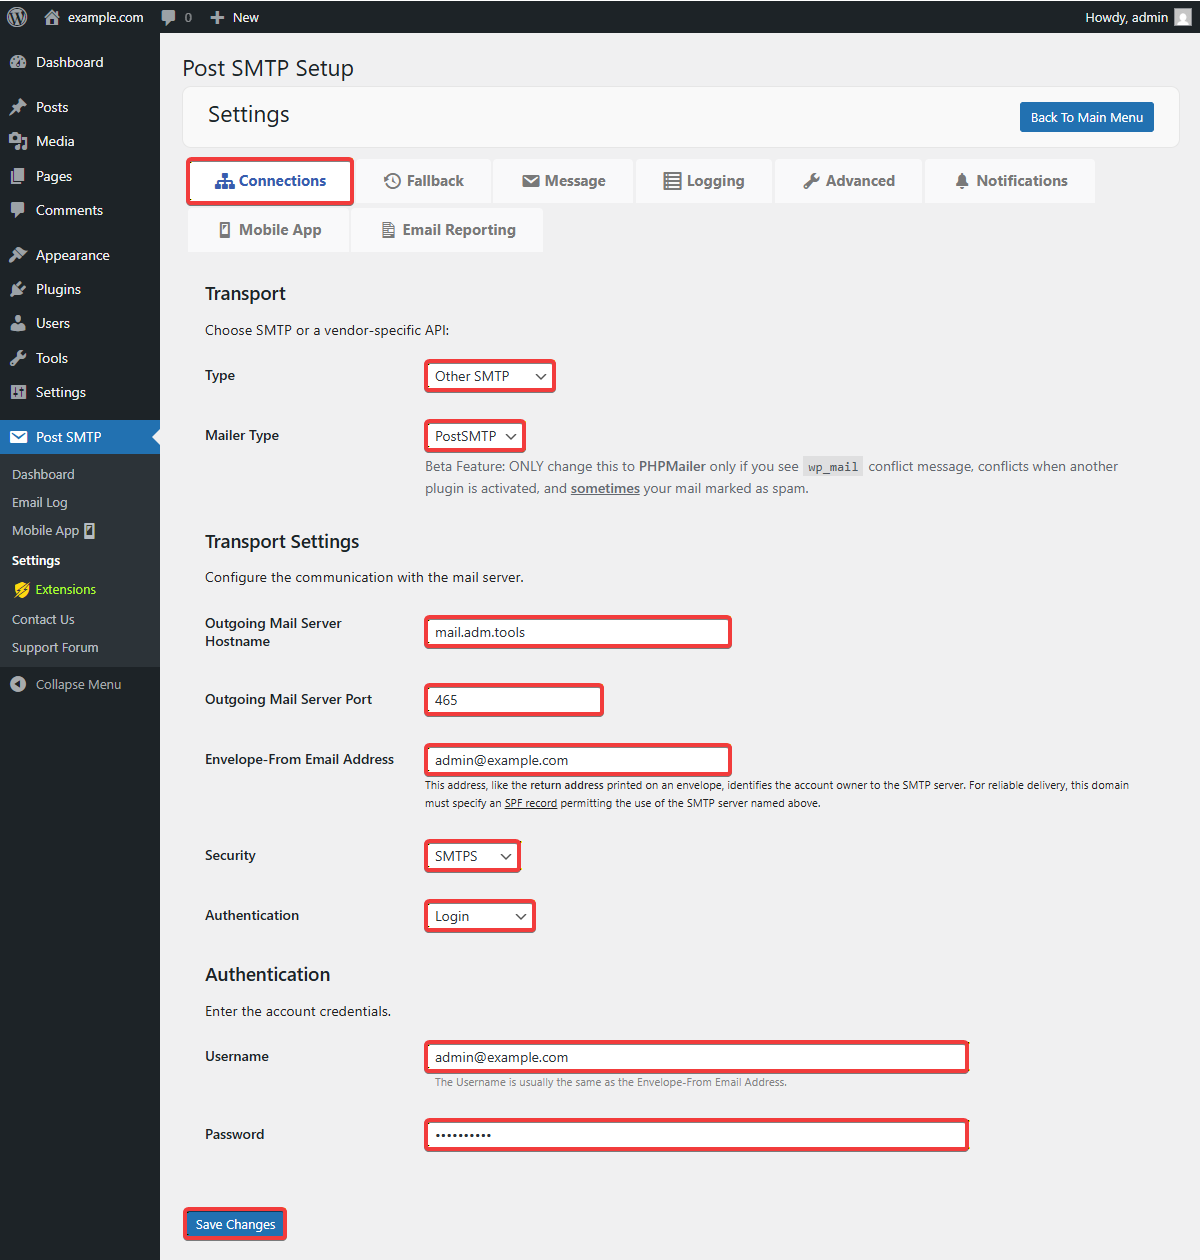
- Transport:
- "Type" — "Other SMTP".
- "Mailer Type" — "PostSMTP".
- Transport Settings:
- "Outgoing Mail Server Hostname" —
mail.adm.tools. - "Outgoing Mail Server Port" —
465. - "Envelope-From Email Address" — mailbox address for return delivery of messages and errors in case of problems.
- "Security" – "SMTPS".
- "Authentication" — "Login".
- Authentication:
- "Username" — mailbox name.
- "Password" — mailbox password.
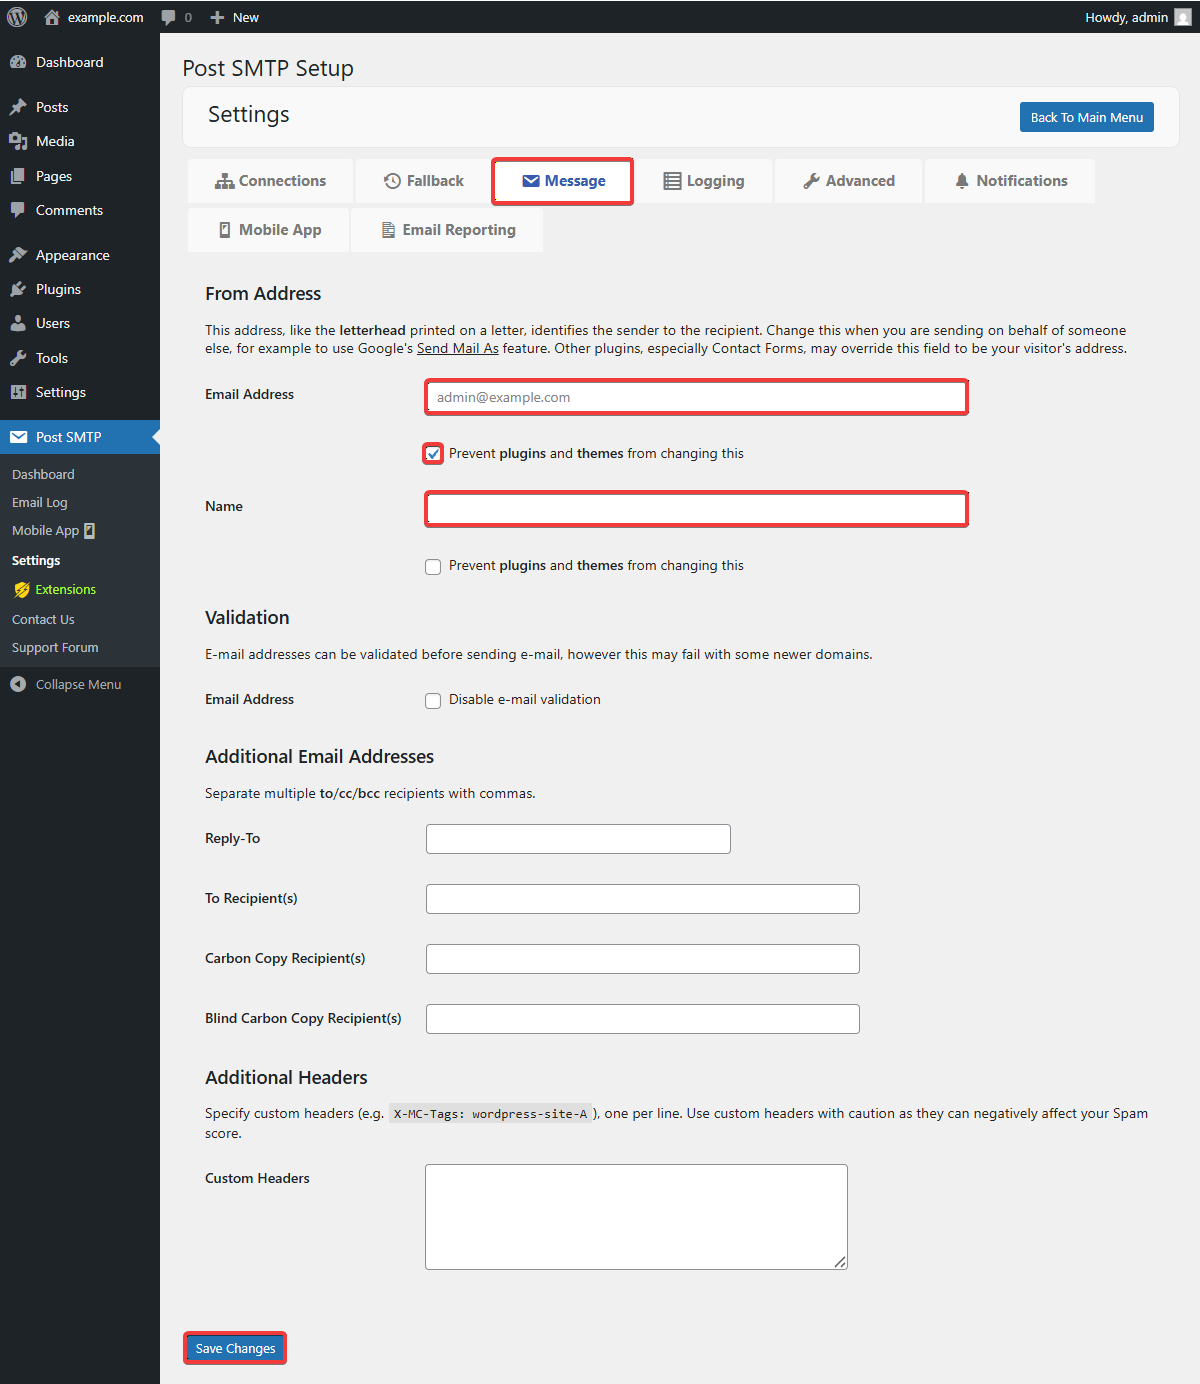
- On the "Message" tab, specify the sender's address, prevent it from being changed, specify the sender's name, and save the changes:
- Check email sending (for example, in the "Post SMTP → Dashboard" section using the "Send a test email" button).
Change Mail Sender
Important points:
- Specify the address of an existing mail domain (only the existence of a mail domain is important; the existence of a mailbox is not required).
- Messages will be sent from the web server without authorization. Message delivery is less reliable than SMTP.
A simple plugin that allows you to change the sender's name and address.
- Open the WordPress admin panel.
- In the "Plugins" section, install and activate the Change Mail Sender plugin.
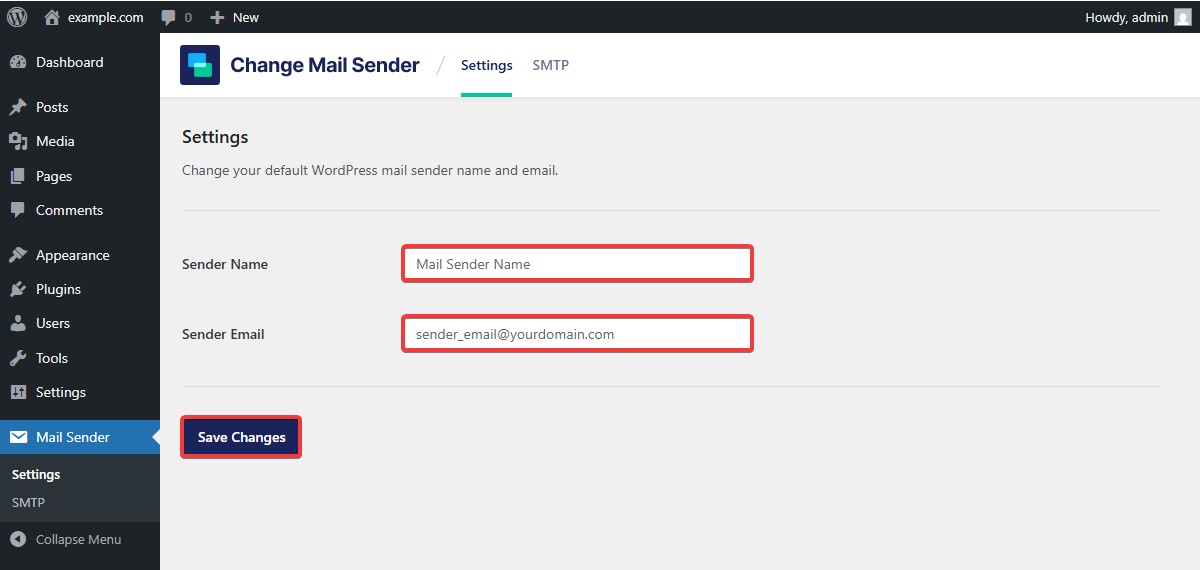
- In the side menu, go to "Mail Sender → Settings".
- Specify the sender's name and the email address that belongs to your mail domain, and save the changes:
- Check email sending (for example, in the WordPress admin panel login form using the "Forgot password?" button).
(4)