Manage cookies that are used for advertising, such as ad personalization, remarketing, and ad effectiveness analysis.
3.6.12. Confirm domain in Azure Active Directory
Attention!
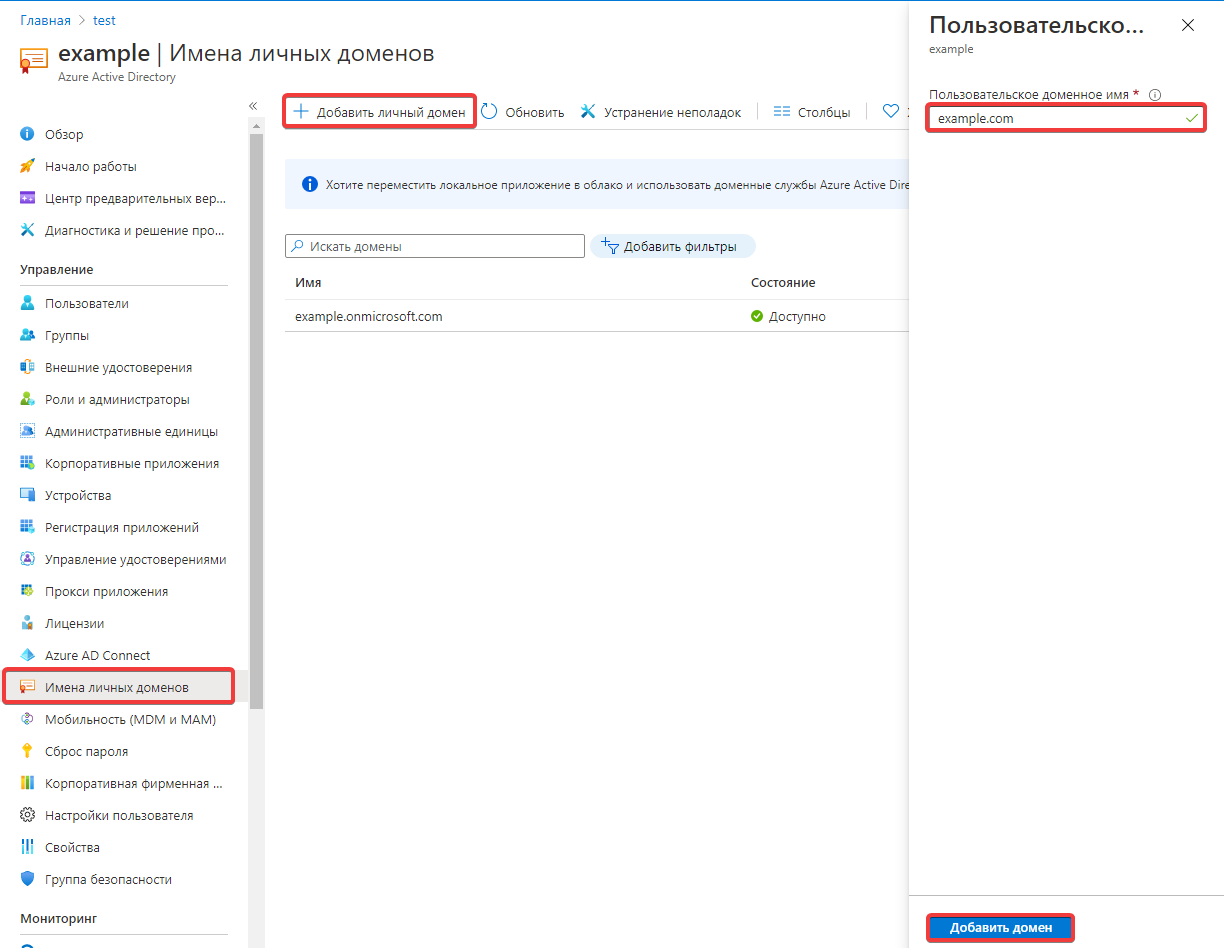
The domain must be serviced on our NS. If the domain is serviced on third-party NS, actions need to be performed not with us, but in the panel of their owner.- Open Azure Active Directory, in the "Custom domain names" section, click "Add custom domain", specify the domain name, and click "Add domain":
- Add a DNS record according to the selected method:
- Method of confirmation by TXT record:
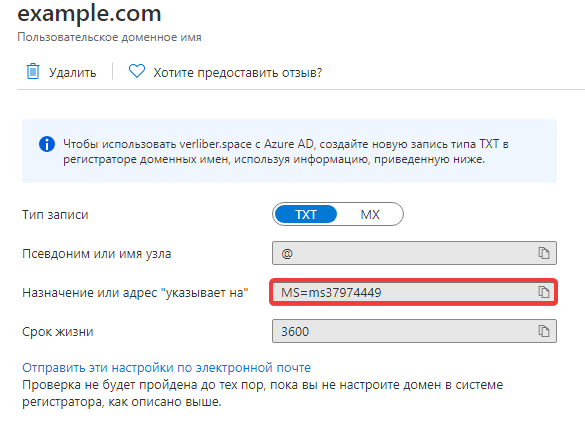
- "Subdomain" — empty.
- "Type" — "TXT".
- "Data" — copied record.When confirming a subdomain, if A and AAAA records are not created for it and a wildcard record is used instead, adding a TXT record will disrupt its operation. It is necessary to additionally add A and AAAA records for the subdomain.
- Method of confirmation by MX record:
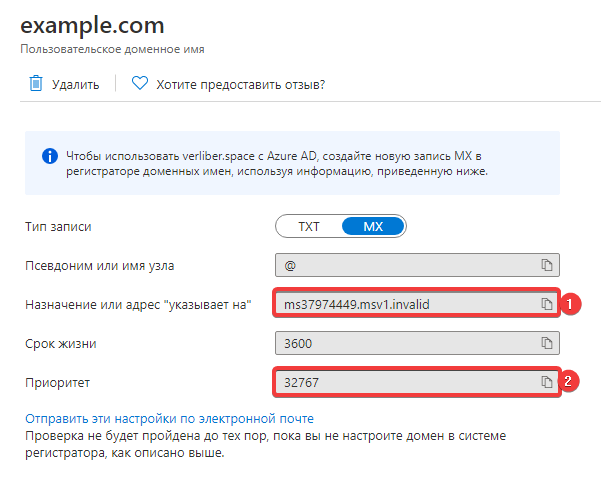
- "Subdomain" — empty.
- "Type" — "MX".
- "Data" — copied record under number 1.
- "Priority" — copied entry under number 2.
- Wait for the DNS cache update. This usually takes several hours (a maximum of 24).