Manage cookies that are used for advertising, such as ad personalization, remarketing, and ad effectiveness analysis.
3.6.8. Configure domain for eSputnik
Attention!
The domain must be serviced on our NS. If third-party NS are used, actions need to be performed not with us, but in the panel of their owner.Automatic setup
Use presets from the "eSputnik" group.
Manual setup
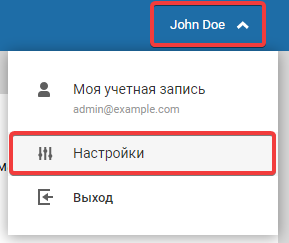
- Open the section "Account → Settings":
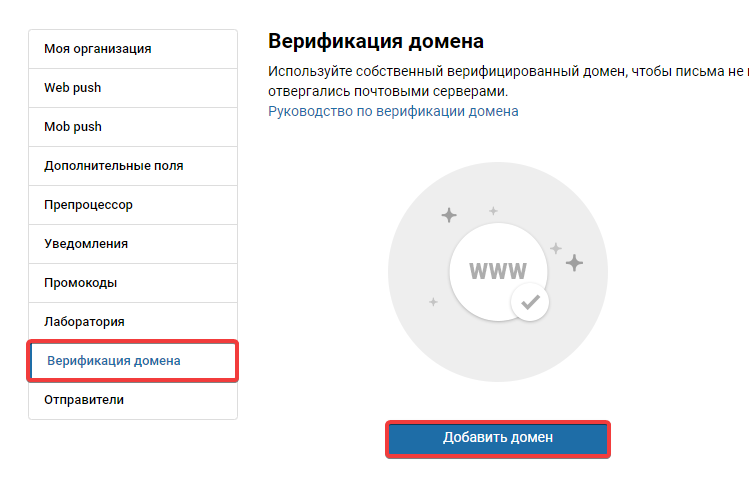
- Go to the "Domain verification" section and click "Add domain":
- Specify the domain, technical subdomain, and click "Start verification":
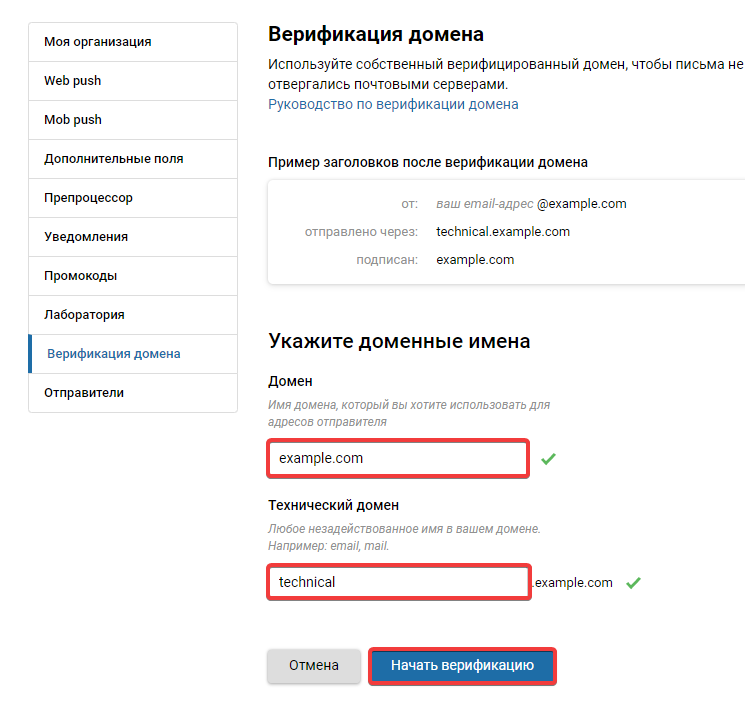
- "Domain" — a domain without the protocol
http://orhttps://. - "Technical domain" — a subdomain that will be used to specify the
SenderandReturn-Pathheaders.
- Wait for the DNS cache update. This usually takes several hours (a maximum of 24).
- Click "Verify domain".
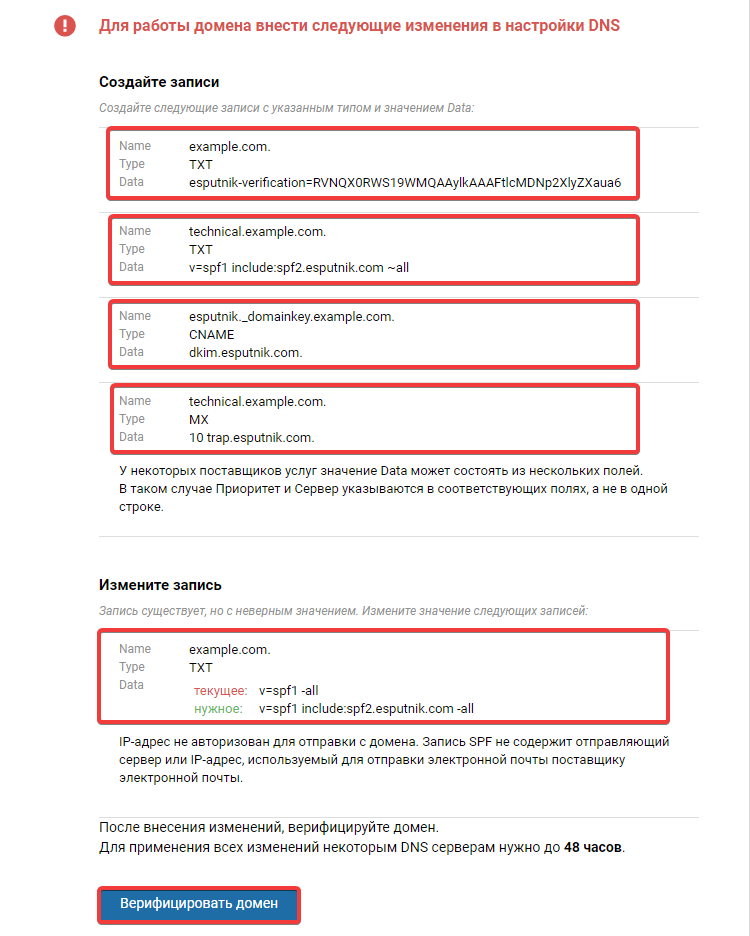
After completing all actions, while waiting for the domain information update, you can close the tab with the request or navigate to another section. The status of the current verification request will be saved, and upon returning to this section, the same information will be displayed again with the option to confirm verification.